Learning Technologies

Learning Technologies

News

LEARN – Viewing Student Grades in the Gradebook

March 22, 2017

Viewing Grades in the Gradebook

Grades can be manually viewed/entered/edited in the LEARN gradebook in a few different ways.

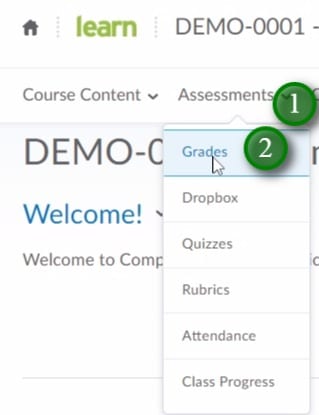
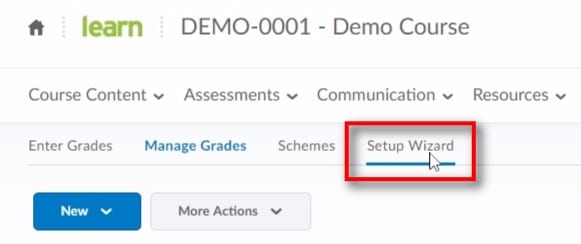
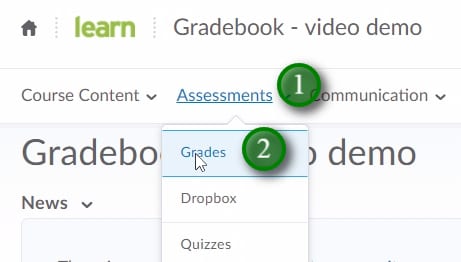
  • Enter the gradebook by clicking “Assessments” (1), “Grades” (2)

 Entering Grades into the Gradebook; Grades can be manually entered and edited in the LEARN gradebook in a few different ways. Enter the gradebook by clicking "Assessments" (1), "Grades" (2)

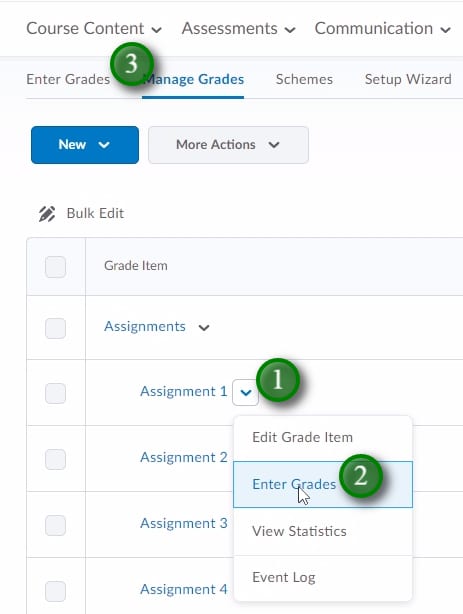
  • To view/add/edit grades for one grade item, click the menu beside the desired grade-item (1), click “Enter Grades” (2).
  • You can also enter grades for multiple grade items by clicking “Enter Grades” (3)

; To add/edit grades for one grade item, click the menu beside the desired grade-item (1), click "Enter Grades" (2). You can also enter grades for multiple grade items by clicking "Enter Grades" (3)

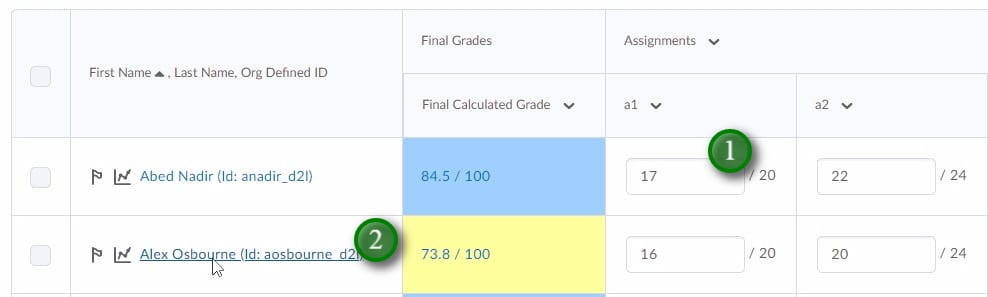
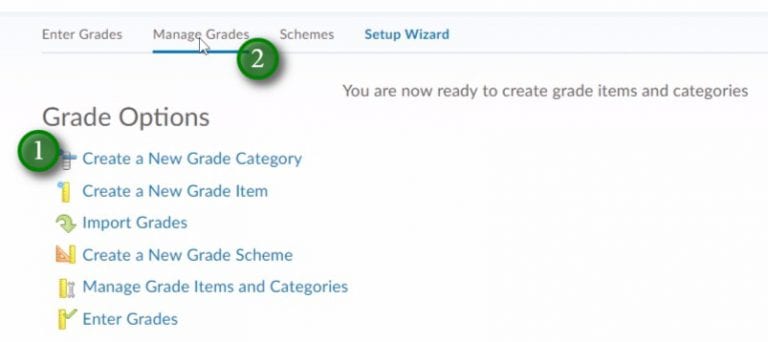
  • After clicking “Enter Grades” you will see your entire gradebook.
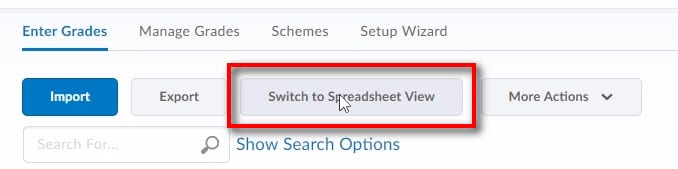
  • You will see the “Standard View” which is a colour coded display. To edit/add from the “Enter Grades” area click “Switch to Spreadsheet View”

; After clicking "Enter Grades" you will see your entire gradebook. If you receive the colour coded gradebook view, click "Switch to Spreadsheet View" to be able to add/edit multiple grade items.

  • You can now add/edit grades (1) for the entire class and all of the grade items.
  • You can view/add/edit grades for one student by clicking that students name (2).

; You can now add/edit grades (1) for the entire class and all of the grade items. You can add/edit grades for one student by clicking that students name (2).

Video:

LEARN – Gradebook Setting up Categories

March 22, 2017

Description:

Categories are a great way to organise your gradebook and they come with some advanced functions otherwise unavailable to your gradebook.

Setting up a Gradebook – Video 2 – Gradebook Setup Wizard

March 22, 2017

Description:

This video will walk through the Gradebook Setup Wizard in LEARN which is the recommended first step when setting up a new gradebook.

To access the captioning for this video:

  • Move your mouse to the lower right side of the video window.
  • Click the menu item represented by three dashes
    Example Image of video options menu
  • If captions are available, click “Show Subtitles”
    Example of the Show Subtitles option on Sharestream video

The Gradebook Setup Wizard

You can run the gradebook setup wizard on an existing gradebook or while setting up a new gradebook. It’s recommended as the first step when creating a new gradebook.

  • Access the Gradebook by clicking “Assessments” (1) and then “Grades” (2).
    Clicking Assessments menu and then Grades
  • Click “Setup Wizard”
    Clicking Setup Wizard under Grades
  • Review the default settings and then click “Start”
    start button in the gradebook setup wizard
  • Step 1 of 7: Select the “Weighted” grade system. You will want your gradebook to sum to 100%. Click “Continue”
    Step 1 of 7 of the Gradebook Setup Wizard
  • Step 2 of 7: Choose how you would like your final grade to be released. Note that this setting will only affect how the final grade is displayed if you release that final grade in LEARN. If you do not release the final grade this setting will have no effect on the students gradebook. “Calculated Final Grade” (1) will be based exactly on how your gradebook is setup and calculate a final grade at the end. “Calculated Final Grade” has the additional option of “Automatically release final grade” (3) which will give the students a running total of how they re doing.  “Adjusted Final Grade” (2) will require you to enter an adjusted grade for each student before releasing that final grade.
    Gradebook Setup Wizard step 2 of 7
  • Step 3 of 7: Select how ungraded items are treated. “Drop ungraded items” (1) will recalculate the grade based on what values have been entered. If a student missed an assessment you would have to enter a 0 or they will have that assessment dropped from there final calculation. “Drop ungraded items” allows for flexibility in complex gradebooks.  “Treat ungraded items as 0” (2) is the safer and more often used option. This will indicate all ungraded items are a 0 until proven otherwise.
    Gradebook setup wizard step 3 of 7
  • Step 4 of 7: Select what grade scheme you would like to use. “Percentage” (1) is a percentage only grade scheme that will not display letter grades. There are 2 default grade scheme options (2) which both include letter grades. These schemes only differ in the colour coding and red “cause for concern” indicator. You can preview these grade schemes by clicking the preview icon (3). Note: Before running the setup wizard you can click the “Schemes” option and create your own custom grade scheme. This is useful for areas that use alternate schemes such as benchmark schemes.
    Gradebook Setup Wizard step 4 of 7
  • Step 5 of 7: Enter the number of decimal places you would like to see in your gradebook. Step 6 will allow you to enter a different value for the student view. Note that this is how many are displayed, and the system will store grade values to more decimal places if entered.
  • Step 6 of 7: Select which student “Grade Details” (1) you wish for them to see, indicate the “Decimals Displayed” (2). The other defaults are typically good enough, but you can adjust them how you see fit.  Under the “Grade Details” (1) the “Points grade” is the points value you enter for the student grade, the “Weighted grade” is the what that points grade is worth towards the total grade, the “Grade scheme symbol” is typically the letter grade, and “Grade scheme colour” is part of the gradebook scheme and will indicate the cause for concern values in red.
    Gradebook Setup Wizard step 6 of 7
  • Step 7 of 7: Review the settings you have applied and click “Finish”
    Gradebook setup wizard step 7 of 7
  • After clicking finish you will be displayed some options you may wish to use (1) however all of those options are available from the “Manage Grades” (2) view.
    Gradebook Setup Wizard final screen of options

The Awards Tool – Badges

March 22, 2017

Description:

Badges are awarded based on any criteria determined by the instructor. They are meant to provide digital markers that represent accomplishment throughout a course or program. Badges do not contribute to achieving a passing grade; however, badges are awarded for achievements that also can contribute to the type of work ethic that results in a passing grade. For example, an instructor might create a badge that is based on posting 15 discussion posts in the first month of a course, or on perfect attendance, or on academic excellence. These items are the types of trends that can help a learner to succeed in a course or program.

Brightspace Manitoba Connection (D2L) Conference

March 16, 2017

Brightspace Manitoba Connection (D2L) Conference
May 26, 2017   9:00am to 2:20pm
Red River College’s Roblin Centre – 160 Princess St, Winnipeg, MB
Cost – Free

Red River College is hosting a conference about LEARN in collaboration with D2L – Brightspace Manitoba Connection. LEARN (otherwise known as Brightspace) is D2L’s flagship product.  Brightspace Manitoba Connection is your opportunity to connect with peers and D2L staff, exchange product feedback, share effective practices, and network with other users. Brightspace Connection will showcase teaching and learning within Brightspace, and sessions will feature topics such as effective practices in instructional design, technology integration, and administrative management. The event is sponsored by D2L and is free to attend.

The event’s goals are:
1. Provide free professional development sessions for online and blended learning
2. Build a strong community between Brightspace users and employees
3. Enhance the networking opportunities among the various members of the user community
4. Inform the user community about new features of the Brightspace platform

If you’re interested in presenting at the event, please indicate that on the registration page. We’re looking for sessions about:
pedagogical practices using Brightspace
highlighting noteworthy projects with your peers / institutions involving Brightspace
innovative use of Brightspace tools

Conference Agenda
9:00 am –    Registration desk open
9:30 am –   10:10 am   Opening Session
10:15 am – 11:05 am   Breakout Sessions (details coming soon)
11:15 am – 12:05 pm   Breakout Sessions (details coming soon)
12:15 am – 12:55 pm   Catered Lunch
1:00 pm –    1:50 pm    Breakout Sessions / Ateliers
2:00 pm –    2:20 pm    Closing Session


Registration: Please go to https://www.d2l.com/events/regional/manitoba/ to register.

LEARN Login Changes – ADFS Logins

December 1, 2016

With LEARN moving to cloud hosting on December 19th, 2016 the College needs to implement a new login system to allow secure logins over the internet.

LEARN will now be authenticating users through Active Directory Federated Services. This authentication method requires a change to the username you enter. For those logging in directly through https://learn.rrc.ca instead of putting in just your College username, you will now be required to enter your Red River College provided email address. Your password will remain the same. Staff will login with username@rrc.ca, and students will login with username@academic.rrc.ca.

There will be no change to logins through HUB.

The new login system will be deployed on Monday, December 19th, 2016.

If you have any questions please contact LEARN Support at learn@rrc.ca.


New Login Instructions For https://learn.rrc.ca

learn_login_new2

  • You will be forwarded to the ADFS login page. On this page enter your RRC email address as your username and the same password that you use for other College services.

learn_login_new_2

HTTPS and LEARN

August 22, 2016

What is HTTPS? HTTPS uses Secure Socket Layer (SSL) to encrypt and decrypt user page requests over the internet. This helps keep the information that you enter into your browser private as it travels through the internet. LEARN supports HTTPS fully.

LEARN was recently upgraded to a new version of D2L Brightspace – 10.6.3. A side effect of this upgrade is that our existing implementation of HTTPS stopped working properly. Previously HTTPS was enforced only on the login page in order to protect users’ login credentials. When users entered LEARN HTTPS became optional. Currently if we set the system to enforce HTTPS on the login page users are unable to login properly. It is particularly critical that logins to LEARN are done through HTTPS to protect users’ login credentials.

D2L is working on the problem, but if a solution isn’t found soon we are going to have to force HTTPS on throughout LEARN. This may have some side effects if courses are embedding insecure content. If the provider of content that’s been embedded in LEARN doesn’t support HTTPS it will not work when HTTPS is enforced. In most cases external content providers already support secure connections. For example, video providers like YouTube, Vimeo, and the College’s ShareStream video service all support HTTPS natively.

Even if we fix the current problem with HTTPS logins, we are going to be turning on HTTPS only in the fall prior to LEARN migrating to a cloud service.

Check if Your Course Is Affected

If you want to see what your course will look like when we switch over to HTTPS you can do this now. If you type https:// before the learn.rrc.ca address in your URL bar (https://learn.rrc.ca) you will be able to navigate through LEARN using a secure connection. If you have trouble seeing your content when accessing LEARN through HTTPS please contact us at learn@rrc.ca.

LEARN Upgrade Completed – August 10, 2016

August 10, 2016

LEARN has been upgraded to a new version 10.6.3.

All problems in the upgrade have been fixed.

  • All browsers should now be able to login to LEARN.
  • The login through HUB and the Employee Development pages has been fixed by ITS.

This new version includes many new requested features, enhancements and bugfixes. In general, LEARN still looks and feels the same, but many features have smoother and more intuitive workflows. The TLTC and LEARN Support have developed a guide to the changes: http://blogs.rrc.ca/tltc/fall-2016-learn-upgrade/.

If you have any questions or concerns about this upgrade please contact us at LEARN Support at learn@rrc.ca.

RRC Polytech campuses are located on the lands of Anishinaabe, Ininiwak, Anishininew, Dakota, and Dené, and the National Homeland of the Red River Métis.

We recognize and honour Treaty 3 Territory Shoal Lake 40 First Nation, the source of Winnipeg’s clean drinking water. In addition, we acknowledge Treaty Territories which provide us with access to electricity we use in both our personal and professional lives.

Learn more ›