Setting up a Gradebook – Video 2 – Gradebook Setup Wizard
Description:
This video will walk through the Gradebook Setup Wizard in LEARN which is the recommended first step when setting up a new gradebook.
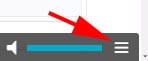
To access the captioning for this video:
- Move your mouse to the lower right side of the video window.
- Click the menu item represented by three dashes
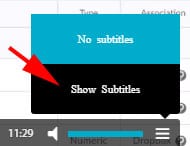
- If captions are available, click “Show Subtitles”
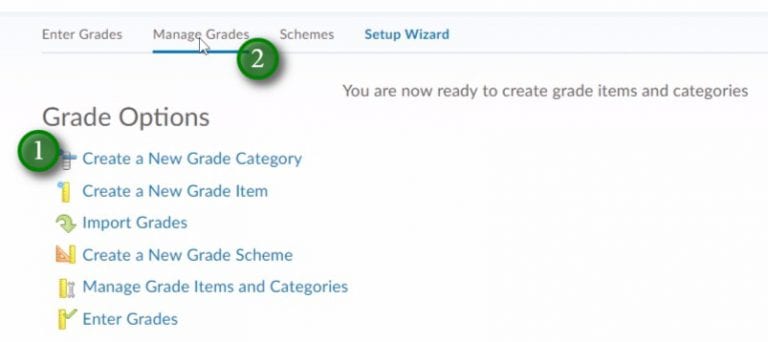
The Gradebook Setup Wizard
You can run the gradebook setup wizard on an existing gradebook or while setting up a new gradebook. It’s recommended as the first step when creating a new gradebook.
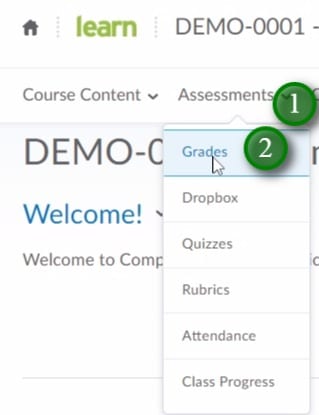
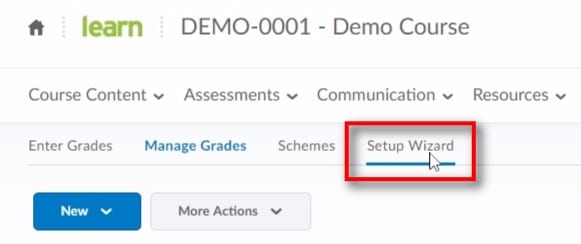
- Access the Gradebook by clicking “Assessments” (1) and then “Grades” (2).
- Click “Setup Wizard”
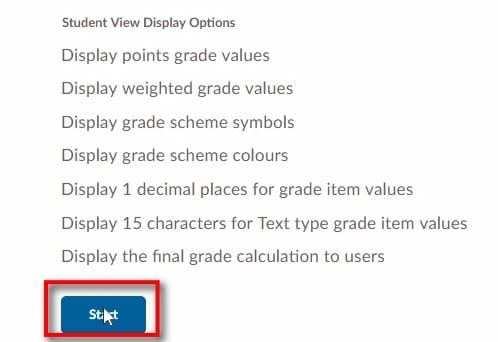
- Review the default settings and then click “Start”
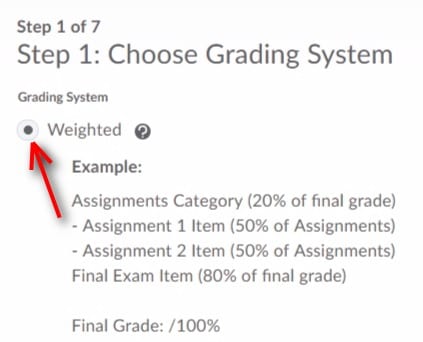
- Step 1 of 7: Select the “Weighted” grade system. You will want your gradebook to sum to 100%. Click “Continue”
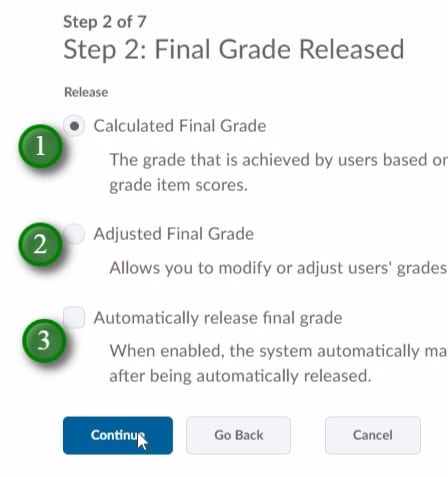
- Step 2 of 7: Choose how you would like your final grade to be released. Note that this setting will only affect how the final grade is displayed if you release that final grade in LEARN. If you do not release the final grade this setting will have no effect on the students gradebook. “Calculated Final Grade” (1) will be based exactly on how your gradebook is setup and calculate a final grade at the end. “Calculated Final Grade” has the additional option of “Automatically release final grade” (3) which will give the students a running total of how they re doing. “Adjusted Final Grade” (2) will require you to enter an adjusted grade for each student before releasing that final grade.
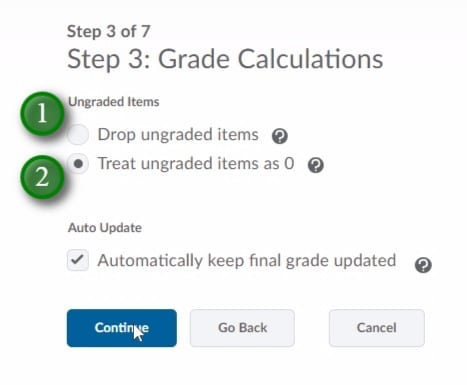
- Step 3 of 7: Select how ungraded items are treated. “Drop ungraded items” (1) will recalculate the grade based on what values have been entered. If a student missed an assessment you would have to enter a 0 or they will have that assessment dropped from there final calculation. “Drop ungraded items” allows for flexibility in complex gradebooks. “Treat ungraded items as 0” (2) is the safer and more often used option. This will indicate all ungraded items are a 0 until proven otherwise.
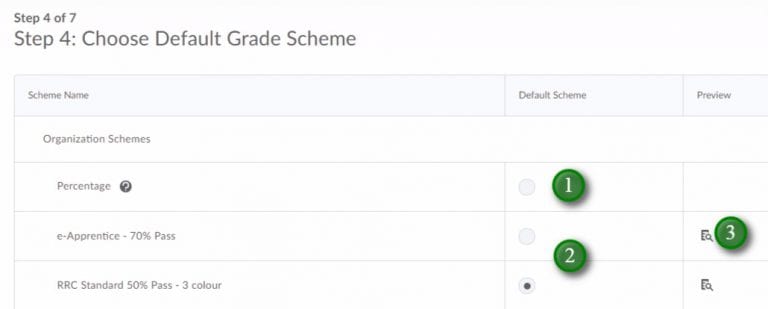
- Step 4 of 7: Select what grade scheme you would like to use. “Percentage” (1) is a percentage only grade scheme that will not display letter grades. There are 2 default grade scheme options (2) which both include letter grades. These schemes only differ in the colour coding and red “cause for concern” indicator. You can preview these grade schemes by clicking the preview icon (3). Note: Before running the setup wizard you can click the “Schemes” option and create your own custom grade scheme. This is useful for areas that use alternate schemes such as benchmark schemes.
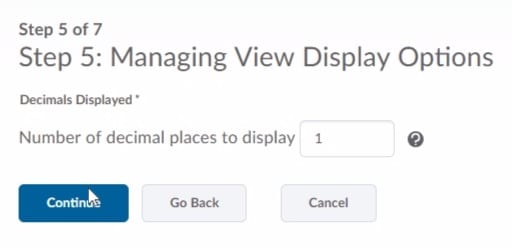
- Step 5 of 7: Enter the number of decimal places you would like to see in your gradebook. Step 6 will allow you to enter a different value for the student view. Note that this is how many are displayed, and the system will store grade values to more decimal places if entered.
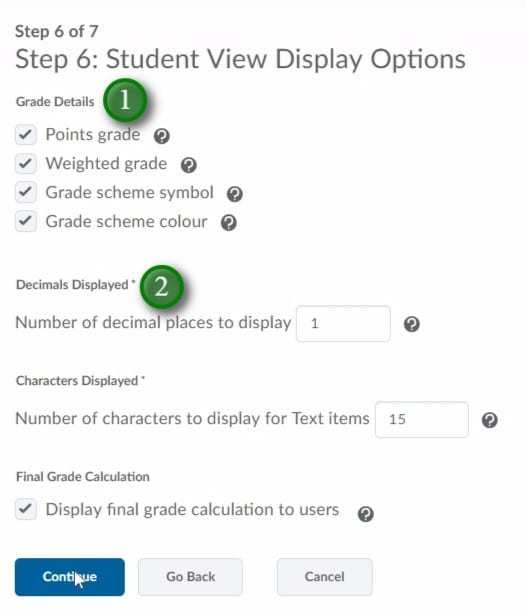
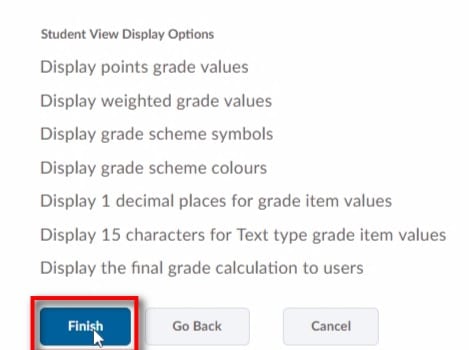
- Step 6 of 7: Select which student “Grade Details” (1) you wish for them to see, indicate the “Decimals Displayed” (2). The other defaults are typically good enough, but you can adjust them how you see fit. Under the “Grade Details” (1) the “Points grade” is the points value you enter for the student grade, the “Weighted grade” is the what that points grade is worth towards the total grade, the “Grade scheme symbol” is typically the letter grade, and “Grade scheme colour” is part of the gradebook scheme and will indicate the cause for concern values in red.
- Step 7 of 7: Review the settings you have applied and click “Finish”
- After clicking finish you will be displayed some options you may wish to use (1) however all of those options are available from the “Manage Grades” (2) view.