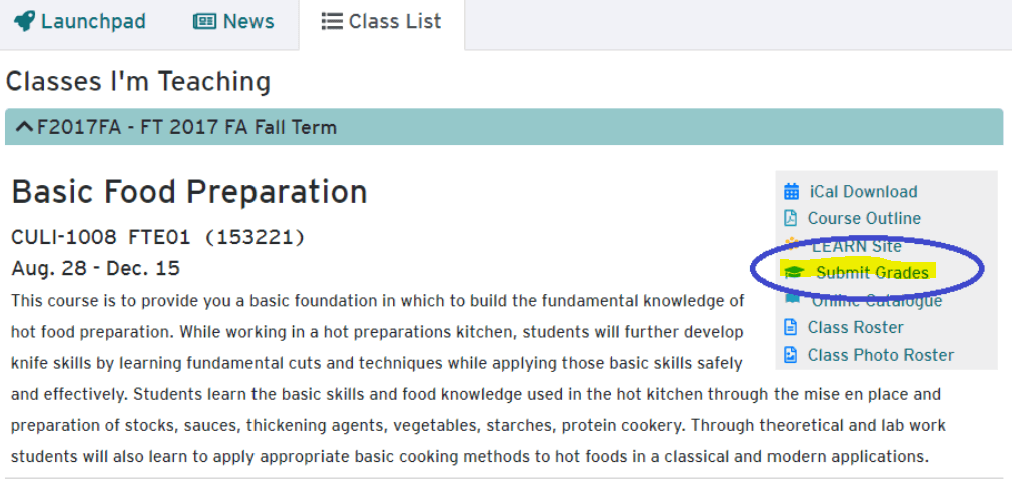
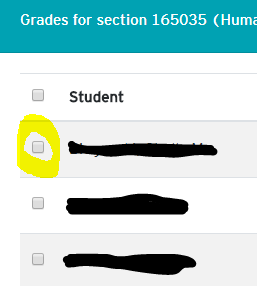
Setting Up a Discussion Forum
Setting Up a Discussion Forum
Use forums to organize your discussion topics into categories. Your course can have multiple forums and topics, but you must create a forum before you can create a topic since all topics belong to forums.
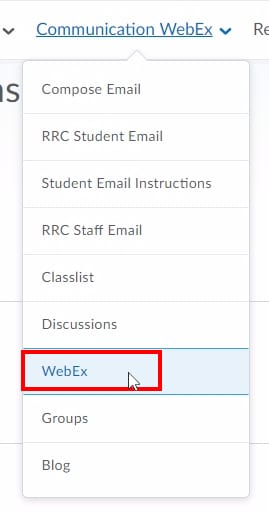
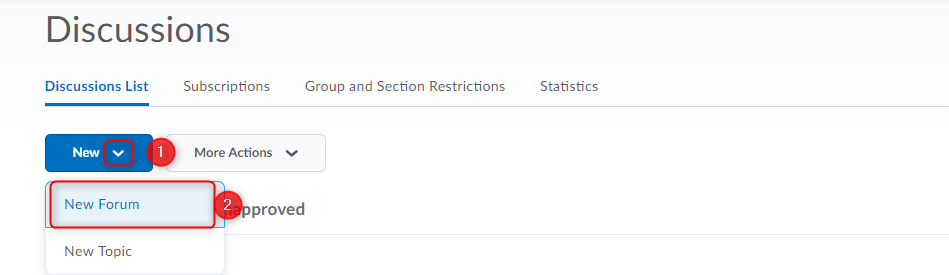
- On the navbar, click Communication and choose Discussions.
- On the Discussions List page, from the New (1) button drop-down menu, click New Forum (2).
- Enter a title (1) for your new forum.
- Enter a description (2) for your new forum. The Description can be used to give any extra information you may have about this forum or the topics within. You can include rules of conduct, how and if this forum will be assessed, or general information about the forum.
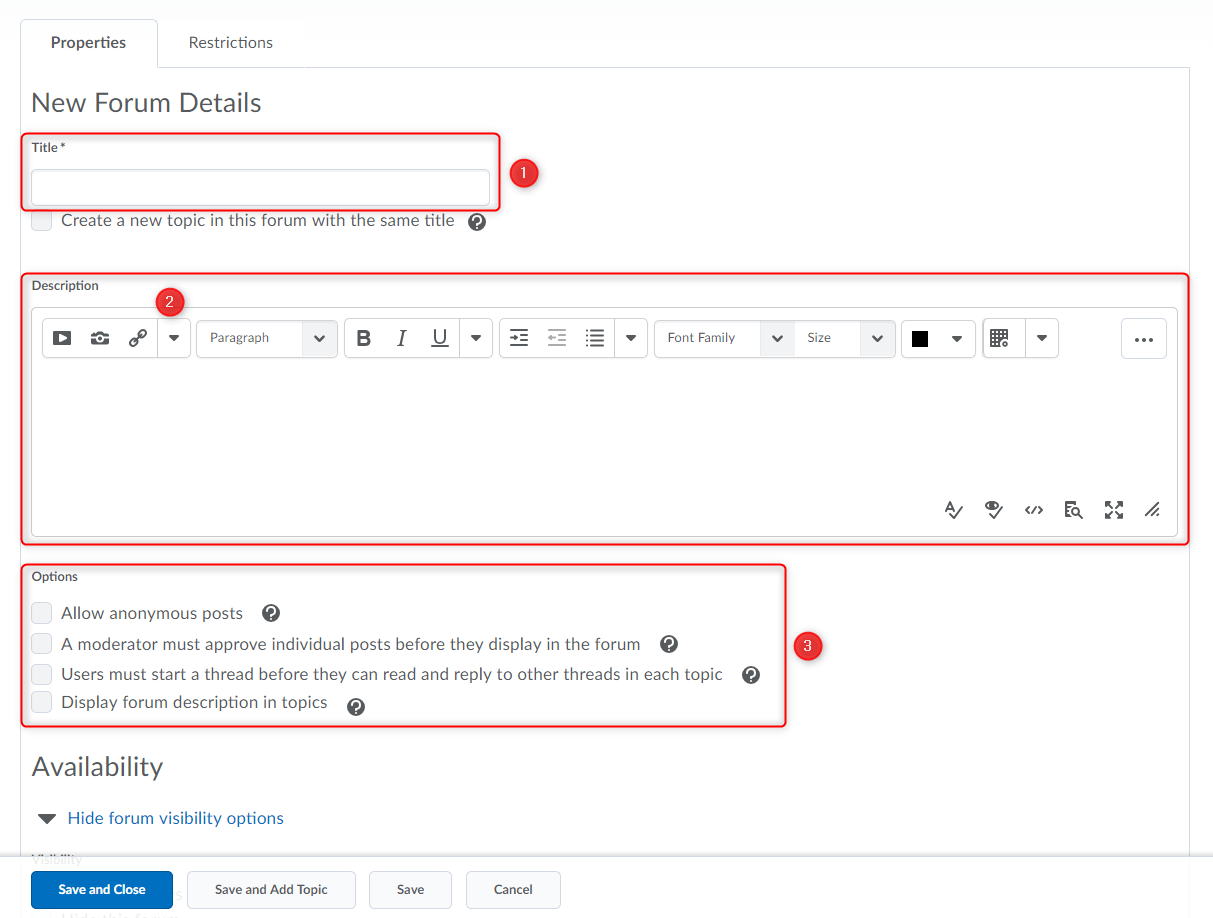
- In the Options (3) section, select any of the following check boxes:
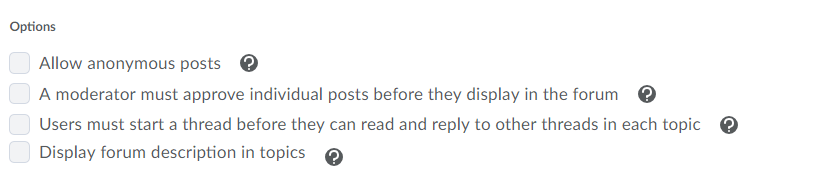
Allow anonymous posts – Selecting this option allows users to post anonymously to topics created within this forum. Anonymous posts display with the author “Anonymous” in the thread.
NOTE: It may be a good idea to also include the option “A moderator must approve individual posts before they display in the forum” when using anonymous posts.
A moderator must approve individual posts before they display in the forum – Selecting this option will require a moderator to approve posts to topics created within this forum before they display to users.
Users must start a thread before they can read and reply to other threads in each topic – Selecting this option will require a user to start a new thread in a topic before viewing or replying to other threads in that topic in the forum. If this forum requires post approval, users will not be able to view or reply to other threads until their thread is approved. This option prevents students from being influenced by each other’s initial posts. It also is a great way to spearhead engagement as it forces each student to initiate a thread rather than simply replying to other student’s initial posts.
Display forum descriptions in topics – To provide instructors the option to display a discussion forum description within a discussion topic description.
- Availability – Visibility – The options under visibility control if and when the student can view the forum and all the topics and threads below it. Often instructors will allow a forum to always be visible and control access with the “Locking Options”.
- Locking Options – Locking a forum will maintain the visibility of the forum, topics and threads, but remove access from the students to create new posts and replies. This can be used to archive a past forum maintaining visibility, or to allow a preview of an upcoming forum.
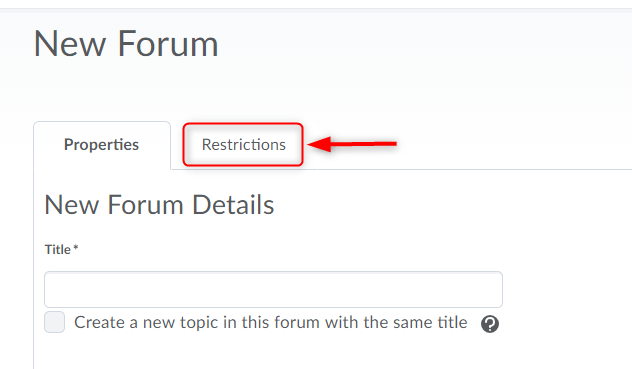
- Restrictions (Tab near the top of screen) – Here you can apply release conditions, or restrict the forum to a group when you are using the groups tool. NOTE: You can create forums from the groups tool when you are setting up groups.
- Click Save and Close.