Learning Technologies

Learning Technologies

WebEx

WebEx Requirements

March 23, 2018

WebEx Requirements

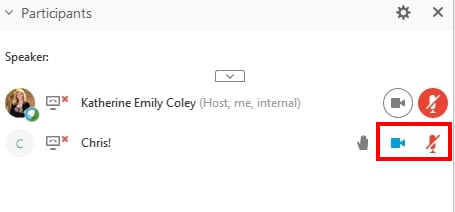
  1. A good quality webcam. For meetings between staff, a laptop webcam will be fine but not ideal.
  2. A good quality headset that includes headphones and a microphone.
  3. A decent internet connection. At least a 3G (2Mbps+) internet connection is required. The college network is ideal.
  4. A quiet, well lit room.
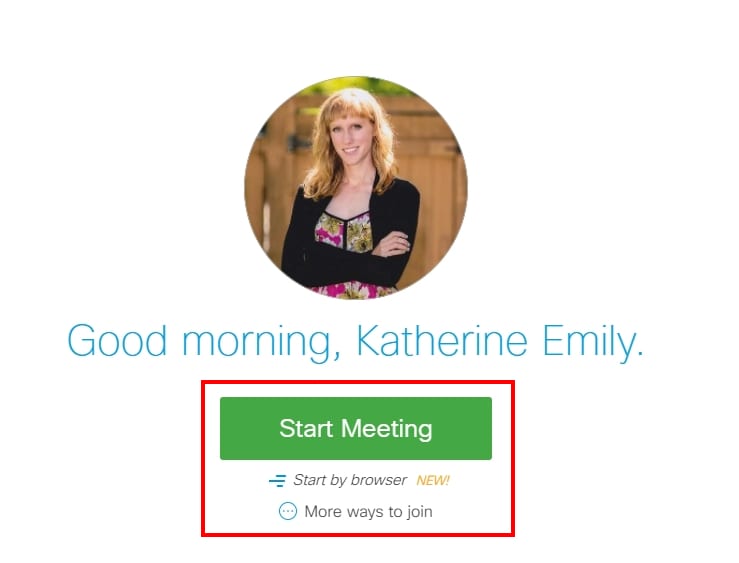
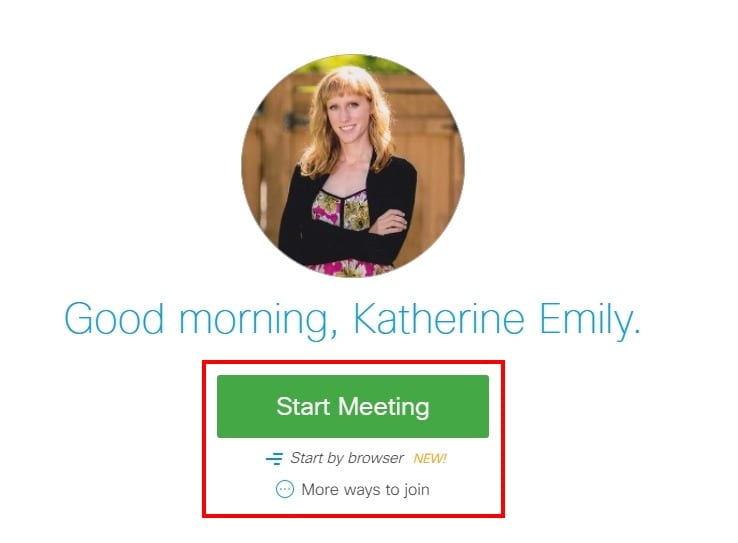
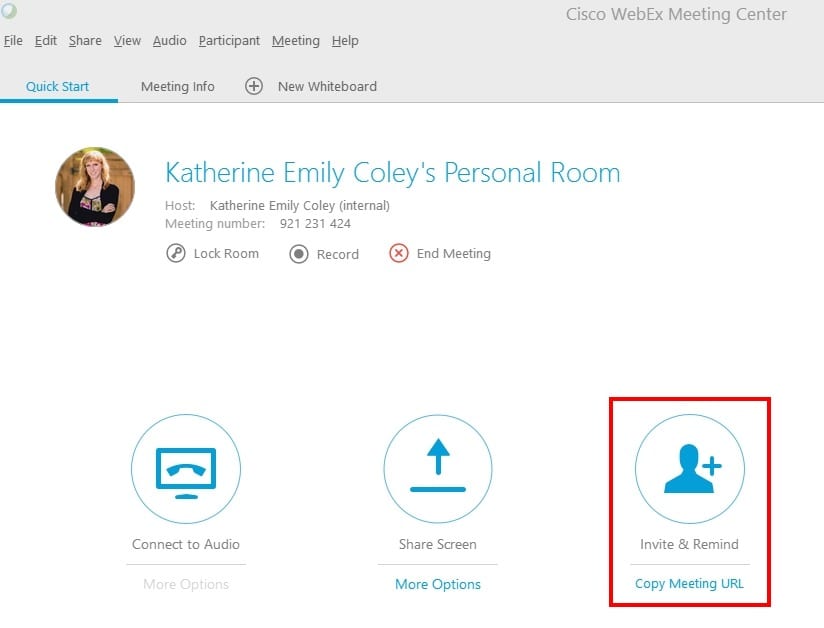
  5. Login to WebEx by going to http://redrivercollege.webex.com and using your RRC credentials. This will create your account.
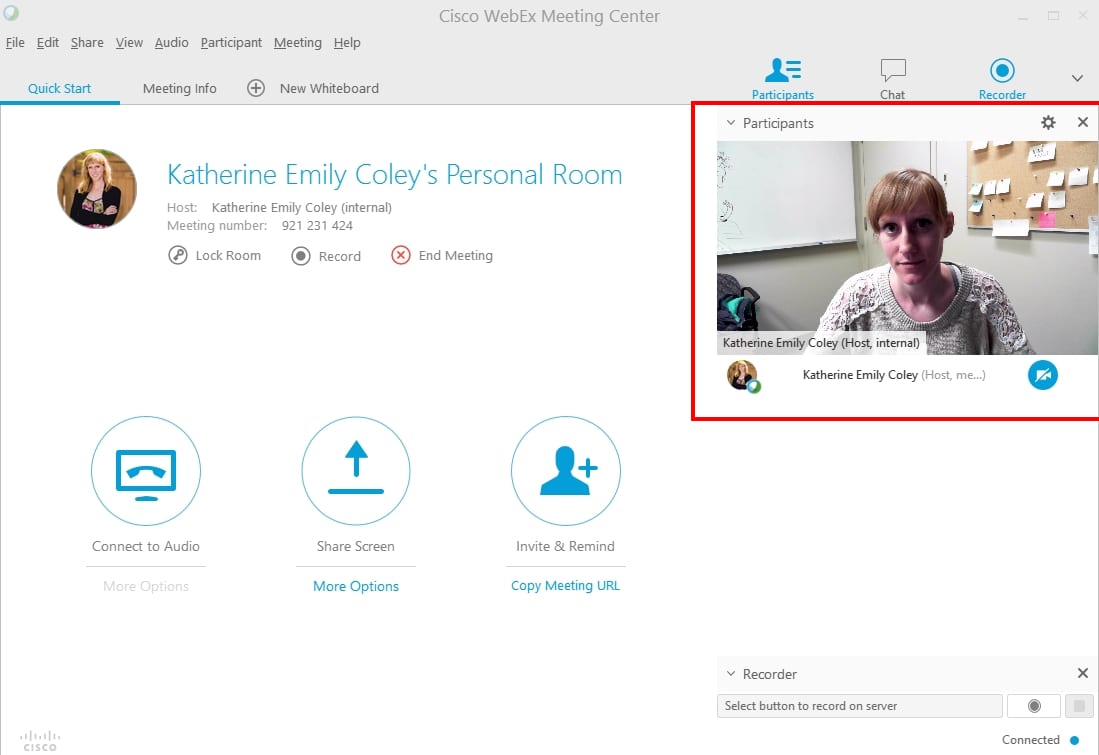
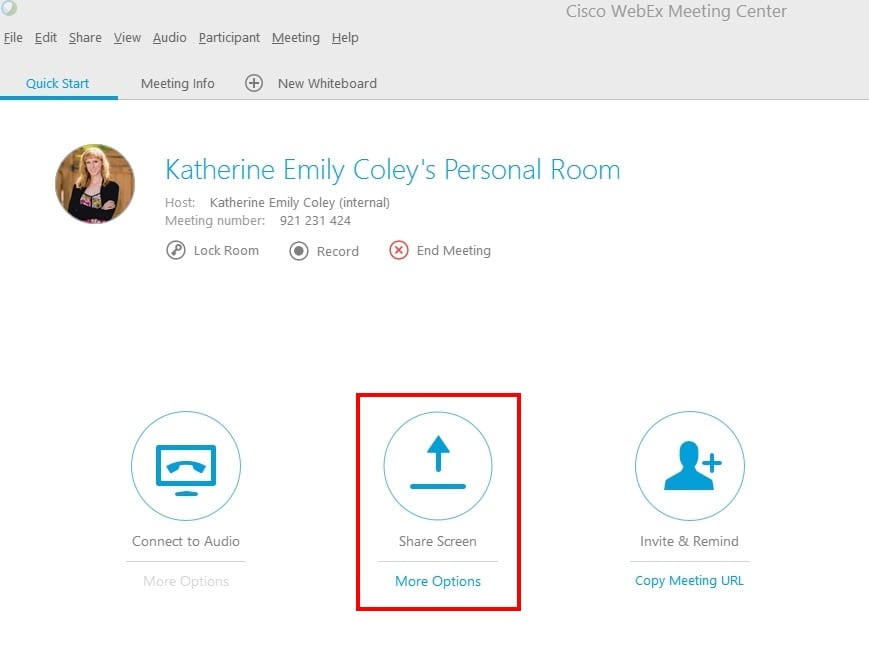
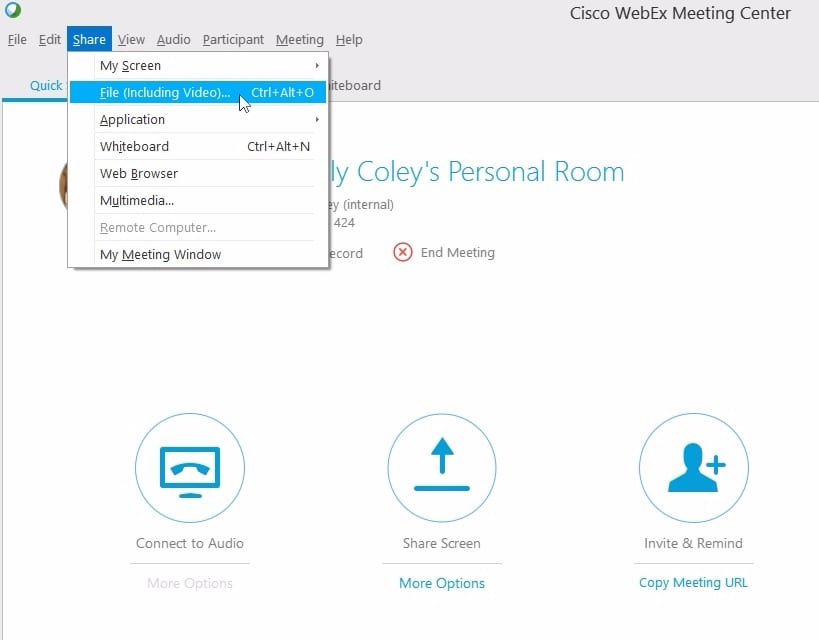
  6. Download the WebEx Desktop Client. Run the client to ensure that it works smoothly.
    Download the WebEx Desktop client for Windows.
    Download the WebEx Desktop Client for Mac.

Using WebEx in LEARN

March 20, 2018

In your LEARN course, click “Communication” then “WebEx”

This will take you to the LEARN WebEx integration where you can view and schedule classes.

In your LEARN course, click "Communication" then "WebEx";This will take you to the LEARN WebEx integration where you can view and schedule classes.

Click “Schedule More Events”

To Schedule events in WebEx click on “Schedule more events” in the top right corner of the page.

Click "Schedule More Events";To Schedule events in WebEx click on "Schedule more events" in the top right corner of the page.

Enter Event Details

Enter your class/event details including the name of the event, the time and duration of the event and the WebEx account you want to use. Most people will use the WebEx Meeting Center account.

Enter Event Details;Enter your class/event details including the name of the event, the time and duration of the event and the WebEx account you want to use. Most people will use the WebEx Meeting Center account.

Click “Schedule”

This will schedule your event so that students can see it upcoming.

Click "Schedule";This will schedule your event so that students can see it upcoming.

Click “Host” to start your event

When the event time comes up, go to WebEx in your LEARN course and click “Host” to begin your meeting.

Click "Host" to start your event;When the event time comes up, go to WebEx in your LEARN course and click "Host" to begin your meeting. Your WebEx desktop client will open and students will be able to join your event.

Students can now “Join” your event

Students can join your event/class by going to the WebEx page in their LEARN course and clicking “Join” next to the appropriate event.

Students can now "Join" your event;Students can join your event/class by going to the WebEx page in their LEARN course and clicking "Join" next to the appropriate event.

Your WebEx Desktop Client will now open

You can see a list of class participants and begin your event as usual.

Close the window or click “End Meeting” when you want to end your class/event.

Your WebEx Desktop Client will now open;You can see a list of class participants and begin your event as usual. Close the window or click "End Meeting" when you want to end your class/event.

Viewing Recordings

Go to the WebEx link in your LEARN course and click “Event Recordings“. You can now view the recording of any past event by clicking on “View Recordings“.

Viewing Recordings;Go to the WebEx link in your LEARN course and click "Event Recordings". You can now view the recording of any past event by clicking on "View Recordings".

The first link is the link to download the recording. The second link is the link to stream the recording online. Students have access to these recordings as well as the instructor.

View Recordings;The first link is the link to download the recording. The second link is the link to stream the recording online. Students have access to these recordings as well as the instructor.

Tips for Teaching Online Using WebEx

March 19, 2018

1. Prepare

  • Have a detailed lesson plan.
  • Keep lessons short and on topic.
  • Have all PowerPoints and files pre-loaded into WebEx.
    ;
  • Load files into LEARN so students can prepare for the class.
  • Prepare WebEx Poll questions and discussion topics.
  • Ensure you follow the technical requirements.
  • Do a practice online session with your students before a formal class.

2. Engage Your Audience

  • Use your webcam to show your face.
    ;
  • Choose when to allow students access to use their microphone or webcam and allow students to share their screens.;
  • Pay attention to when students “raise their hand”, say their name, and address them in chat or using a microphone.;
  • Use polling and interactive whiteboards.;

3. Multitask

  • Be aware of the chat and students raising their hands.
  • Mute and un-mute students appropriately.;


4. Have a Backup Plan

Let’s face it, sometimes technology fails. It’s safest to always have a backup plan for online classes.

  • Record the session for students that may miss it for technical reasons.;
  • Post all materials, whiteboards, images, files, etc. in LEARN after the session.

For more detailed information on teaching online, click here to download the eLearning Guild’s Handbook on Synchronous Learning (PDF).

Virtual Office Hours with WebEx

March 12, 2018

Why Have Virtual Office Hours?

Virtual office hours allow you to meet with students without anyone having to travel. This is ideal for online or blended courses but can also be used for face to face classes to give students another option to get help with their classes.

Virtual office hours can be used for tutoring, information sessions, or quick check-ins with students.

Your Own Personal Meeting Room

With WebEx you have your own meeting room where you can start meetings and invite participants at any time. To get started, log in to WebEx (http://redrivercollege.webex.com), go to My WebEx and then click Start Meeting.

Simply link to your own meeting room (http://redrivercollege.webex.com/meet/username) and students can join whenever you are “in” your virtual meeting room.

Your Own Personal Meeting Room;With WebEx you have your own meeting room where you can start meetings and invite participants at any time. Simply link to your own meeting room (http://redrivercollege.webex.com/meet/username) and students can join whenever you are "in" your virtual meeting room.

Use Live Video to Connect

With WebEx you can use a webcam and microphone to easily connect with your students on a more personal level and get problems solved quicker than with email.

For online and blended classrooms, the live video provides a more personalized experience and increases engagement.

Use Live Video to Connect;With WebEx you can use a webcam and microphone to easily connect with your students on a more personal level and get problems solved quicker than with email. For online and blended classrooms, live video provides a more personalized experience and increases engagement.

Easily Invite Participants

With WebEx you can easily link to your meeting room or invite participants via email. You can also send reminder emails to participants.

Easily Invite Participants;With WebEx you can easily link to your meeting room or invite participants via email. You can also send reminder emails to participants.

Share Your Screen

Share your screen and allow participants to share their screens with you. Sharing your screen allows you to demonstrate software, give feedback on assignments, and troubleshoot problems students may be having.

Annotate your demonstrations and record them for later.

Share Your Screen;Share your screen and allow participants to share their screens to you. Sharing your screen allows you to demonstrate software, give feedback on assignments, and troubleshoot problems students may be having. Annotate your demonstrations and record them for later.

Share Files and Presentations

Quickly share files to students and present PowerPoint files directly within WebEx. Review class material and annotate files for further clarification.

Students can also participate, give them permission to control the presentation, annotate slides, and write on a virtual whiteboard.

Share Files and Presentations;Quickly share files to students and present PowerPoint files directly within WebEx. Review class material and annotate files for further clarification. Students can also participate, give them permission to control the presentation, annotate slides, and write on a virtual whiteboard.

Record for Later

Explaining something multiple times? Record an explanation once and share it with the class.

Record for Later;Explaining something multiple times? Record an explanation once and share it with the class.

For more information on scheduling meetings with WebEx, see the Getting Started with Cisco WebEx Meeting Centre Documentation.

Small Group Meetings Using WebEx

March 12, 2018

Why Use WebEx for Meetings?

You can use WebEx to easily schedule online meetings between co-workers. WebEx runs on almost every device and can support text chat, video conferencing, screen sharing, and audio conferencing.

You can use WebEx to use a shared whiteboard, share files, and show your screen to others for troubleshooting and presentations.

With WebEx, you don’t have to travel for meetings and can conference with many people at once, saving time and money.

Create Meetings Quickly and Easily

With WebEx you have your own personal meeting room (http://redrivercollege.webex.com/meet/username) that you can start any time and can invite anyone to join. No more scheduling meetings and setting up meetings rooms, just start a meeting, invite using email, and go.

Create Meetings Quickly and Easily;With WebEx you have your own personal meeting room (http://redrivercollege.webex.com/meet/username) that you can start any time and can invite anyone to join. No more scheduling meetings and setting up meetings rooms, just start a meeting, invite using email, and go.

Share Your Screen

With WebEx you can share your screen with one click. Perfect for troubleshooting or sharing websites, software, and works in progress.

Share Your Screen;With WebEx you can share your screen with one click. Perfect for troubleshooting or sharing websites, software, and works in progress.

Share Files

Share files to participants and upload PowerPoint presentations to show within WebEx.

Share Files;Share files to participants and upload PowerPoint presentations to show within WebEx.

Easily Invite Participants

Invite participants via email or directly within Outlook with the WebEx productivity tools.

Easily Invite Participants;Invite participants via email or directly within Outlook with the WebEx productivity tools.

For more information on scheduling meetings with WebEx, see the Getting Started with Cisco WebEx Meeting Centre Documentation.

RRC Polytech campuses are located on the lands of Anishinaabe, Ininiwak, Anishininew, Dakota, and Dené, and the National Homeland of the Red River Métis.

We recognize and honour Treaty 3 Territory Shoal Lake 40 First Nation, the source of Winnipeg’s clean drinking water. In addition, we acknowledge Treaty Territories which provide us with access to electricity we use in both our personal and professional lives.

Learn more ›