Learning Technologies

Learning Technologies

Uncategorised

Share an ePortfolio within LEARN or outside of the organization

March 19, 2018

Share an ePortfolio within LEARN or outside of the organization

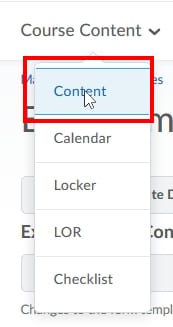
  • Access your ePortfolio and click to view “My Items”

Sharing an Artifact or Presentation;Access your ePortfolio and click to view "My Items"

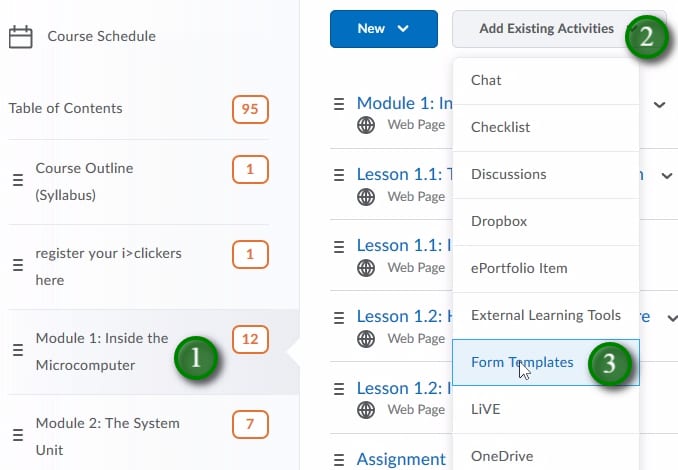
  • Click the menu button (1) for the item you wish to share and then click “Share” (2)

;Click the menu button (1) for the item you wish to share and then click "Share" (2)

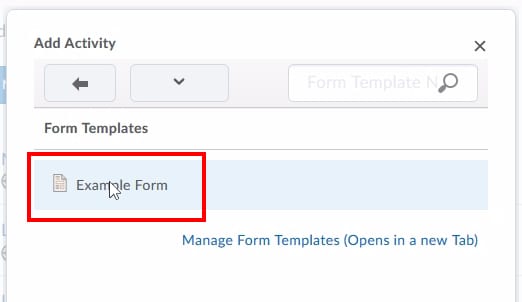
  • Click “Add Users and Groups” (1) to share this artifact with your instructor or classmates.
  • “Allow public viewing of presentation” (2) will only be available for Presentations. To share this way you will add the checkmark to that box and distribute the “Share URL” with those you wish to view the presentation. Removing the checkmark will remove the ability to view the presentation from the URL.
  • “Show Visibility Options” (3) will allow you to set a start and end date for the visibility of your presentation.

;Click "Add Users and Groups" (1) to share this artifact with your instructor or classmates. "Allow public viewing of presentation" (2) will only be available for Presentations. To share this way you will add the checkmark to that box and distribute the "Share URL" with those you wish to view the presentation. Removing the checkmark will remove the ability to view the presentation from the URL. "Show Visibility Options" (3) will allow you to set a start and end date for the visibility of your presentation.

  • After clicking “Add Users and Groups” and selecting users to share your artifact with you will have the ability to “Assign Permissions” to control how the users can interact with your artifact.

;After clicking "Add Users and Groups" and selecting users to share your artifact with you will have the ability to "Assign Permissions" to controll how the users can interact with your artifact.

Video

ePortfolio – Presentation

March 18, 2018

Creating a Presentation

  • Access your ePortfolio and click “New Presentation”

Creating a Presentation;Access you ePortfolio and click "New Presentation"

  • Give your Presentation a Name, add a description and any tags you would like, click Save.
  • Click “Content/Layout”

;Give your Presentation a Name, add a description and any tags you would like, click Save. Click "Content/Layout"

  • Select any optional navigation or layout settings by clicking “Edit Presentation Navigation”(1), or “Edit Page Layout”(2).
  • To create a new page click the “New Page” icon (3)

;Select any optional navigation or layout settings by clicking "Edit Presentation Navigation"(1), or "Edit Page Layout"(2). To create a new page click the "New Page" icon (3)

  • Give your new page a “Page Name” (1), apply any settings (2), and “Save” (3)

;Give your new page a "Page Name" (1), apply any settings (2), and "Save" (3)

  • To re-order your pages click the “Reorder pages” button

;To re-order your pages click the "Reorder pages" button

  • To add content to your Presentation click the page you wish to add to (1), and then “Add Component” (2)

;To add content to your Presentation click the page you wish to add to (1), and then "Add Component" (2)

  • Click the content you would like to add to your Presentation

;Click the content you would like to add to your Presentation

  • Clicking “Banner” (1) will allow you to rename your presentation’s banner, “Theme” (2) allows you to pick a new theme for your presentation.
  • You are able to preview (3) themes, and click “Select” (4) to choose a new theme.
  • At any point when building your Presentation you can click “View Presentation” (5) to see what it looks like.

Options for changing the Banner and Theme

Video

Submit an ePortfolio Artifact as a Dropbox Assignment

March 18, 2018

Submit an ePortfolio Artifact as a Dropbox Assignment

  • First, you will have had to add your artifact to your ePortfolio.
  • To submit it to the Dropbox click “Assessments” (1) and “Dropbox” (2).

Submitting an ePortfolio Artifact as a Dropbox Assignment;First you will have had to add your artifact to your ePortfolio. To submit it to the Dropbox click "Assessments" (1) and "Dropbox" (2).

  • Find the dropbox you wish to submit the artifact to and click it’s title.

;Find the dropbox you wish to submit the artifact to and click it's title.

  •  Click on “Add a File” button as you would submitting any file.

; Click on "Add a File" button as you would submitting any file.

  •  Click on “ePortfolio”

; Click on "ePortfolio"

  • Select the ePortfolio item you wish to submit (1) and then click “Select Item” (2)

;Select the ePortfolio item you wish to submit (1) and then click "Select Item" (2)

  • You will now see your artifact attached (1), you are able to add any comments (2) you wish, and when ready hit “Submit” (3).

;You will now see your artifact attached (1), you are able to add any comments (2) you wish, and when ready hit "Submit" (3). You will receive a confirmation page and email.

  • You will receive a confirmation page and email.

ePortfolio – Assessing Forms

March 16, 2018

Assessing a Completed ePortfolio Form

A student is able to submit their completed forms to an assignment Dropbox in LEARN.
To assess the student submission:

  • Click “Assessments,” and “Dropbox.”

Assessing a Completed Form;A student is able to submit there completed forms to an assignment Dropbox in LEARN. To assess, click "Assessments", and "Dropbox"

  •  Click on the Dropbox the student submitted their Form to.

;Click on the Dropbox the student submitted there Form to.

  •  From the list of student submissions, click on the Form (1) or “Evaluate” (2) to view and grade the form.

;From the list of student submissions, click on the Form (1) or "Evaluate" (2) to view and grade the form

  •  From the “Evaluate Submission” area you can click the name of the form to view for assessment.

;From the "Evaluate Submission" area you can click the name of the form to view for assessment.

  •  Depending on your web browser it may open in a new tab, or exit the “Evaluate Submission” screen. To view the completed form click “View.”

;Depending on your web browser it may open in a new tab, or exit the "Evaluate Submission" screen. To view the completed form click "View"

  •  After viewing the completed form, you may have to either close the browser tab or click the back button to return to the “Evaluate Submission” screen where you can add grades and comments for the student.

;After viewing the completed form you may have to either close the browser tab, or click the back button to return to the "Evaluate Submission" screen where you can add grades and comments for the student.

Creating forms for surveys, self-reflection, or self and peer evaluation through forms

March 15, 2018

Creating forms for surveys, self-reflection, or self and peer evaluation through forms

Forms are a powerful tool that will integrate with your course content and a users ePortfolio. Forms can be used for surveys, guided reflections, self-assessment, peer-evaluation and more. Forms are the only way for a student to fill out a rubric and completed forms can be easily submitted to a dropbox for instructor assessment.

Creating a Form

  • Click “Edit Course”

Creating a Form;Click "Edit Course"

  •  Click on “Forms”

; Click on "Forms" 

  •  Click on “New Form Template” button

; Click on "New Form Template" button 

  •  Name your Form Template (1), ad a Description if desired (2), and click “Save”
    (3)

;Name your Form Template (1), ad a Description if desired (2), and click "Save" (3)

  •  Click on “Add System Field” button to choose what user data you would like to collect when the form is filled out

; Click on "Add System Field" button to choose what user data you would like to collect when the form is filled out

  •  Select what data you would like to include in your form (1) and click “Add” (2)

;Select what data you would like to include in your form (1) and click "Add" (2)

  •  Click “Add Custom Field”

;Click "Add Custom Field"

  •  Give the Field a Name (1), decide if it’s required or not (2), and select what Data Type you would like (3)

;Give the Field a Name (1), deside if it's required or not (2), and select what Data Type you would like (3)

  •  In this example “Drop-down List” was selected as the Data Type. Fill in any required information (1), decide on any optional settings (2), and click “Save” (3)

;In this example "Drop-down List" was selected as the Data Type. Fill in any required information (1), deside on any optional settings (2), and click "Save" (3)

  •  Click “Add Custom Field” to continue adding fields.

;Click "Add Custom Field" to continue adding fields. 

  •  Fill in the required fields (1), select your Data Type (2),  click on “Which data type should I choose?” (3) if you need an explanation on data types, fill in any optional fields (4), click “Save” (5) when done.

;Fill in the required fileds (1), select your Data Type (2),  click on "Which data type should I choose?" (3) if you need an explanation on data types, fill in any optional fields (4), click "Save" (5) when done.

Using Forms Allows for Self and Peer Evaluation

Forms will allow for self and peer evaluation through the use of rubrics. Rubrics will need to be published in the course shell and the “Advanced Availability”, “Allow new associations in ePortfolio” option will need to be selected.

Selecting e-portfolio option in advanced availability

  • Click “Add Custom Field”

Using Forms Allows for Self and Peer Evaluation;Click "Add Custom Field"

  •  Select “Rubric Evaluation” as your custom Data Type

;Select "Rubric Evaluation" as your custom Data Type

  •  Give your Field a name (1),  Click on “Select Rubric” (2) button (Note: You will have had to build the Rubric into LEARN already and have it published), click “Save” (3)

;Give your Field a name (1),  Click on "Select Rubric" (2) button (Note: You will have had to build the Rubric into LEARN already and have it published), click "Save" (3)

Making a Form Available to Students

  • Click on “Course Content”, and “Content”.

Making a Form Available to Students;Click on "Course Content", and "Content".

  •  Click or create the Module you would like the Form to be added to (1), click on “Add Existing Activities” menu (2), click on “Form Templates” (3)

;Click or create the Module you would like the Form to be added to (1), click on "Add Existing Activities" menu (2), click on "Form Templates" (3) 

  •  Click on the Form you wish to add

;Click on the Form you wish to add

  •  The Form is now added to the content

;The Form is now added to the content

ePortfolio – Reflections

March 15, 2018

Creating a Reflection

  • Access your ePortfolio
  • Click “My Items”

;Click "My Items"

  • Click Add (1) and then Reflections (2)

;Click Add (1) and then Reflections (2)

  • Create a Title (1), the Reflection its self (2), any Tags you want to be associated (3), and then click “Save and Close” (4)

;Create a Title (1), the Reflection it's self (2), any Tags you want associated (3), and then click "Save and Close" (4)

  • Once done your Reflection can be treated as any other Artifact within your ePortfolio

Reflecting on Course Content

  • Access the course content you would like to reflect on within LEARN
  • Scroll to the bottom of the page of content and click “Reflect in ePortfolio”

;Scroll to the bottom of the page of content and click "Reflect in ePortfolio"

  • You will receive the same Reflection screen as above, but Tags related to the course content will be automatically applied. You can remove unwanted tags by clicking the “x” at the end of the tag name.
  • Fill in the Title, any Tags you would like to include, the Reflection, and click “Add”.

Click on "Add" button;You will receive the same Reflection screen as above, but Tags related to the course content will be automatically applied. You can remove unwanted tags by clicking the "x" at the end of the tag name. Fill in the Title, any Tags you would like to include, the Reflection, and click "Add".

  • You can now view your reflection in ePortfolio (1), or click “Close” (2) to return to your course content.

;You can now view your reflection in ePortfolio (1), or click "Close" (2) to return to your course content.

ePortfolio – Organizing Artifacts in Collections

March 14, 2018

Collections

Collections are groups of artifacts, reflections, presentations, and learning objectives. An item can belong to multiple collections at the same time. For example, you can add a short story you wrote to a collection called “Fiction” as well as a collection called “Creative Writing 101” and there will only be one copy of the story (artifact).

Creating a Collection

    •   Access your ePortfolio 
    •  Click on “New Collection” link

; Click on "New Collection" link

  • Add a Name and if desired Description and Tags to your Collection
  • Click “Save and Close”

Adding Artifacts to a Collection

  • Select the Artifact and click on “Add to Collection”

;Select the Artifact and click on "Add to Collection"

  •  Select the Collections (1) and click Add (2)

; Select the Collections (1) and click Add (2)

Adding Artifacts to a Collection from within the Collection

  • Create or Edit a Collection
  • Click on “Add to Collection” button

; Click on "Add to Collection" button

  • Click on “Artifacts, Presentations, Reflections, or Learning Objectives” edit

; Click on "Artifacts, Presentations, Reflections, or Learning Objectives" edit

  •  Select Artifacts (1) to add to the Collection and click Add (2)

; Select Artifacts (1) to add to the Collection and click Add (2)

Adding Artifacts to a Collection through Tags

This process is especially handy when uploading multiple files that you would like added to the same collection.

  • Create or Edit a Collection
  • Click on “Add to Collection” button

; Click on "Add to Collection" button

  • Click on “Tag List”

; Click on "Tag List" 

  • Create a Tag List Name (1), add Tags to the list (2), and click on “Save” button (3)

;Create a Tag List Name (1), add Tags to the list (2), and click on "Save" button (3)

  • Create, Upload or Edit and Artifact
  • Tag (1) the Artifact with the Tag from the desired Collection Group and Save (2).

;Tag (1) the Artifact with the Tag from the desired Collection Group and Save (2).

Video: ePortfolio – Create and Add Items to a Collection – Learner

Virtual Office Hours with WebEx

March 12, 2018

Why Have Virtual Office Hours?

Virtual office hours allow you to meet with students without anyone having to travel. This is ideal for online or blended courses but can also be used for face to face classes to give students another option to get help with their classes.

Virtual office hours can be used for tutoring, information sessions, or quick check-ins with students.

Your Own Personal Meeting Room

With WebEx you have your own meeting room where you can start meetings and invite participants at any time. To get started, log in to WebEx (http://redrivercollege.webex.com), go to My WebEx and then click Start Meeting.

Simply link to your own meeting room (http://redrivercollege.webex.com/meet/username) and students can join whenever you are “in” your virtual meeting room.

Your Own Personal Meeting Room;With WebEx you have your own meeting room where you can start meetings and invite participants at any time. Simply link to your own meeting room (http://redrivercollege.webex.com/meet/username) and students can join whenever you are "in" your virtual meeting room.

Use Live Video to Connect

With WebEx you can use a webcam and microphone to easily connect with your students on a more personal level and get problems solved quicker than with email.

For online and blended classrooms, the live video provides a more personalized experience and increases engagement.

Use Live Video to Connect;With WebEx you can use a webcam and microphone to easily connect with your students on a more personal level and get problems solved quicker than with email. For online and blended classrooms, live video provides a more personalized experience and increases engagement.

Easily Invite Participants

With WebEx you can easily link to your meeting room or invite participants via email. You can also send reminder emails to participants.

Easily Invite Participants;With WebEx you can easily link to your meeting room or invite participants via email. You can also send reminder emails to participants.

Share Your Screen

Share your screen and allow participants to share their screens with you. Sharing your screen allows you to demonstrate software, give feedback on assignments, and troubleshoot problems students may be having.

Annotate your demonstrations and record them for later.

Share Your Screen;Share your screen and allow participants to share their screens to you. Sharing your screen allows you to demonstrate software, give feedback on assignments, and troubleshoot problems students may be having. Annotate your demonstrations and record them for later.

Share Files and Presentations

Quickly share files to students and present PowerPoint files directly within WebEx. Review class material and annotate files for further clarification.

Students can also participate, give them permission to control the presentation, annotate slides, and write on a virtual whiteboard.

Share Files and Presentations;Quickly share files to students and present PowerPoint files directly within WebEx. Review class material and annotate files for further clarification. Students can also participate, give them permission to control the presentation, annotate slides, and write on a virtual whiteboard.

Record for Later

Explaining something multiple times? Record an explanation once and share it with the class.

Record for Later;Explaining something multiple times? Record an explanation once and share it with the class.

For more information on scheduling meetings with WebEx, see the Getting Started with Cisco WebEx Meeting Centre Documentation.

Small Group Meetings Using WebEx

March 12, 2018

Why Use WebEx for Meetings?

You can use WebEx to easily schedule online meetings between co-workers. WebEx runs on almost every device and can support text chat, video conferencing, screen sharing, and audio conferencing.

You can use WebEx to use a shared whiteboard, share files, and show your screen to others for troubleshooting and presentations.

With WebEx, you don’t have to travel for meetings and can conference with many people at once, saving time and money.

Create Meetings Quickly and Easily

With WebEx you have your own personal meeting room (http://redrivercollege.webex.com/meet/username) that you can start any time and can invite anyone to join. No more scheduling meetings and setting up meetings rooms, just start a meeting, invite using email, and go.

Create Meetings Quickly and Easily;With WebEx you have your own personal meeting room (http://redrivercollege.webex.com/meet/username) that you can start any time and can invite anyone to join. No more scheduling meetings and setting up meetings rooms, just start a meeting, invite using email, and go.

Share Your Screen

With WebEx you can share your screen with one click. Perfect for troubleshooting or sharing websites, software, and works in progress.

Share Your Screen;With WebEx you can share your screen with one click. Perfect for troubleshooting or sharing websites, software, and works in progress.

Share Files

Share files to participants and upload PowerPoint presentations to show within WebEx.

Share Files;Share files to participants and upload PowerPoint presentations to show within WebEx.

Easily Invite Participants

Invite participants via email or directly within Outlook with the WebEx productivity tools.

Easily Invite Participants;Invite participants via email or directly within Outlook with the WebEx productivity tools.

For more information on scheduling meetings with WebEx, see the Getting Started with Cisco WebEx Meeting Centre Documentation.

Accessibility Account Settings in LEARN

October 19, 2017

There are a few personal Account Settings that can be configured for your LEARN experience.

Access these settings by first logging into LEARN, click your name in the upper right-hand corner of the page, and click “Account Settings”.
Selecting Account Settings in LEARN

Font Options

You are able to adjust the font size, as well as select the “OpenDyslexic” font to improve readability.
Adjusting font settings in LEARN

Settings for Assistive Technologies

Dialog Setting

By default, secondary windows are displayed in Dialog boxes. You may wish to change this to Pop-ups if you use an assistive technology (such as a screen reader, screen magnifier or voice software).
Dialog Settings in LEARN

HTML Editor Settings

You can opt to turn off the rich text editor in LEARN. The HTML editor enables you to enter text and HTML in the system. It has many additional rich text features. If you use assistive technology such as screen readers, some of these features might be difficult to navigate.

Reading Content

Some tools automatically mark content as read as you scroll it into view. If you use an assistive technology such as a screen reader then you may wish to disable this feature.

Video Settings

There is an option to optimize video presentation for programmatically-driven assistive technologies.

Discussions and Email Settings

Though not specifically accessibility settings, you are able to customize your experience using Discussions and Email within LEARN.

Access these settings by the corresponding tabs at the top of the page.
Discussion and Email account settings in LEARN

RRC Polytech campuses are located on the lands of Anishinaabe, Ininiwak, Anishininew, Dakota, and Dené, and the National Homeland of the Red River Métis.

We recognize and honour Treaty 3 Territory Shoal Lake 40 First Nation, the source of Winnipeg’s clean drinking water. In addition, we acknowledge Treaty Territories which provide us with access to electricity we use in both our personal and professional lives.

Learn more ›