Learning Technologies

Learning Technologies

Learn

LEARN Discussions

March 1, 2013

Tagged in: LEARN, How to Videos

Description:

The Discussions tool can be used for online discussions between you and your students or between groups of students. After setting up a discussion Forum (major categories), you can create individual topics within the forum for discussion. Students can post messages in a ‘threaded’ discussion. Students can also attach documents & images to their messages. You can set Discussions up to be marked.

LEARN Intelligent Agents

March 1, 2013

Tagged in: LEARN, How to Videos

Description:

The Intelligent Agents tool monitors your course to find activity that matches criteria that you set. You can use intelligent agents to do things like email students with grades below a certain level, check for students that have not logged in recently, or perform actions when students view certain pieces of content.

LEARN Quizzes

March 1, 2013

Tagged in: LEARN, How to Videos

Description:

The Quizzes tool allows you to create a variety of assessments for your students. While labeled ‘Quizzes’, this tool can be used for exams, surveys, and/or homework assignments. The Quizzes tool can be used to create the following types of questions: multiple-choice, true/false, arithmetic (including specifying ranges of numbers with significant figures), fill-in-the-blank, multi-select, matching, ordering, and long and short answers. Many of these questions can be graded automatically and then automatically entered into the Grades tool. Quizzes can be released conditionally based on date and time

LEARN Quizzes (Advanced)

March 1, 2013

Tagged in: LEARN, How to Videos

Description:

More about advanced settings in the Quiz tool

LEARN Release Conditions

March 1, 2013

Tagged in: LEARN, How to Videos

Description:

Release Conditions are used to define conditions that need to be satisfied in order to grant students access to a piece of content. “Release” means “visible or accessible to students.” The most commonly used release conditions are date and time. Learn also allows instructors to define other types of conditions for release of material to students. It can be used to define the order in which a student accesses course materials. These defined orders are sometimes referred to as “learning paths.”

LEARN Attendance

February 19, 2013

LEARN Attendance Tool

  • To access the Attendance tool click “Assessments” (1) and then “Attendance”.
  • First, you may wish to set up a custom Scheme, click “Attendance Schemes” (2) and “New Scheme” (3)

LEARN Attendance Tool;To access the Attendence tool click "Assessments" (1) and then "Attendance". First you may wish to set up a custom Scheme, click "Attendance Schemes" (2) and "New Scheme" (3)

  • Give your scheme a name (1), fill in the Symbol, Full Name, and % value (2). The % value will allow you to set a cause for concern threshold so typically present will be worth 100%.
  • If you need more statuses enter the number needed and click “Add Statuses” (3).
  • Click “Save” (4) and then “Cancel” if it doesn’t return to the previous screen.

;Give your scheme a name (1), fill in the Symbol, Full Name, and % value (2). The % value will allow you to set a cause for concern threshold so typically present will be worth 100%. If you need more statuses enter the number needed and click "Add Statuses" (3). Click "Save" (4) and then "Cancel" if it doesn't return to the previous screen.

  • You will now need to set up one or more “Attendance Registers” (1), click “New Register” (2).

;You will now need to set up one or more "Attendance Registers" (1), click "New Register" (2).

  • Your register will need a name (1),  select which Attendance Scheme (2) you wish to use, and add a “Cause for Concern %”(3). The cause for concern is the threshold where you wish to be alerted if a student has dropped below it.
  • Select any other settings you wish.

;Your register will need a name (1), select which Attendance Scheme (2) you wish to use, and add a "Cause for Concer %"(3). The cause for concern is the threshold where you wish to be allerted if a student has dropped below it. Select any other settings you wish.

  • Add the “Session Name” (1), and add any extra sessions you need by entering the number and clicking “Add Sessions” (2).
  • Once done click “Save” (3) and “Cancel” if not returned to the previous screen on saving.

;Add the "Session Name" (1), and add any extra sessions you need by entering the number and clicking "Add Sessions" (2). Once done click "Save" (3) and "Cancel" if not returned to previous screen on saving.

  • To view or add Attendance Data click the menu button beside the register (1) and click “View Attendance Data” (2).

;To view or add Attendance Data click the menu button beside the register (1) and click "View Attendance Data" (2).

  • To add data for a Session click the “Enter Attendance Data” button beside the session name (1).

;To add data for a Session click the "Enter Attandance Data" button beside the session name (1).

  • Typically the majority of students will be receiving the same status, so click “Set Status for All Users” (1). You can then adjust the ones who require alternate statuses.

;Typically the majority of students will be receiving the same status, so click "Set Status for All Users" (1). You can then adjust the ones who require alternate statuses.

  • Set the desired status (1) and click “Save” (2).

;Set the desired status (1) and click "Save" (2).

  • Set the individual students “Attendance Status” (1) and click “Save” (2) when done.

;Set the indevidual students "Attenance Status" (1) and click "Save" (2) when done.

Video:


Tagged in: How to Videos, LEARN V10

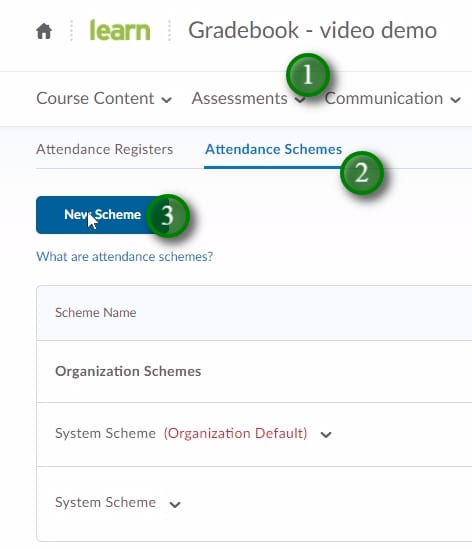
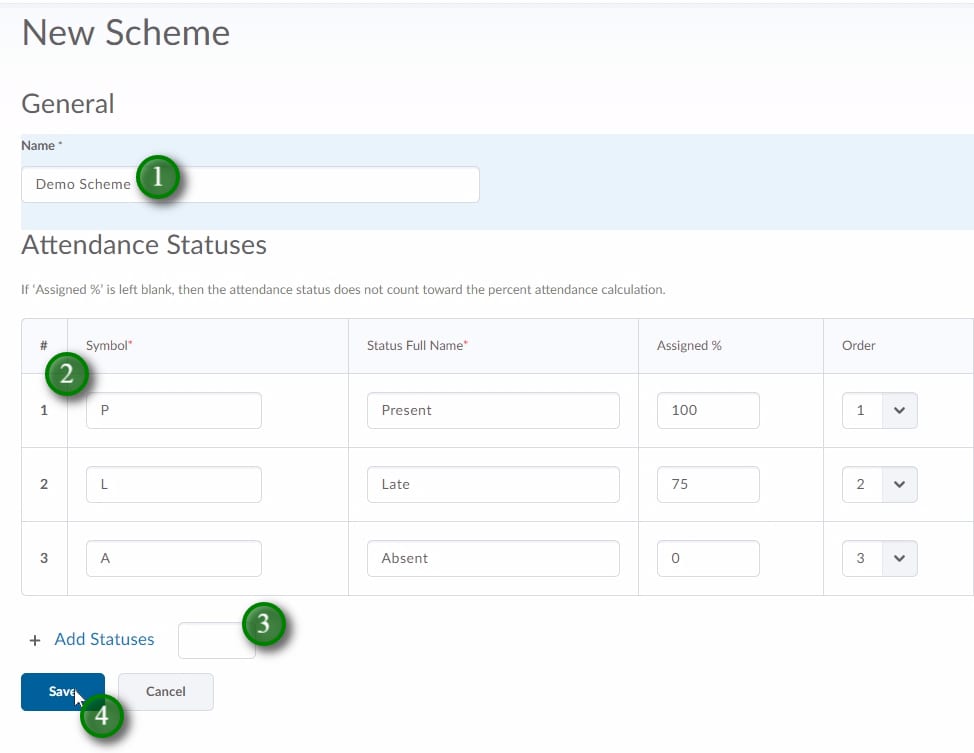
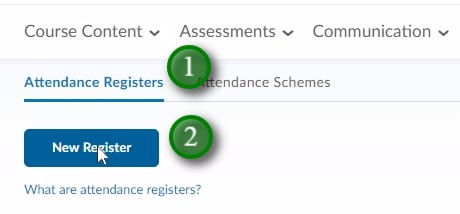
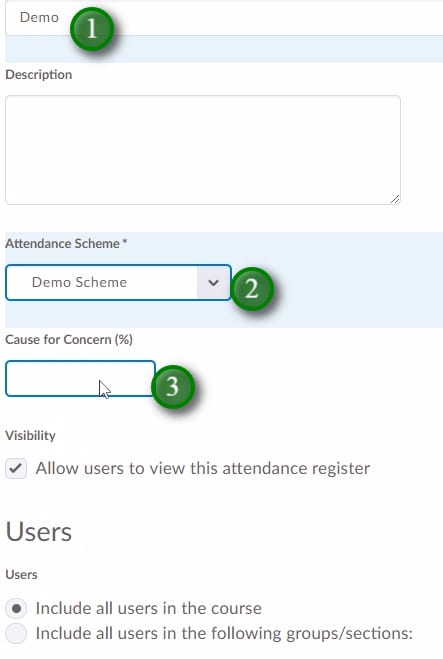
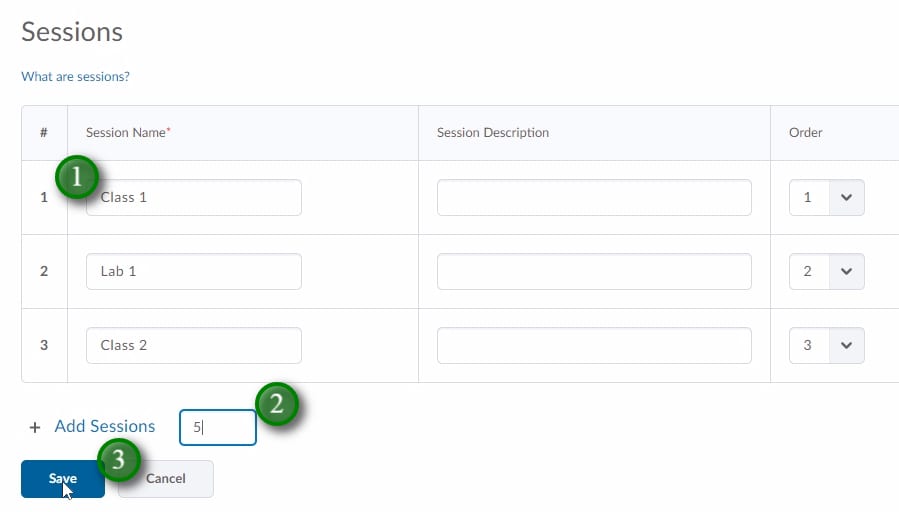
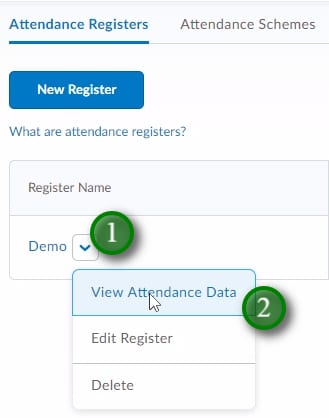
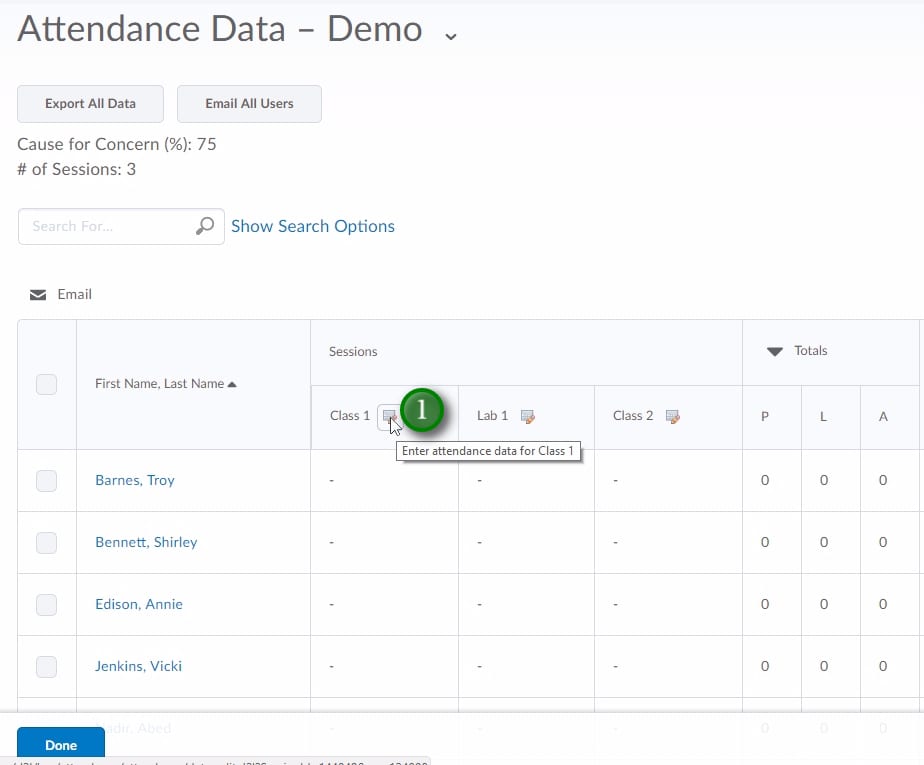
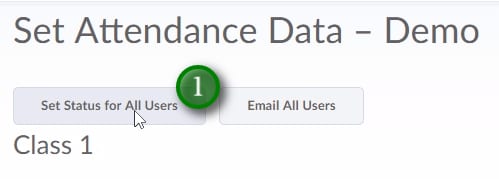
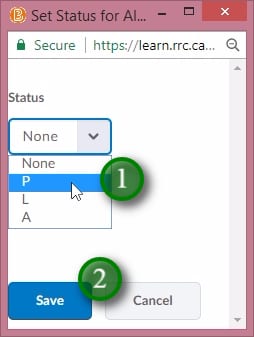
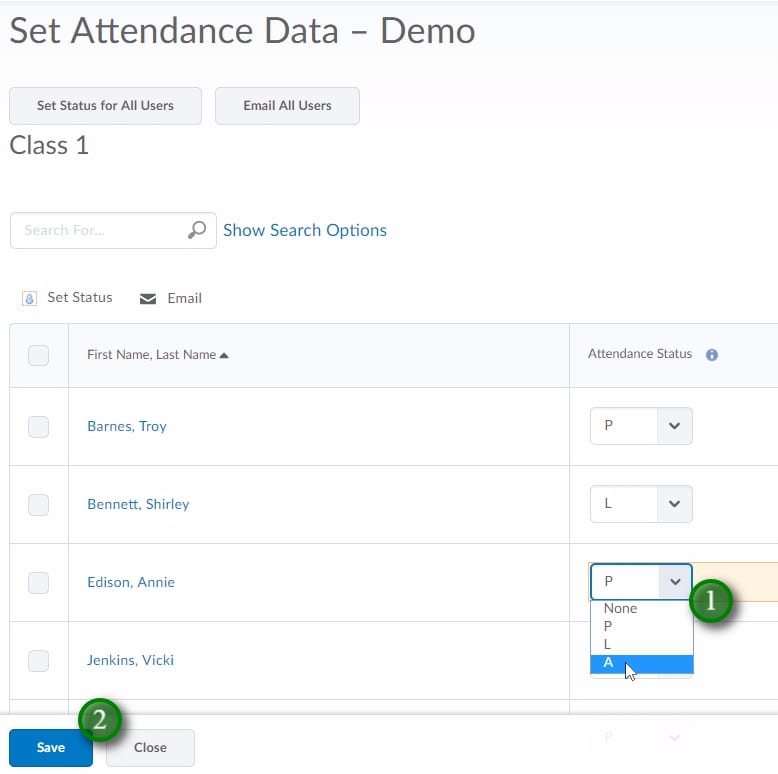
Description: The attendance tool is used to help organize your daily attendance. This video will show you how to set one up.

LEARN Demo Student

February 19, 2013

Demo Students in LEARN

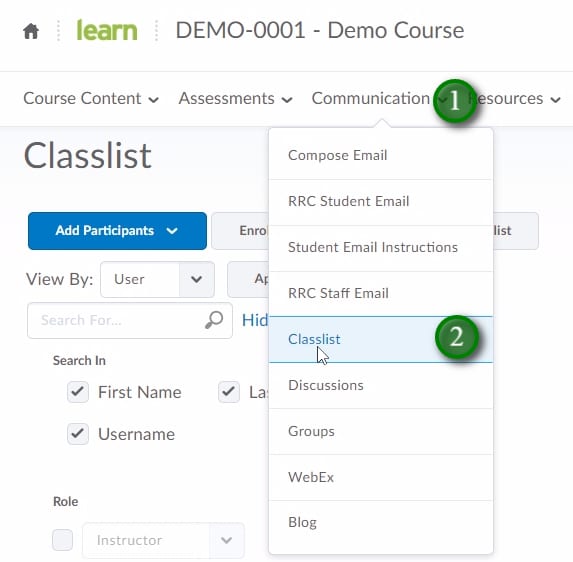
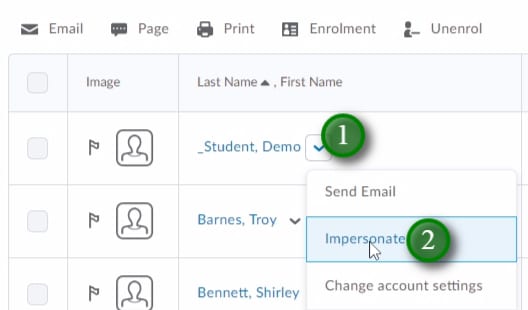
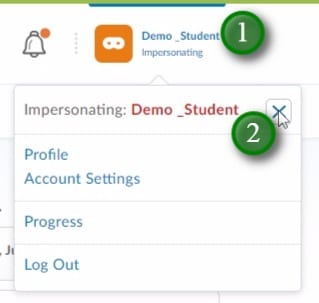
Demo students are used for checking anything in your course which requires a students view. The demo student also allows you to check against grades schemes or rubrics. To request a demo student be added to a course simply email LEARN support at learn@rrc.ca, please be sure to include the name of the course you wish to have the demo student added to.

Impersonating a Demo Student

  • Enter your course
  • Click “Communication”, and “Classlist”
    Clicking Communication and Classlist in LEARN
  • Click the dropdown menu beside the demo student’s name (1) and select “Impersonate” (2)
    Impersonating a Demo Student in LEARN Classlist
  • You are now able to view the course as a student completing assessments, viewing feedback, viewing the gradebook etc. Note that release conditions based on content viewed will not be activated by impersonating a demo student.
  • When done impersonating the demo student, click the demo students name in the upper right-hand corner of the page (1) and click the “X” beside “Impersonating: Demo _Student” (2).
    Ending a Demo Student impersonation session

Video

Tagged in: How to Videos, LEARN V10

LEARN Navbar – Custom Link Group

February 19, 2013

Tagged in: How to Videos, LEARN V10

Description:

Version 10 of LEARN introduced “Link Groups”.  These allow course tools to appear in a drop-down on the Navigation Bar.  This video will show how to Create and Edit custom link groups for your course, and even how to make a link group of external learning resources for your students.

RRC Polytech campuses are located on the lands of Anishinaabe, Ininiwak, Anishininew, Dakota, and Dené, and the National Homeland of the Red River Métis.

We recognize and honour Treaty 3 Territory Shoal Lake 40 First Nation, the source of Winnipeg’s clean drinking water. In addition, we acknowledge Treaty Territories which provide us with access to electricity we use in both our personal and professional lives.

Learn more ›