
These instructions are for both current staff and new staff. Please review the following.
Current staff have already completed the setup of their multi-factor authentication (MFA). Please proceed to Step 1 to start the College-issued computer setup instructions.
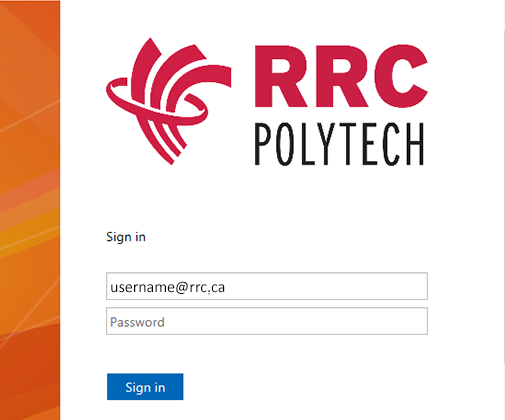
New staff must claim their account first and then configure their multi-factor authentication (MFA), before starting the College-issued computer setup instructions.
When complete, Teams will open. You can close it and move on to Step 4.
Outlook will search for your accounts.
In the bottom taskbar of your computer, in the Search box type Cisco Secure Client, then click the result, and then click Disconnect.
This step is only if you are using a Lenovo Thinkpad.
This step is for all other laptops, but not the Lenovo Thinkpad, as you would have already restarted your laptop in Step 8.
In the Windows search box, in the bottom taskbar, type File Explorer and then click the File Explorer result under Best Match.
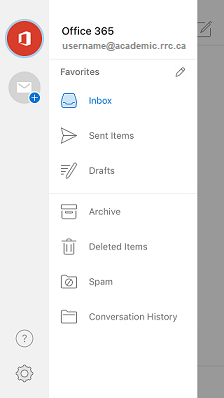
Network shares will appear under This PC called z:\admin.rrc.ca\staff shares. There will be no individual drive letters mapped.
![]()
Congratulations!
You have now completed the College computer set up instructions.
~~~~~~~~~~~~~~~~~~~~~~~~~~~~~~~~~~~~~~~~~~~~~~~~
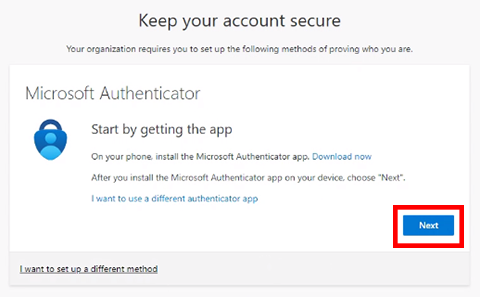
To provide an extra layer of security for your College account, RRC Polytech
uses multi-factor authentication (MFA). With multi-factor authentication, in addition
to your College user name and password, a time-limited verification code is required when
you log on to Microsoft 365 services, Outlook desktop and mobile clients, Microsoft Teams,
and HUB. If a hacker were to steal your password, it would be difficult for them to access
your account without a verification code.
Once you log on using multi-factor authentication, you will not receive another prompt for a
verification code unless you completely sign out or change your password.
~~~~~~~~~~~~~~~~~~~~~~~~~~~~~~~~~~~~~~~~~~~~~~~~~~~~~~~~~~~~~~~~~~~~~~
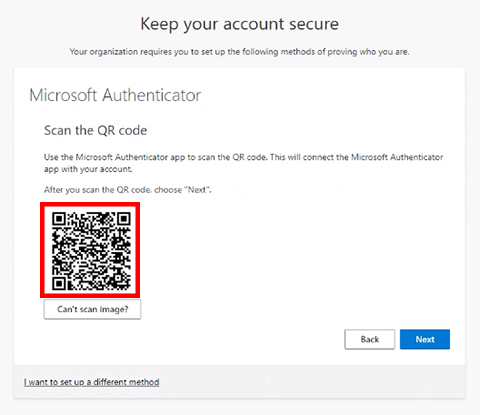
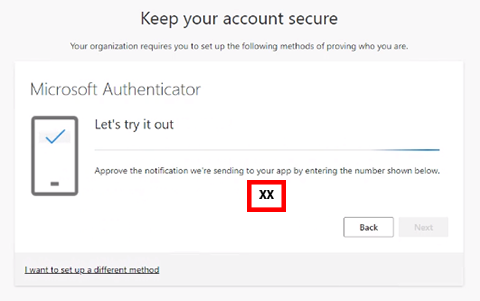
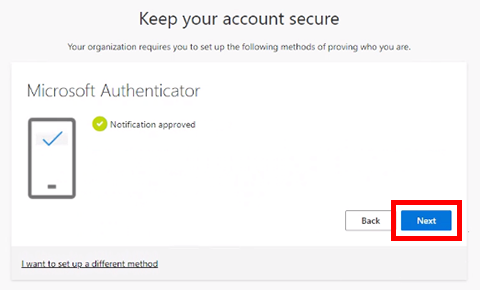
To set up multi-factor authentication, please follow these steps:
If you are already logged in you will not be prompted to sign in and can proceed to step 5.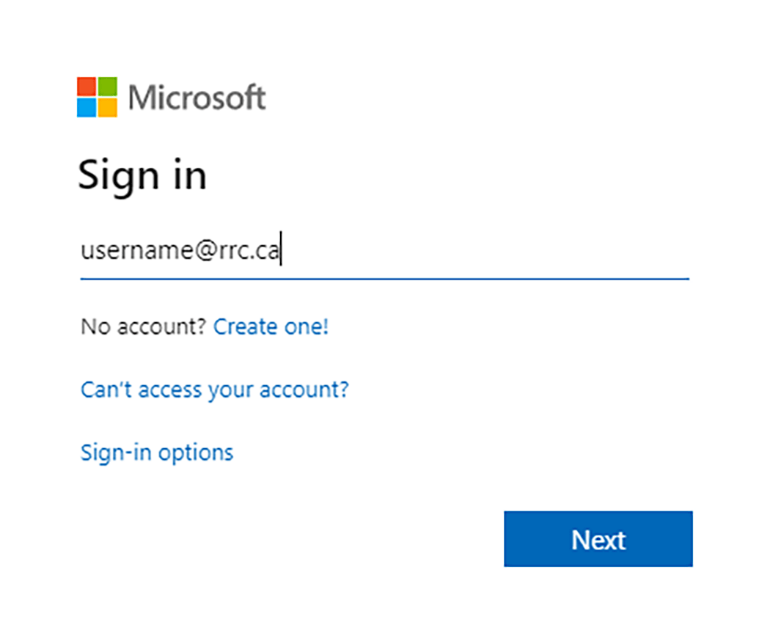


If you have any questions or issues with MFA, please contact the ITS Service Desk website to submit a Service Desk ticket, or call 204-632-2125, or email servicedesk@rrc.ca.
← Back to Information Technology Security
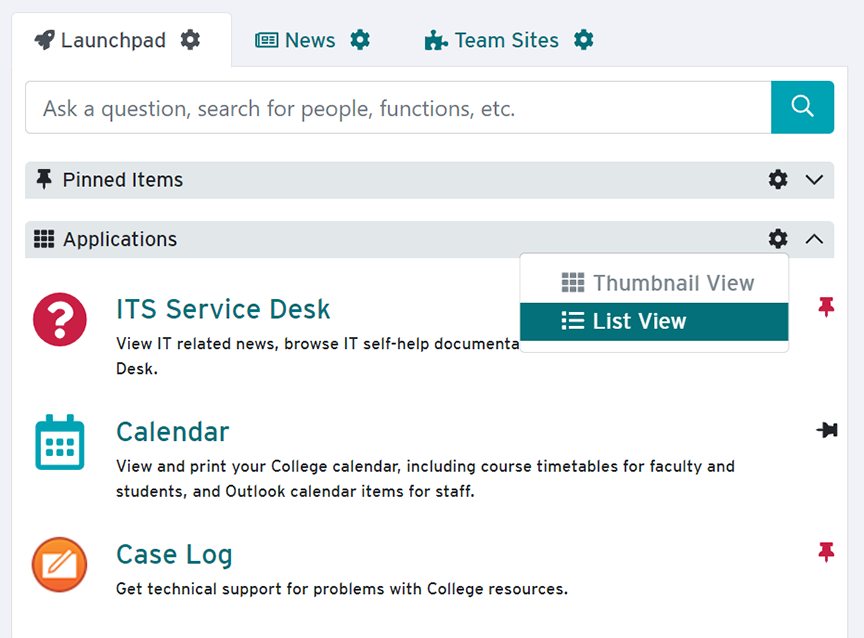
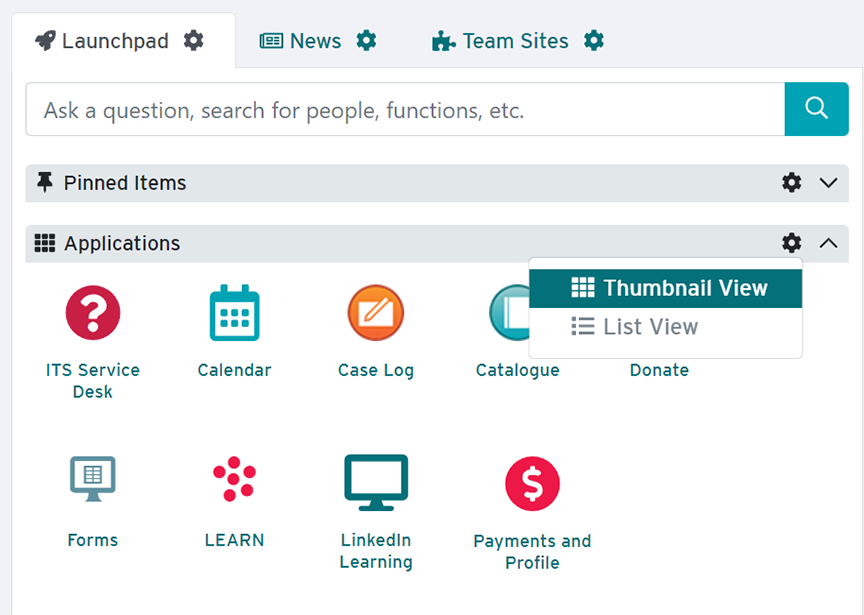
| List View | Thumbnail View |
|---|---|
 |
 |
Information Technology Solutions (ITS) replaces College issued computers older than 4 years of age with a new computer as part of our regular hardware upgrade process. These computer upgrades are performed to benefit all staff and faculty by providing current computer technology and up to date software.
The upgrade will directly affect your ability to access computer and network resources on the assigned date. ITS will not be requesting your account information (user id and password) as part of this upgrade process. Instead, your account will be disabled during the upgrade process and you will have no access to the College network.
If you are unable to accommodate the upgrade on the date ITS sends you due to unforeseen circumstances, please respond no later than 24 hours prior to the assigned date so that your upgrade can be rescheduled.
Before the Upgrade
Please save all personal items to a USB Key, external hard drive or other personal device as ITS does not transfer personal files like these listed below:
• Personal photos and videos
• Downloaded music or videos
• Applications not supported or purchased by ITS; including their files and folders
College related documentation and relevant work related data will be transferred. This relevant data includes:
• All Office Products, including but not limited to Visio, Word, Project, Excel
• Course material and work in application folders and files
• Archived email and archived contacts list
• Work related video and images considered “fair use”.
Please ensure all files are stored in the “Documents”, “Desktop” and “Favorites” folders; and if relevant to your work, “Music”, “Pictures” and/or “Videos” folders. Any files stored outside these folders will not be copied.
Day of Upgrade
Staff member must:
• Disable any wireless or email access to your account on any mobile phone or tablet. If they are not disabled prior to the process beginning your devices may be locked out and could impact your ability to reconnect to the college network
o If you require assistance disabling your devices, please submit a case log. The make and model of each device will be needed in order to assist you
ITS will:
• Remove your current computer from your location
• All relevant and correctly placed work related data will be transferred to your new computer
• Software and applications will be installed on the new computer:
o Window 10 Enterprise – 64 bit
o Office Professional 2016
o Adobe Acrobat
o Cisco VPN (laptop only)
o Red River College Software Center
• College email will be configured for you on the new computer
• Printers used on the old computer will be installed on the new computer
After the Upgrade
You will be provided a temporary login password when your new computer is delivered. During your first login with the temporary password, you will be prompted to change your password to a new password of your choice, following the college password guidelines.
Some applications not installed by ITS during the upgrade process may be available for install through Red River College Software Centre. If you are unfamiliar with Software Centre, please click here for detailed instructions on how to find and use Software Centre.
Your old computer will be stored by ITS for 30 days in case any relevant data was missed during the transfer. Data will not be accessible after this period. If applicable, please create a case log for any missing data that you require installed on the new computer
If you have questions or concerns about this process, please email the Manager of ITS – Client Services.
To update your cached credentials in Windows, please see the following:
https://www.rrc.ca/its/test-dl/
Calling in to Teams meetings with Audio Conferencing is helpful when participants cannot attend a meeting using the Microsoft Teams app on their laptop or mobile device.
This feature is especially useful when:
Please visit Microsoft’s Audio Conferencing Common Questions webpage to learn more about the benefits of audio conferencing.
Image check
![]()


| Functionality | Private Conversation | Group Conversation | Team Conversation | Channel Conversation |
|---|---|---|---|---|
| Using Chat or Teams | Chat | Chat | Teams | Channel within Teams |
| Must be a member of a team | No | No | Yes | Yes |
| Conversation type | Between two employees | Between a group of three or more | Between members of the team | Between members of the channel within a team |
OR
A private conversation is within Chat, between two employees who are not a member of a team.
A group conversation is within Chat and between three or more employees who are not a member of a team.
When you only have one channel, it would appear to be a team conversation, which includes all members.
A team can have a number of different channels and different members speaking in any particular channel.
OR
https://searchcontentmanagement.techtarget.com/definition/Microsoft-Planner
Planner definition
Microsoft Planner is a project management application developed by Microsoft that allows teams to create, assign and organize work visually. With this app, it facilitates teamwork, as well as progress visibility and coordination.
Once opened through Office 365 , Microsoft Planner is broken into plans, tasks and buckets (or groups of tasks). Creating a plan is equivalent to starting up a project which is made up of tasks organized into buckets, or categories. Each task can be assigned a label, a deadline, and a team member.
Features and functionality
Planner definition
A task management tool to organize teamwork. With Planner, teams can manage their work and associated tasks visually and openly with the rest of the team. Planner is integrated with Microsoft Teams.
Features and functionality
| Chat | Teams |
|---|---|
 |
 |
| Limited to 50 participants. | Up to 5,000 members in a team. |
| Each reply will follow the last one sent. | Reply specifically to any message in a conversation. |
| A group chat only has one conversation space. | Team conversations are across multiple channels for specific topics within a team. |
| Reduced number of apps in Chat. | More app options within Teams, including Wiki and Microsoft Planner. |
| Every participant has the same level of access to remove and add people. | Team owners manage team settings, and can add and remove members from the team. |
| Folders cannot be created within the Files tab. | Folders and several layers of subfolders can be created within the Files tab. |
| When adding a new participant to a group chat you may keep all of the chat history, based on number of days, or have no chat history at all. | When adding a new member to the team, all of the team chat history is included by default. |
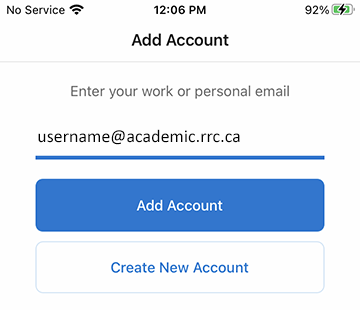
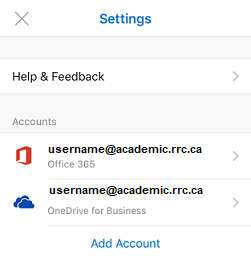
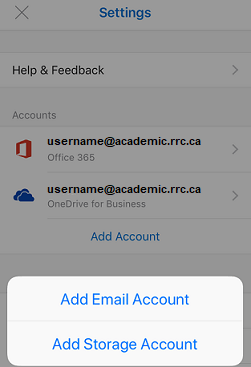
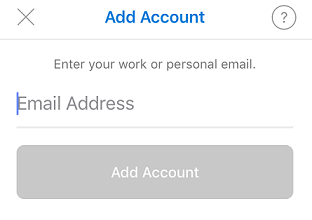
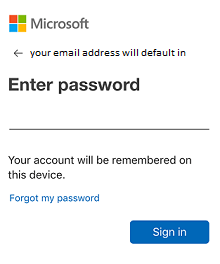
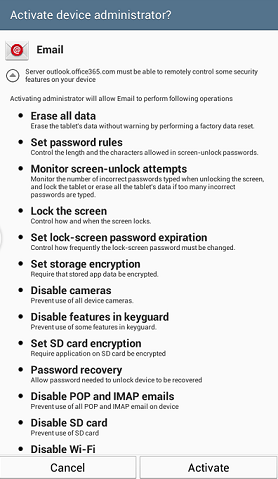
The Outlook for Apple app will allow you to access your email, calendar, contacts and OneDrive files from within the app.
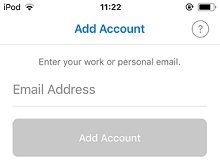
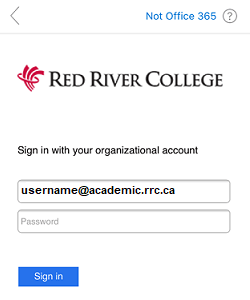
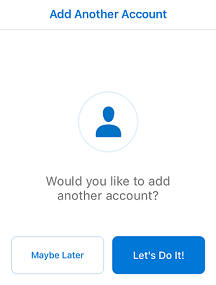
You can have more than one email account in Outlook for iOS.
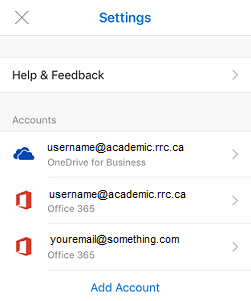
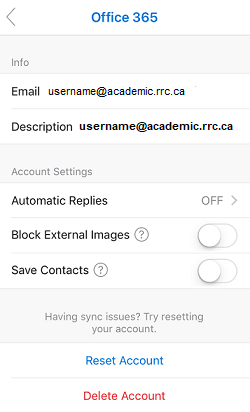
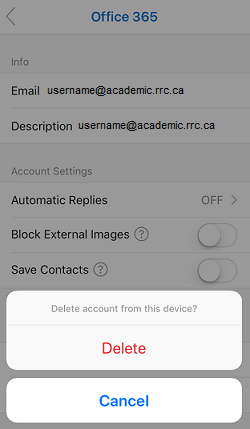
← Back to Connect student email to your device
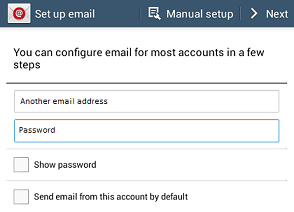
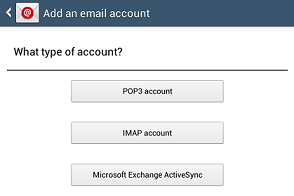
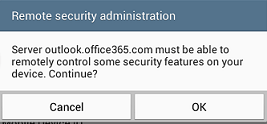
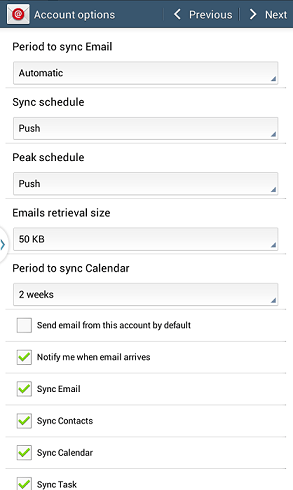
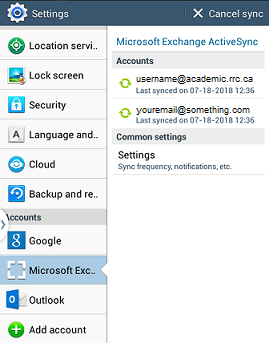
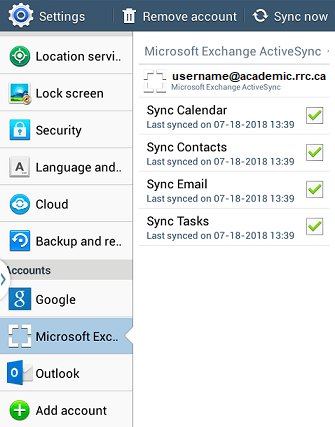
The Android mail app will allow you to access your email, calendar, contacts, and OneDrive files from within the app.
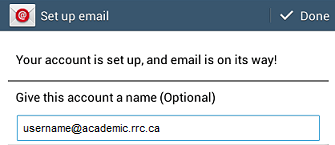
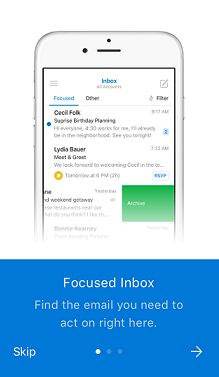
This is your new inbox.

← Back to Connect student email to your device
The following terms are commonly used and referred to while using SharePoint.
You can choose to scroll through each topic alphabetically on this page, or you may click a specific letter below.
A | B | C | D | E | F | G | H | I | J | K | L | M | N | O | P | Q | R | S | T | U | V | W | X | Y | Z
You can choose to scroll through each topic on this page, or you may click individual topics directly below.
or
You can choose to scroll through each topic on this page, or you may click individual topics directly below.
You can choose to scroll through each topic on this page, or you may click individual topics directly below.
You can choose to scroll through each topic on this page, or you may click individual topics for the Other inbox or the Different folder directly below.
RRC Polytech campuses are located on the lands of the Anishinaabeg, Ininiwak, Anishininwak, Dakota Oyate, and Denésuline, and the National Homeland of the Red River Métis.
We recognize and honour Treaty 3 Territory Shoal Lake 40 First Nation, the source of Winnipeg’s clean drinking water. In addition, we acknowledge Treaty Territories which provide us with access to electricity we use in both our personal and professional lives.