RESPONDUS Creating a New Quiz
Tagged in: Respondus, How to Videos
Description:
Learn how to create a new Quiz.

Tagged in: Respondus, How to Videos
Description:
Learn how to create a new Quiz.
Tagged in: Respondus, How to Videos
Description:
Import Questions from a text file.
Tagged in: Respondus, How to Videos
Description:
This tutorial demonstrates how to upload to Learn.
Tagged in: Respondus, How to Videos
Description: Watch this video for instructions on setting up your Respondus to connect to LEARN.
Tagged in: Respondus, How to Videos
Description:
Retrieve Quiz’s from Learn.
Tagged in: Respondus, How to Videos
Description:
Learn how to create random questions.
Tagged in: Respondus, How to Videos
Description:
This guide will demonstrate the settings in Respondus.
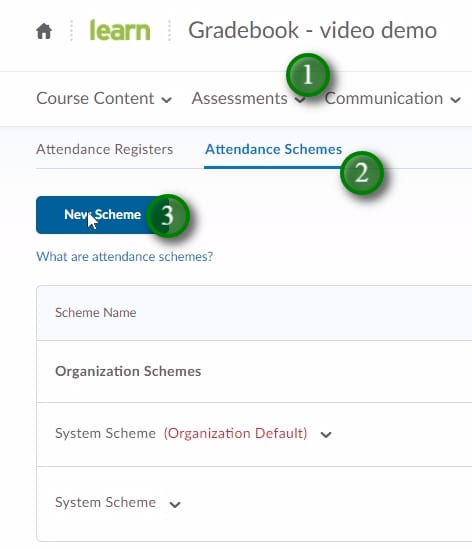
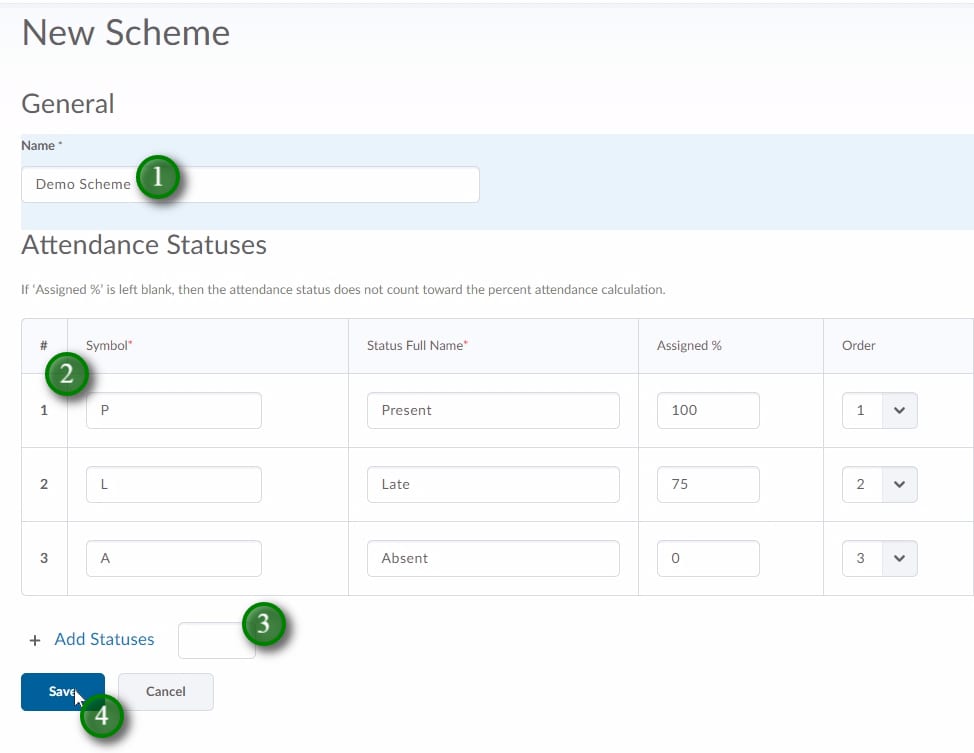
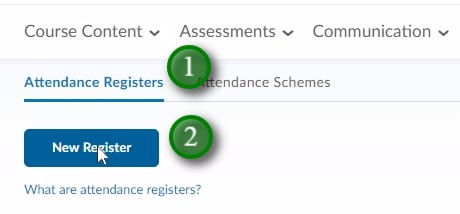
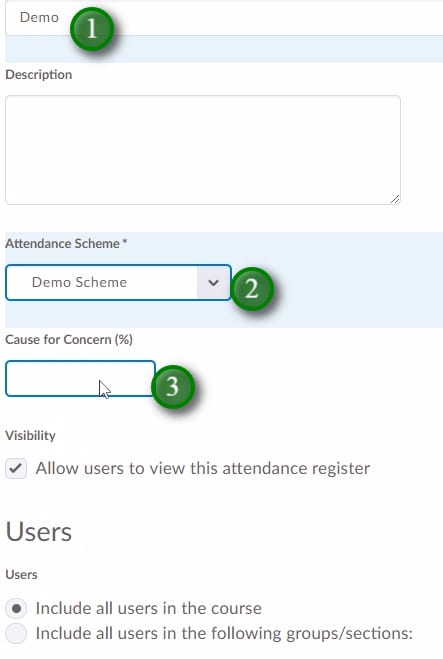
Tagged in: How to Videos, LEARN V10
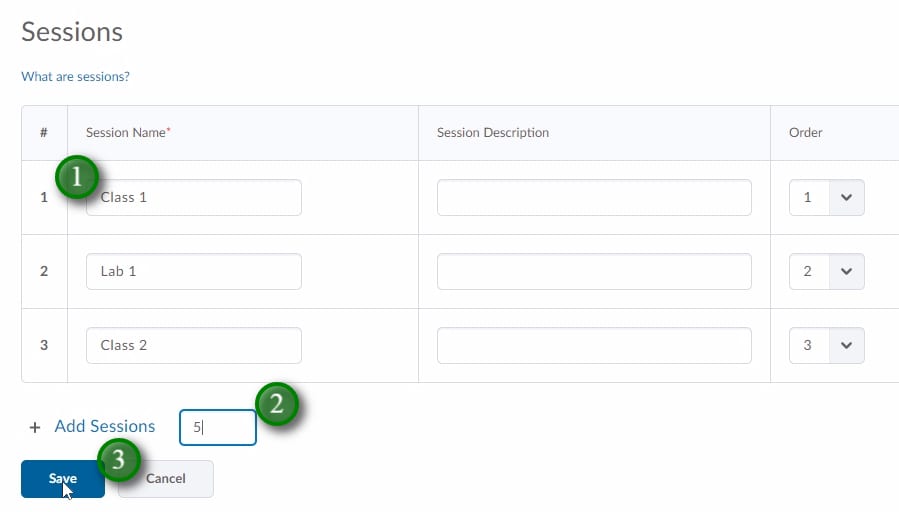
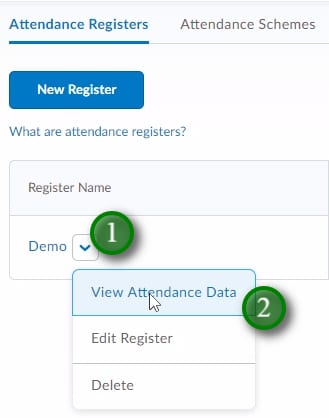
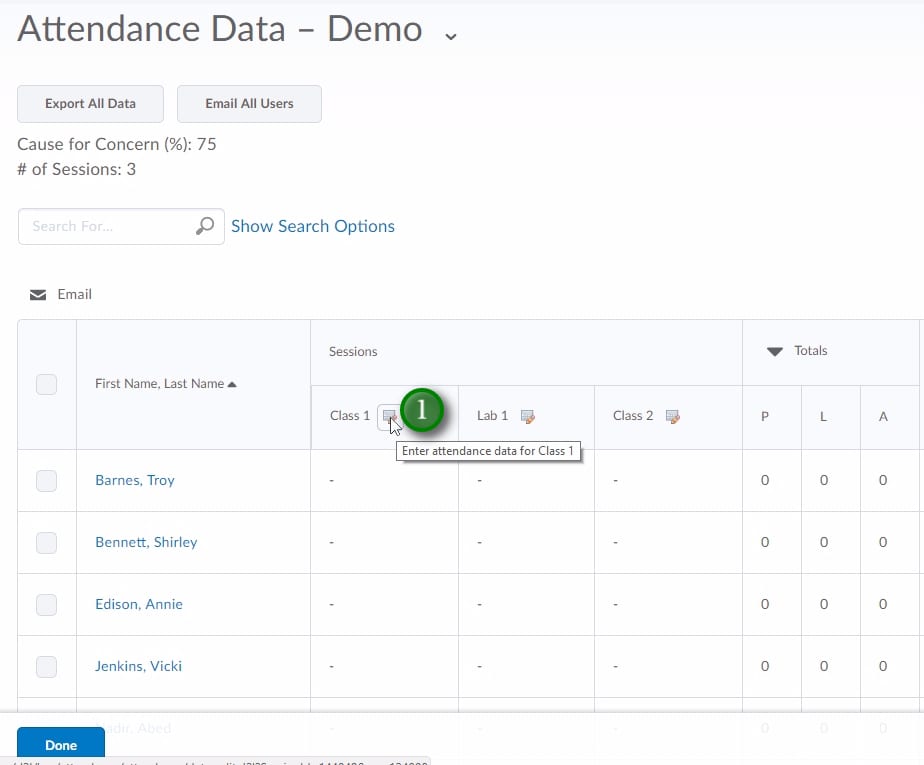
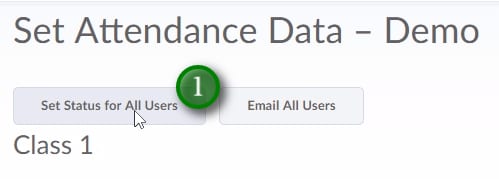
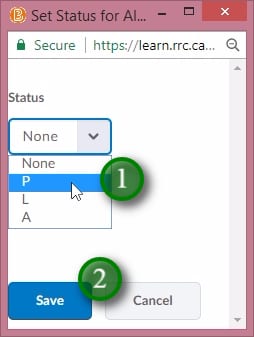
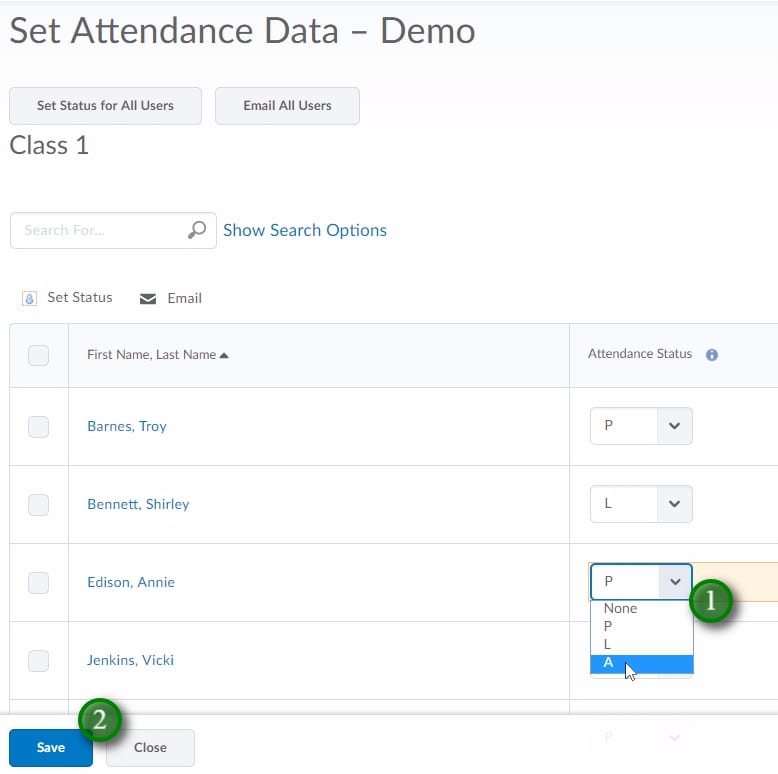
Description: The attendance tool is used to help organize your daily attendance. This video will show you how to set one up.
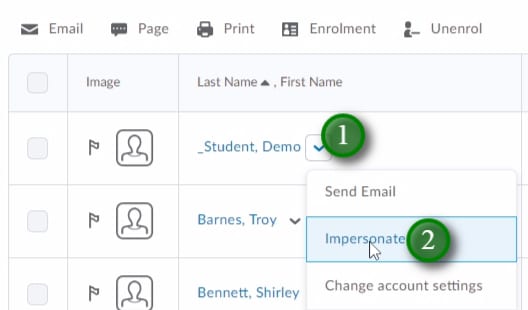
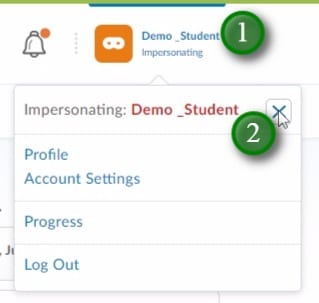
Demo students are used for checking anything in your course which requires a students view. The demo student also allows you to check against grades schemes or rubrics. To request a demo student be added to a course simply email LEARN support at learn@rrc.ca, please be sure to include the name of the course you wish to have the demo student added to.
Tagged in: How to Videos, LEARN V10
Tagged in: How to Videos, LEARN V10
Description:
Version 10 of LEARN introduced “Link Groups”. These allow course tools to appear in a drop-down on the Navigation Bar. This video will show how to Create and Edit custom link groups for your course, and even how to make a link group of external learning resources for your students.
RRC Polytech campuses are located on the lands of the Anishinaabeg, Ininiwak, Anishininwak, Dakota Oyate, and Denésuline, and the National Homeland of the Red River Métis.
We recognize and honour Treaty 3 Territory Shoal Lake 40 First Nation, the source of Winnipeg’s clean drinking water. In addition, we acknowledge Treaty Territories which provide us with access to electricity we use in both our personal and professional lives.