
LEARN Attendance
LEARN Attendance Tool
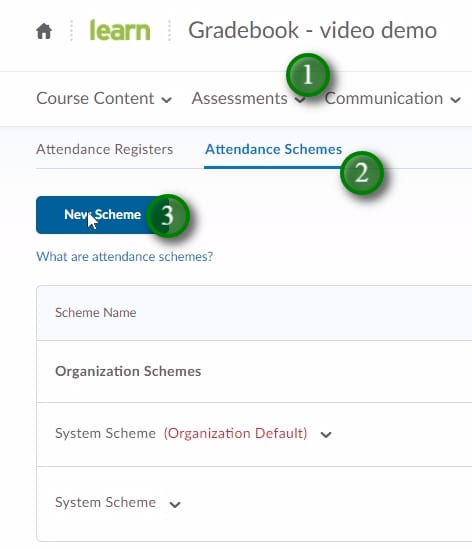
- To access the Attendance tool click “Assessments” (1) and then “Attendance”.
- First, you may wish to set up a custom Scheme, click “Attendance Schemes” (2) and “New Scheme” (3)
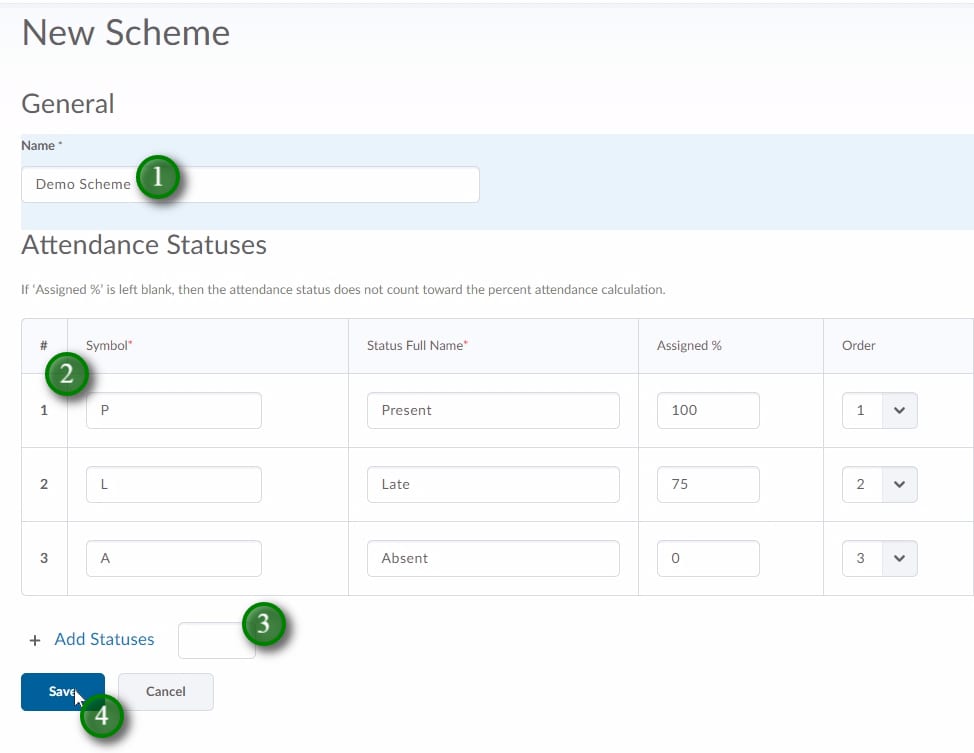
- Give your scheme a name (1), fill in the Symbol, Full Name, and % value (2). The % value will allow you to set a cause for concern threshold so typically present will be worth 100%.
- If you need more statuses enter the number needed and click “Add Statuses” (3).
- Click “Save” (4) and then “Cancel” if it doesn’t return to the previous screen.
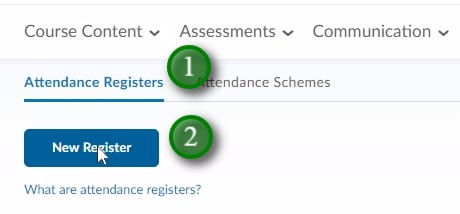
- You will now need to set up one or more “Attendance Registers” (1), click “New Register” (2).
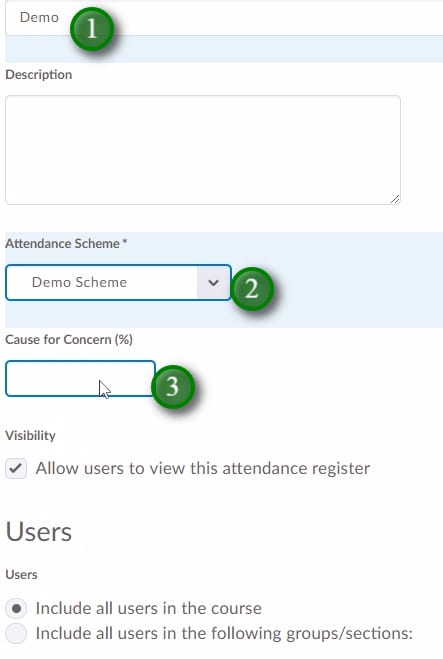
- Your register will need a name (1), select which Attendance Scheme (2) you wish to use, and add a “Cause for Concern %”(3). The cause for concern is the threshold where you wish to be alerted if a student has dropped below it.
- Select any other settings you wish.
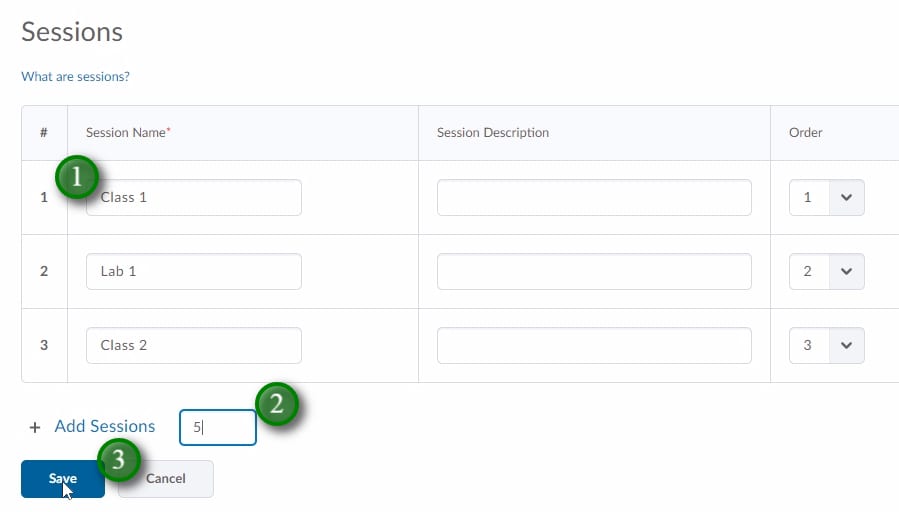
- Add the “Session Name” (1), and add any extra sessions you need by entering the number and clicking “Add Sessions” (2).
- Once done click “Save” (3) and “Cancel” if not returned to the previous screen on saving.
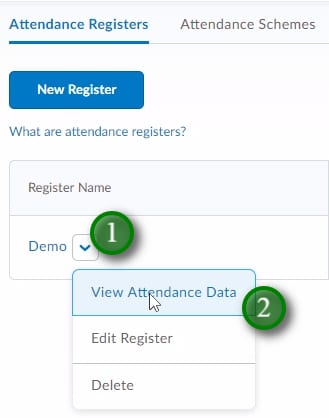
- To view or add Attendance Data click the menu button beside the register (1) and click “View Attendance Data” (2).
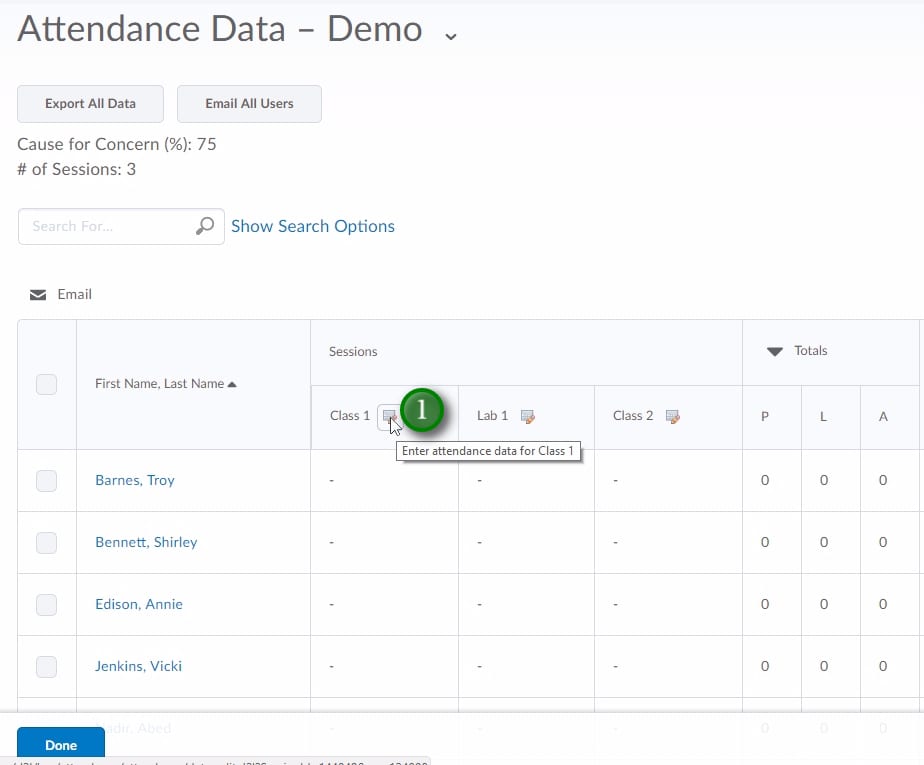
- To add data for a Session click the “Enter Attendance Data” button beside the session name (1).
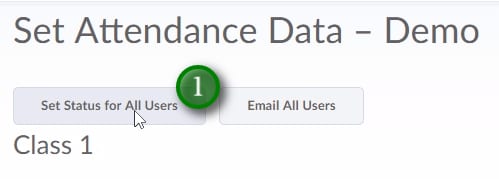
- Typically the majority of students will be receiving the same status, so click “Set Status for All Users” (1). You can then adjust the ones who require alternate statuses.
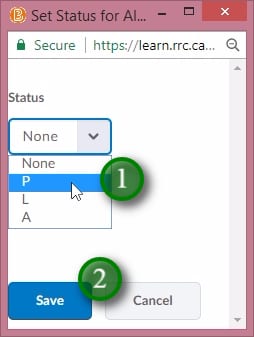
- Set the desired status (1) and click “Save” (2).
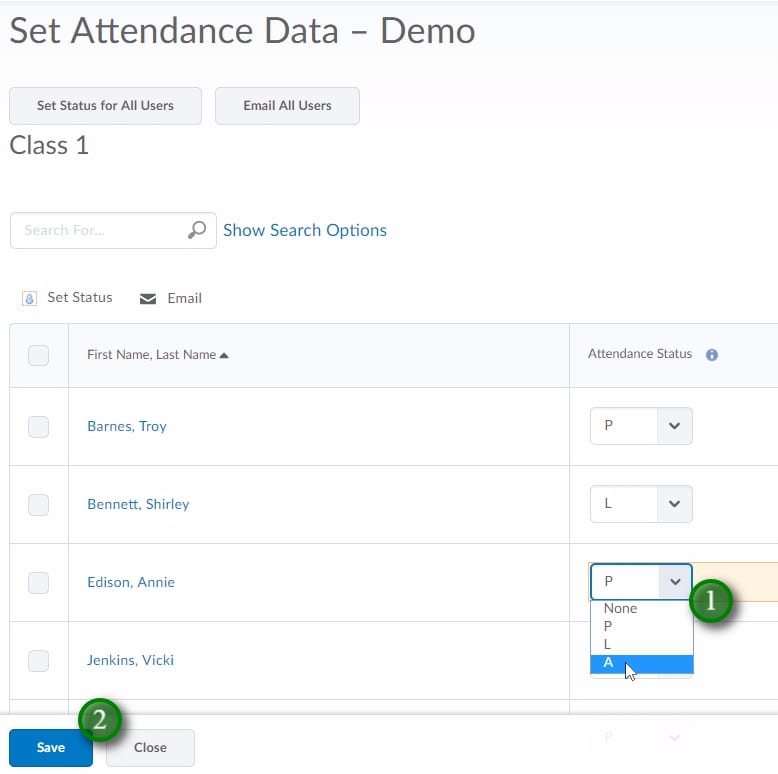
- Set the individual students “Attendance Status” (1) and click “Save” (2) when done.
Video:
Tagged in: How to Videos, LEARN V10
Description: The attendance tool is used to help organize your daily attendance. This video will show you how to set one up.