Install PaperCut on your device
Red River College Polytechnic uses PaperCut print management software, which allows you to install, access, and use College networked printers on your personal tablet or laptop. To install PaperCut on your device, follow these steps:
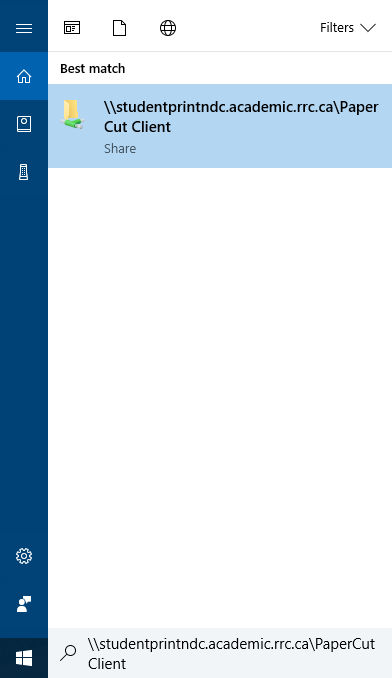
- In your Windows search box at the bottom left‑hand corner of the taskbar, type \\studentprintndc.academic.rrc.ca\PaperCut Client (ensuring that you leave a space between PaperCut and Client), and then press the Enter key (or click the search result).

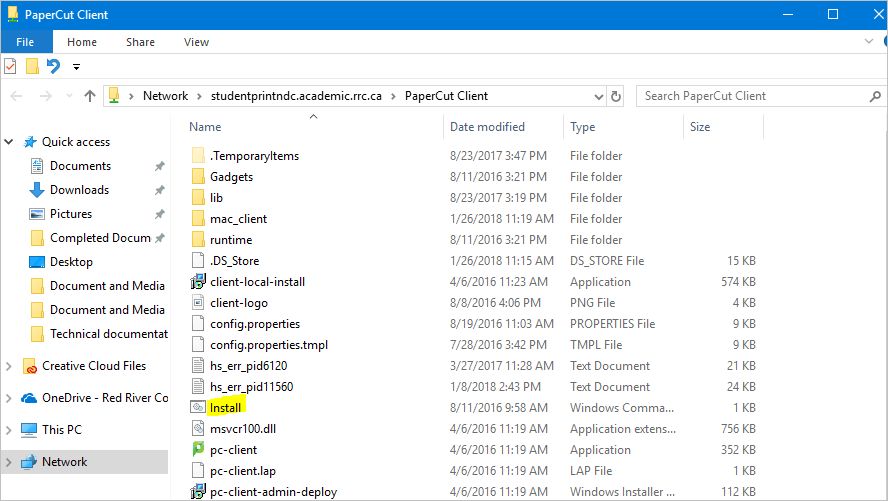
- On the PaperCut Client menu, double‑click Install.

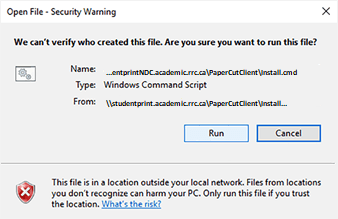
- On the Open File – Security Warning menu, click Run.

- Once the installation is complete, restart your device.
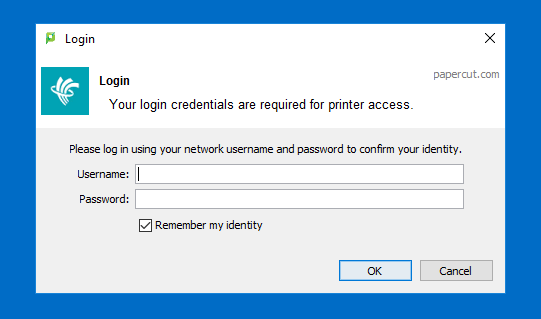
- When the PaperCut log in screen opens, type in your College user name and password, and then click OK to access your PaperCut account.
NOTE: Select the Remember my identity check box to allow the PaperCut Client to remember your user name and password. If you choose not to at this time, you will have another opportunity the next time you log on.

- When the PaperCut Balance window opens at the top right‑hand corner of your desktop screen, click the Details… link to see your balance, recent print jobs, and to add credit.

NOTE: Once you have installed PaperCut on your device, there are two more steps to follow in order to print your documents.
- Please see the Student PaperCut webpage to add credit to your PaperCut account and to view more PaperCut features.
- See the Install a College printer on your device webpage for instructions on printing from your device.
← Back to Student Printing