Web Printing
Before you begin, essential notes on web printing
- Web printing is used entirely via a web browser. It is not necessary to install any drivers or print queues to use web printing.
- Web printing is also available on your mobile device, follow the same instructions below.
- You must be on campus to use web printing.
- To use web printing you will need to add credits to your personal printing account.
How to add credits to your web printing account:
- At the PaperCut pay station in the atrium beside the elevators.
- In person, at the Campus Store.
- Online using the Add Credit button on the web printing website.
Note: Once funds have been added to your PaperCut account they are non-refundable.
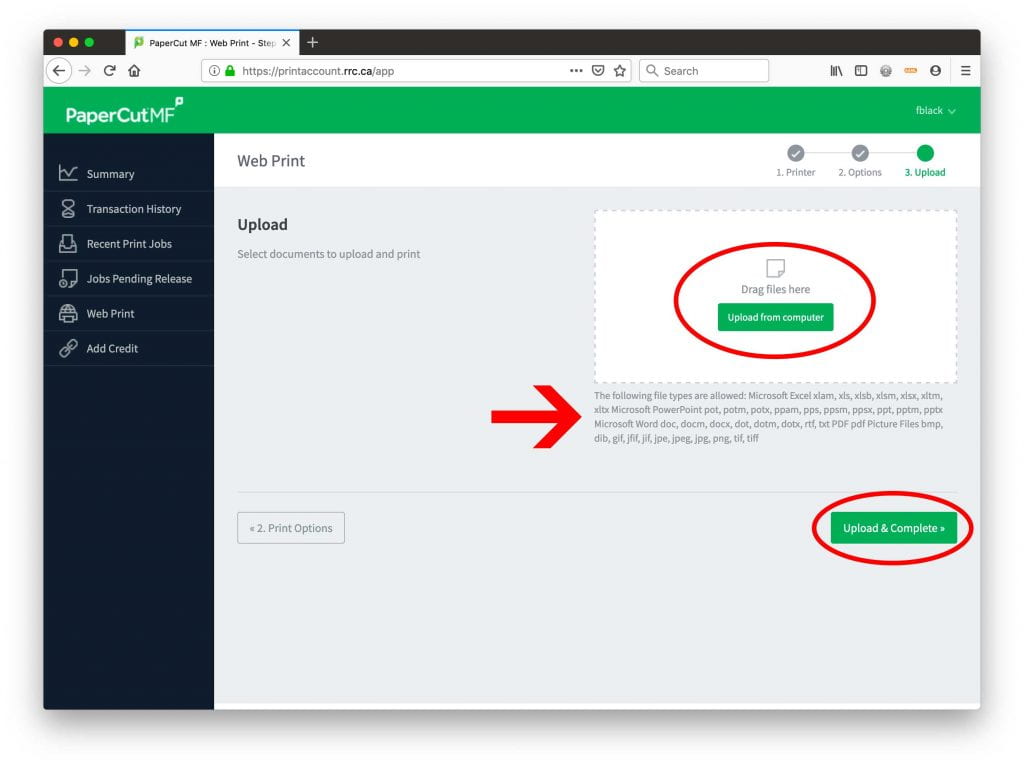
Web printing submissions are restricted to the following file formats:
- pdf, txt
- Picture Files: bmp, dib, gif, jfif, jif, jpe, jpeg, jpg, png, tif, tiff
- Microsoft Word: doc, docm, docx, dot, dotm, dotx, rtf,
- Microsoft Excel: xlam, xls, xlsb, xlsm, xlsx, xltm, xltx
- Microsoft PowerPoint: pot, potm, potx, ppam, pps, ppsm, ppsx, ppt, pptm, pptx
How to submit a print job using web printing
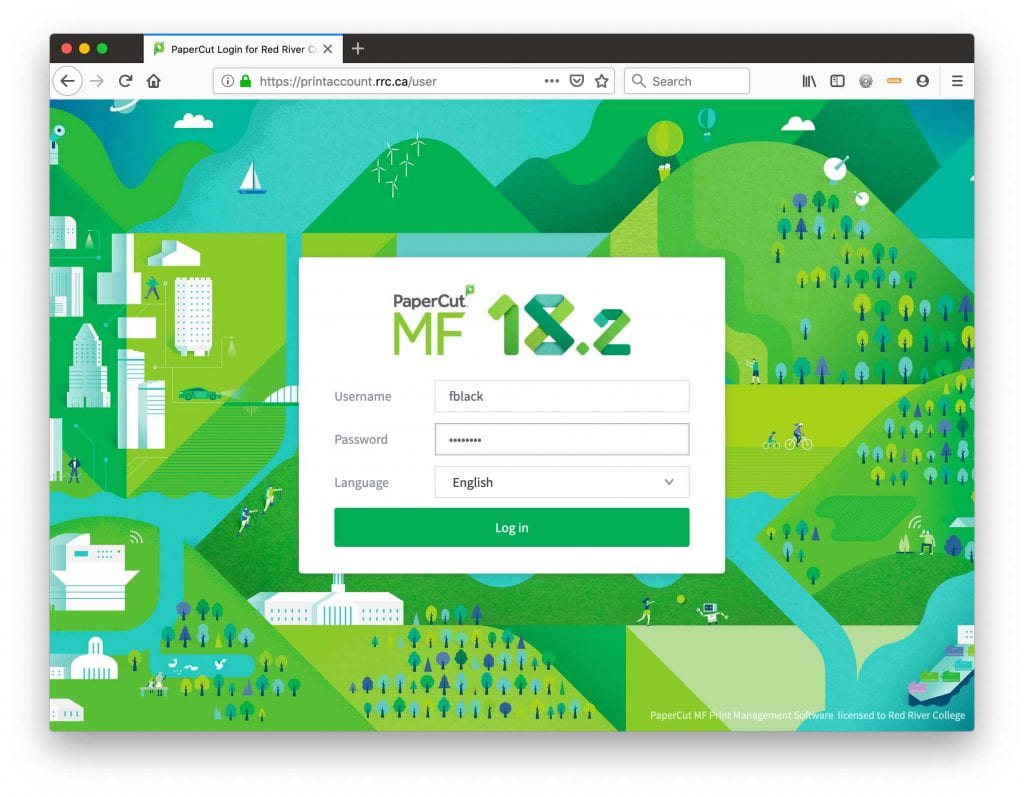
- Go to: https://printaccount.rrc.ca
- Enter your college username and password, and select: Log in.
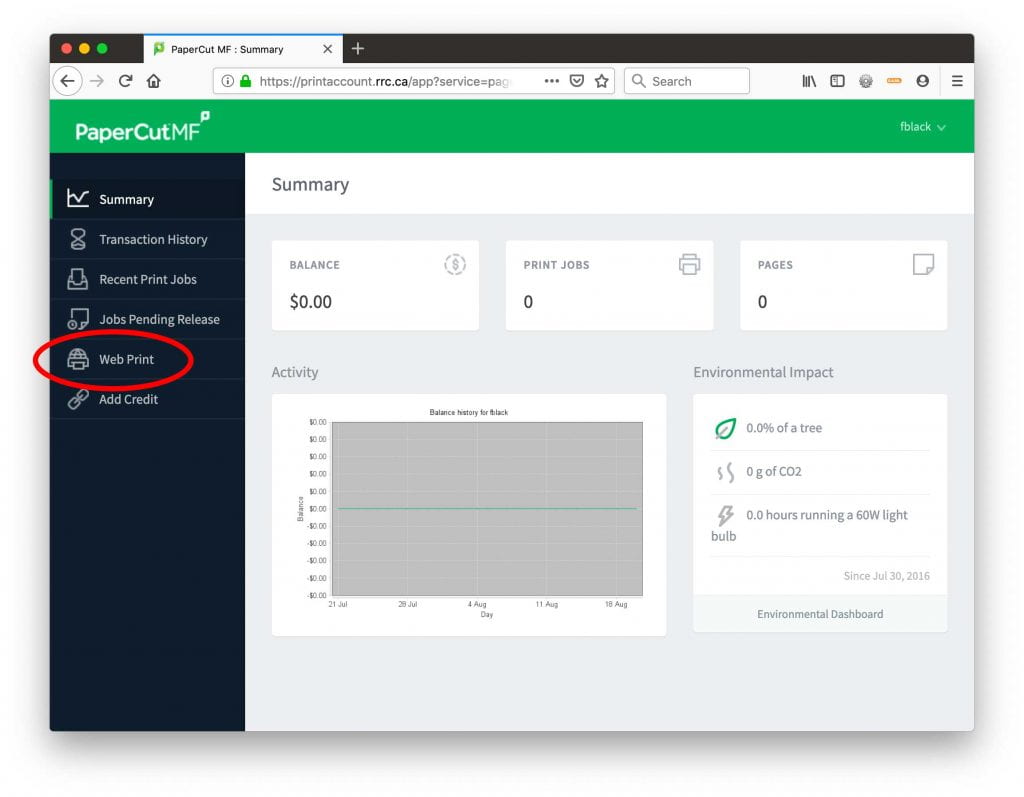
- Select: Web Print from the left vertical menu.
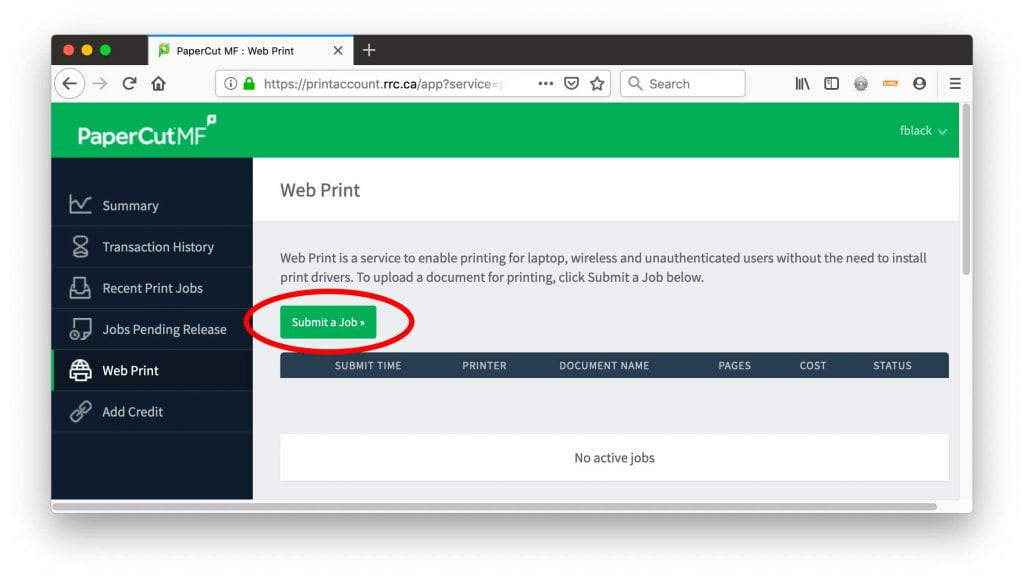
- Select: Submit a Job.
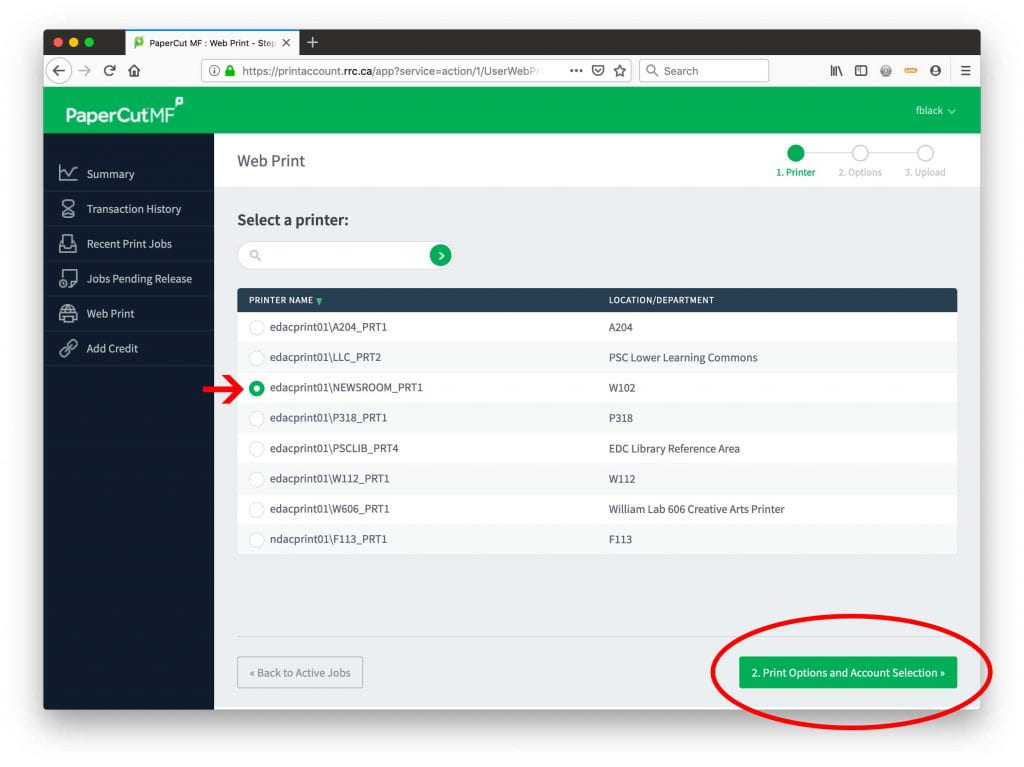
- Select the radio button beside the printer you would like to print to, then select: 2. Print Options and Account Selection.
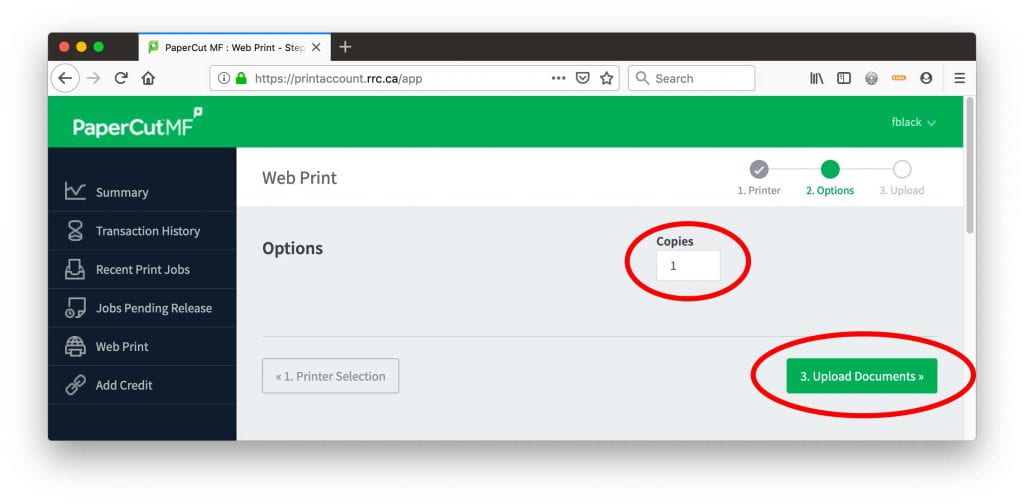
- Adjust the number of copies you would like to print, and select: 3. Upload Documents.
- Drag the file you would like to print to drop zone or select: Upload from computer, then select: Upload & Complete.
- The following page will indicate rendering, queueing and when your job is finished.