
Now, when you upload a video or audio file in the Course Content area, you will be able to access Advanced editing features, including Closed Captions, Chapters and Timeline editor. The editor features are available for all Video Notes and for newly uploaded audio-video files. It is recommended to use the desktop experience when editing audio-video files.
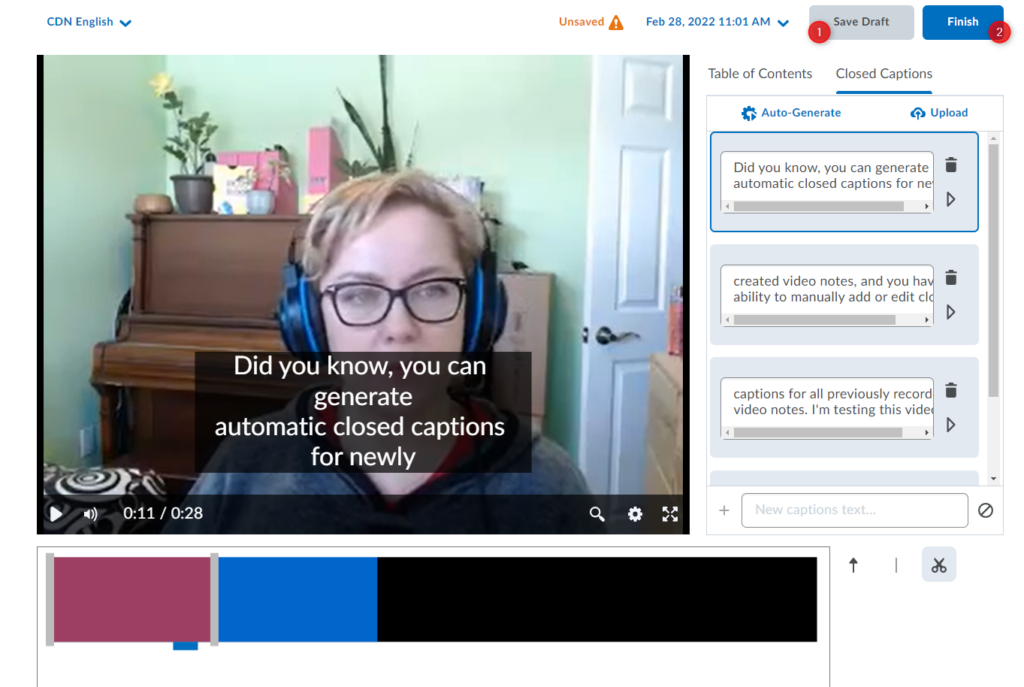
With Timeline editor (1) you can trim out parts of your video using the Seek (2), Mark (3) and Cut (4) tools.

You can also enlarge the timeline for accessibility by clicking and dragging on the tab (5) below the timeline.
Use the Mark tool (line) to identify the starting (1) and ending points (2) on the timeline of the part you wish to cut out.

Select the Cut tool (scissors) and click on the timeline between the selected points. The selected segment will turn red and will be excluded from the playback.

Note: If you want to restore the cut section, click again on the red segment (between the two marks). It will turn blue as the rest of the timeline.
If you want to remove elected start and end points on the timeline, activate/click on the Mark tool and click each point again.

Once you are done editing, click Save Draft (1) to keep the changes without updating the published file OR Finish (2) to save the changes and publish a new version of your media file.
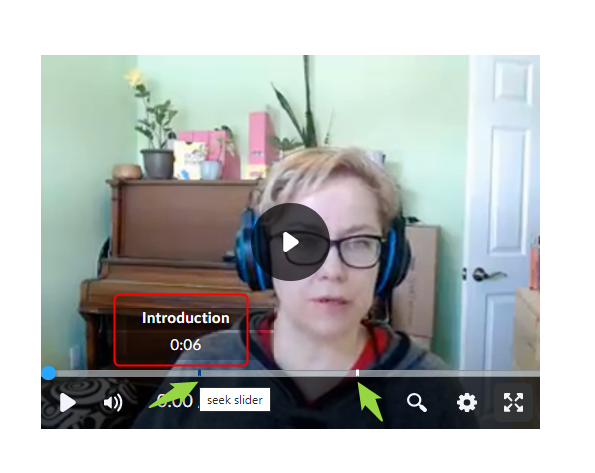
You can create meaningful sections in larger videos using chapters. Chapters appear above the timecode when a user mouses over the timeline.
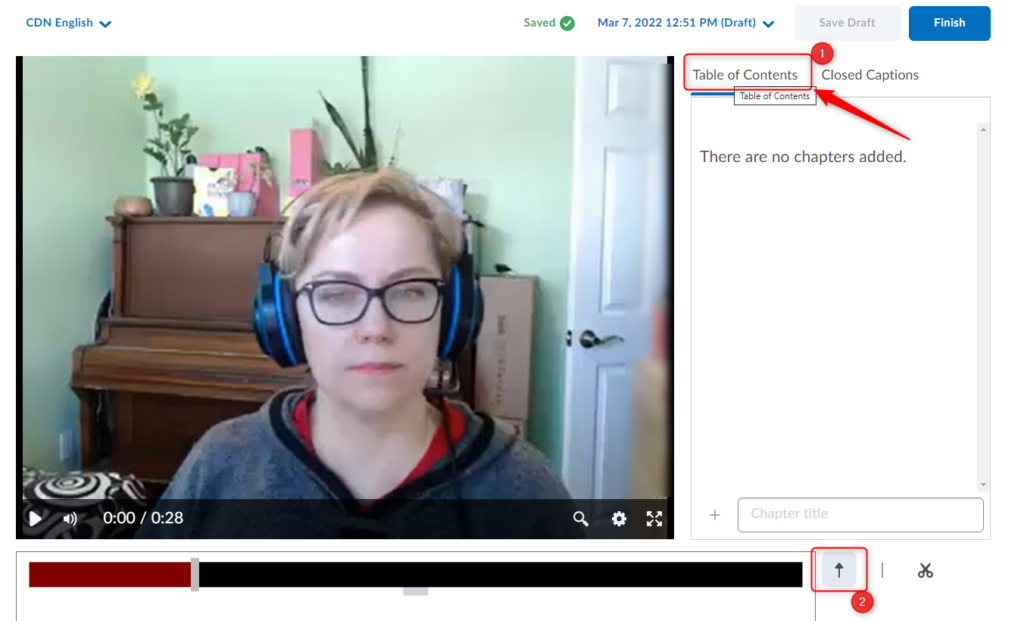
From the Advanced Editor, select the Table of Contents (1) tab on the top right side of the video and click on the Seek tool (arrow) (2).
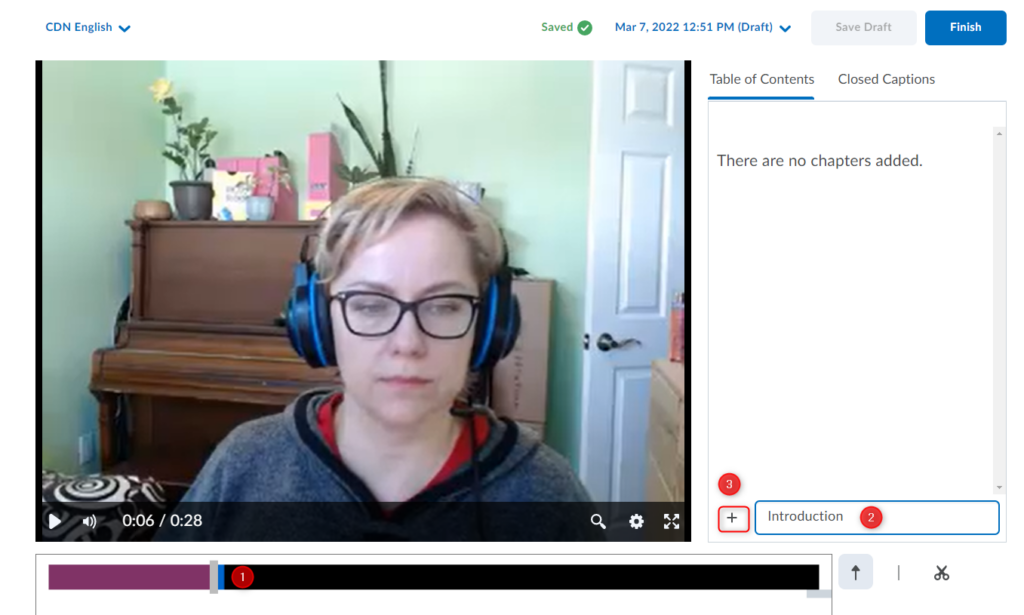
Click on the timeline to select a space where you want your chapter to start (1). Enter your chapter title (2) and click the + button (3).
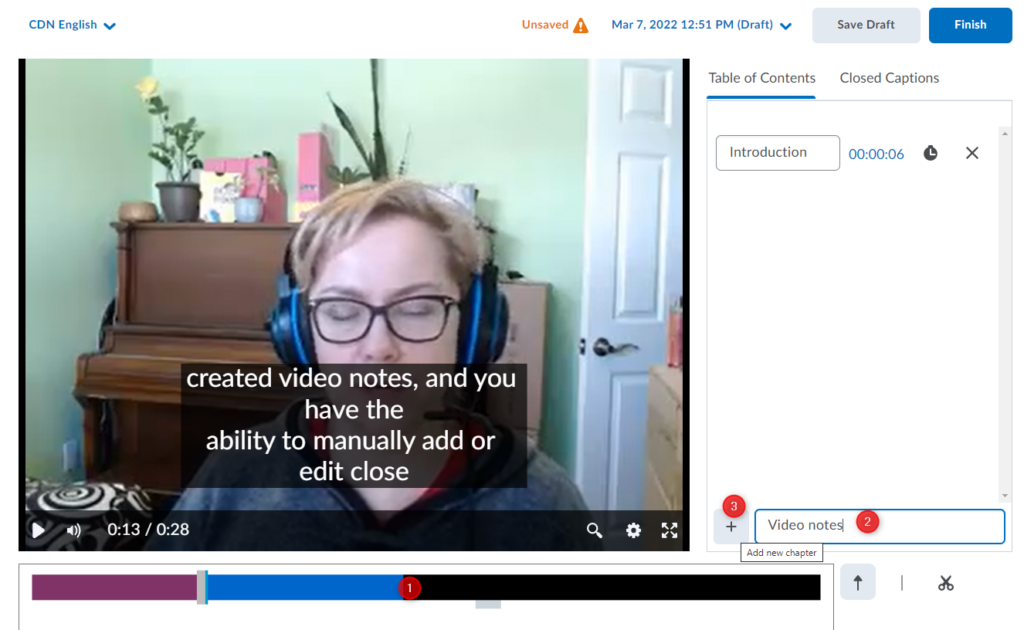
For the next chapter, select the next spot on the timeline (1), enter the chapter title (2) and click + (3).
To correct/update the time of the chapter, select a spot on the timeline (1) and click the clock (2) beside that chapter in Table of Contents.
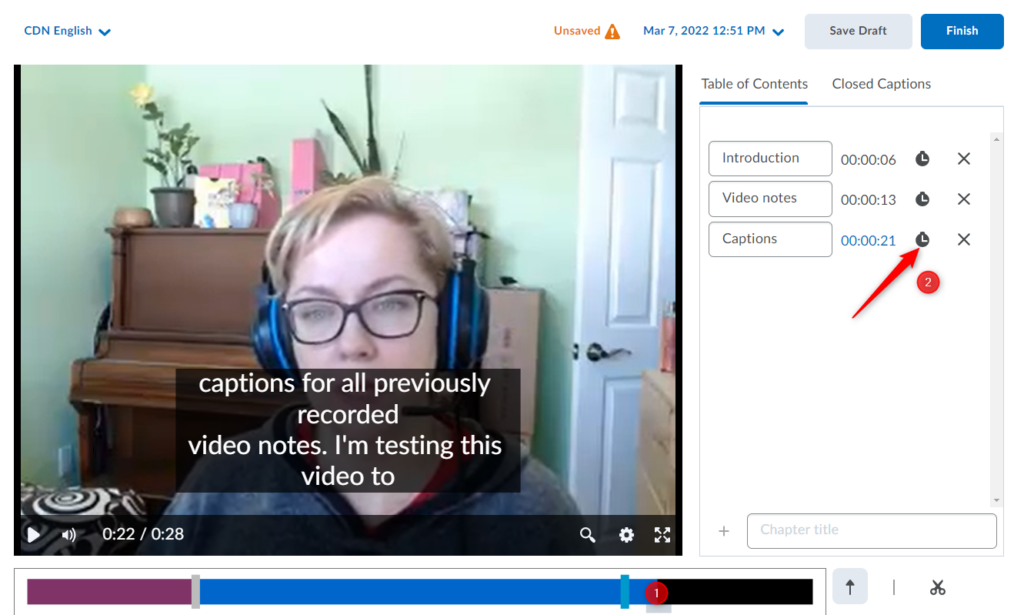
To delete chapters, click on the X next to the chapter you wish to remove.
Once you are done editing, click Save Draft (1) to keep the changes without updating the published file OR Finish (2) to save the changes and publish a new version of your media file.
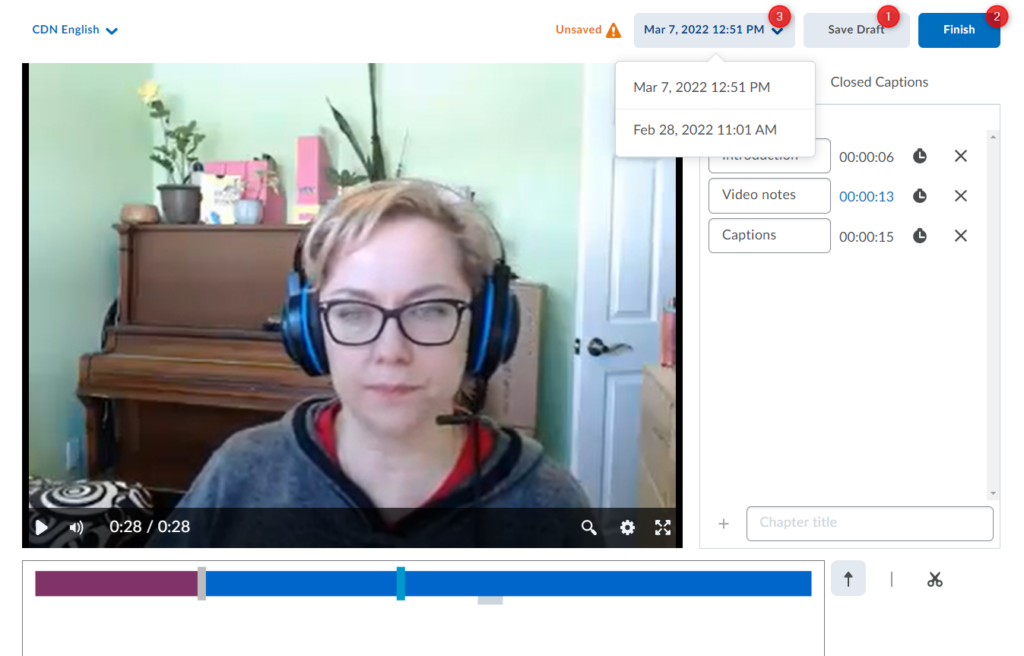
Note: You can roll back to earlier versions and revisit previous edits (3). The latest saved version appears wherever the file is used within Brightspace.
Your chapters will appear as points on the timeline when users hover their mouse over it.
RRC Polytech campuses are located on the lands of the Anishinaabeg, Ininiwak, Anishininwak, Dakota Oyate, and Denésuline, and the National Homeland of the Red River Métis.
We recognize and honour Treaty 3 Territory Shoal Lake 40 First Nation, the source of Winnipeg’s clean drinking water. In addition, we acknowledge Treaty Territories which provide us with access to electricity we use in both our personal and professional lives.