
Now, when you upload a video or audio file in the Course Content area, you will be able to access Advanced editing features, including Closed Captions, Chapters and Timeline editor. The editor features are available for all Video Notes and for newly uploaded audio-video files. At the moment, it is recommended to use the desktop experience when editing audio-video files.
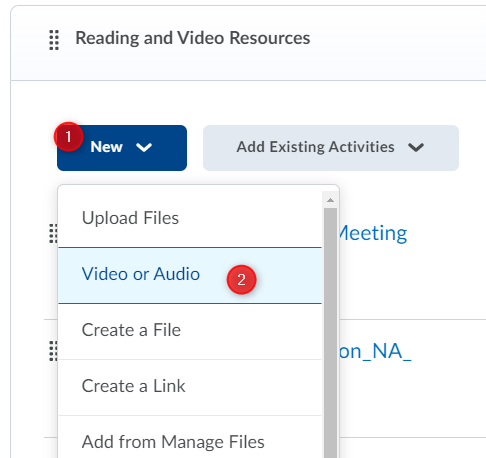
In the Content tool, click New (1) and select the Video or Audio (2) option.
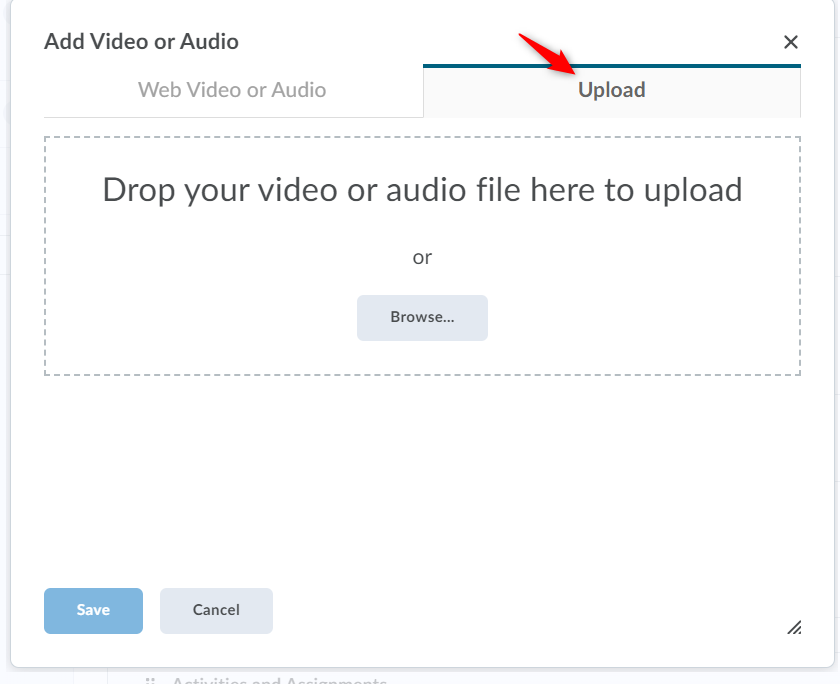
In the Add Video or Audio window, select the Upload tab. You can use Browse or drag your video file into the upload space.
The upload process begins.
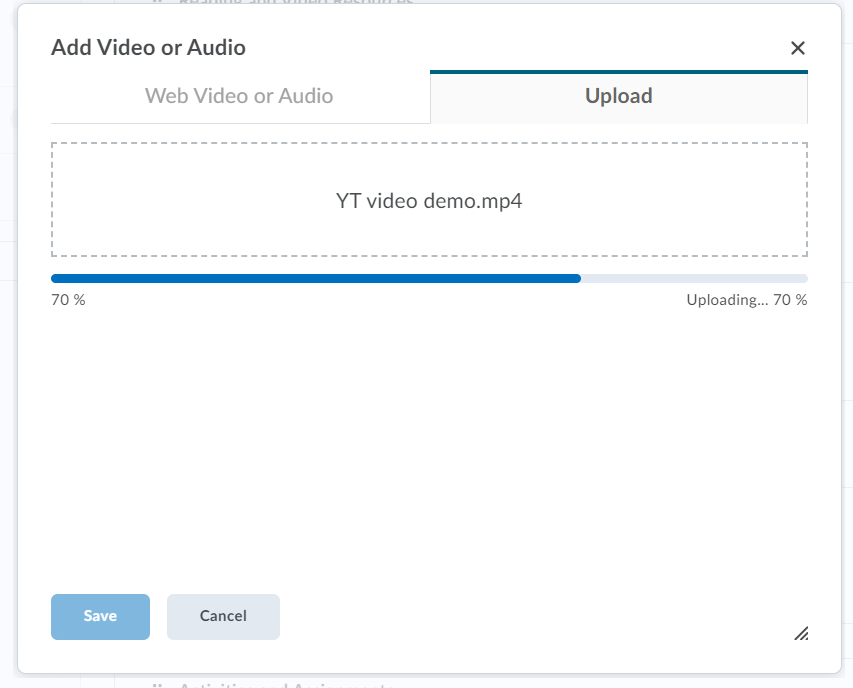
Note: The transcoding process starts when the file reaches 70% upload and may result in a brief pause.
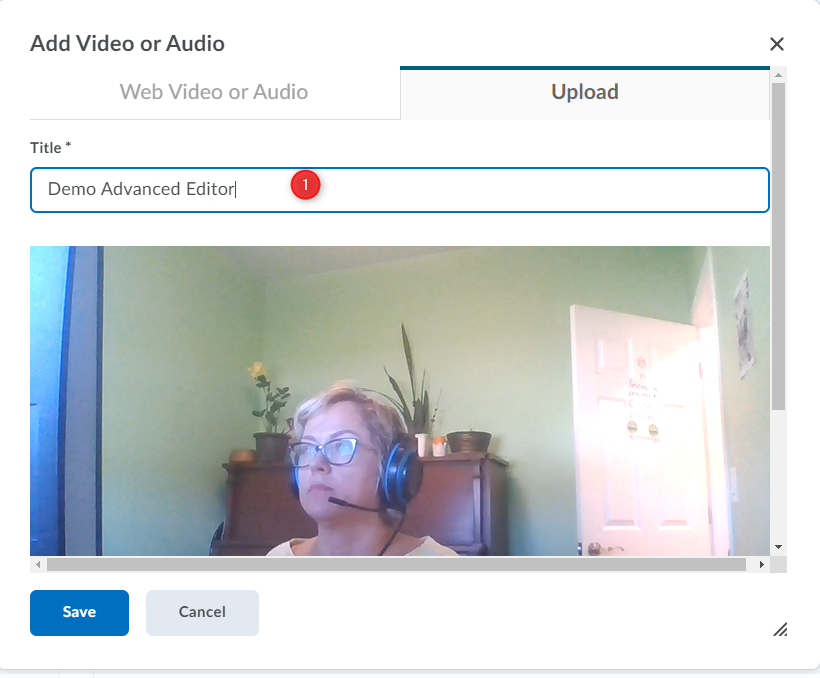
When the upload is complete, enter a title (1) of your file.
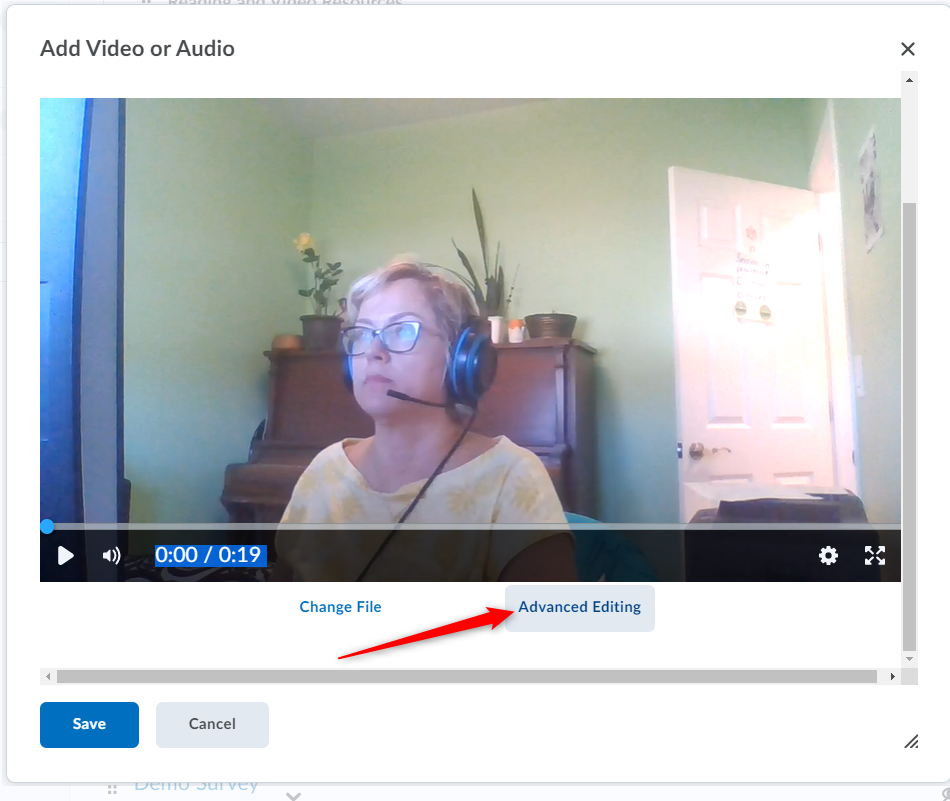
Select Advanced Editing at the bottom of the video; you may need to scroll.
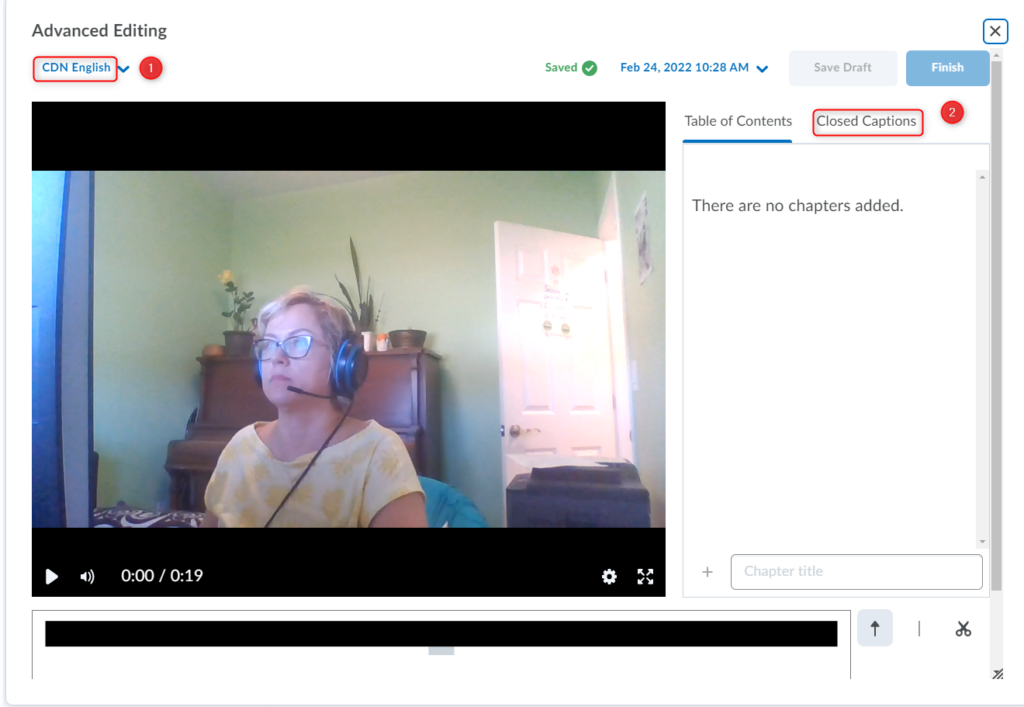
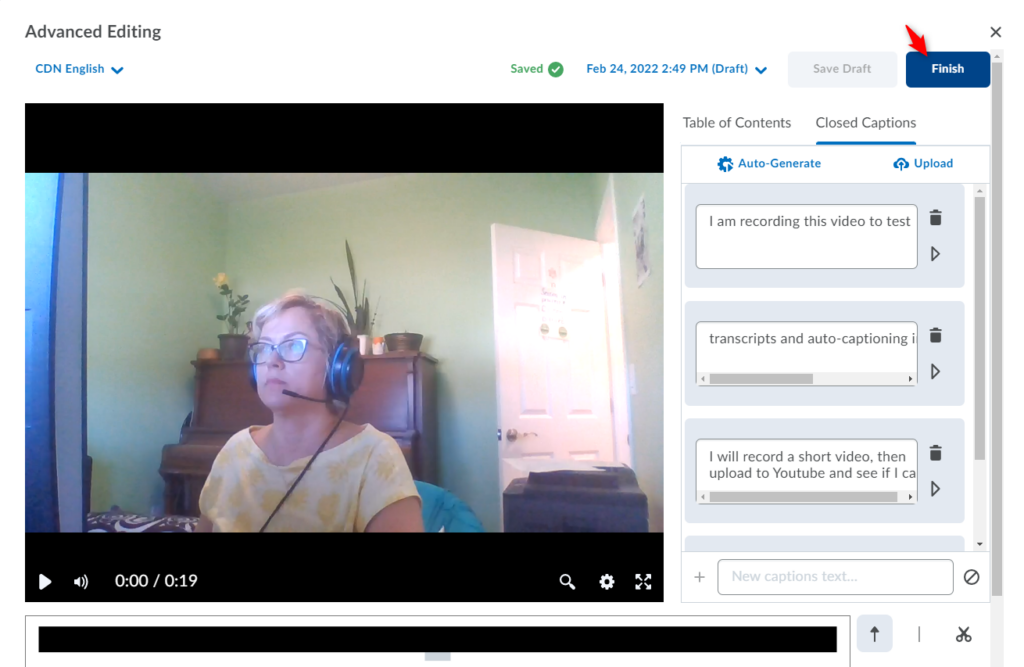
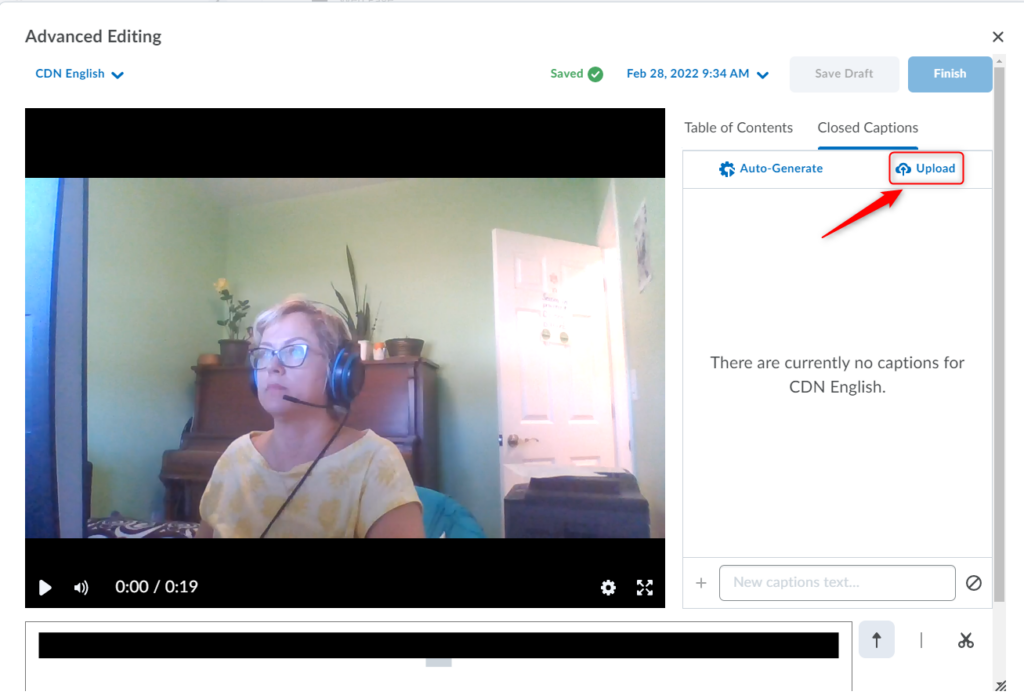
From the Advanced Editor, set the language of the video (1), and click on the Closed Captions tab (2).
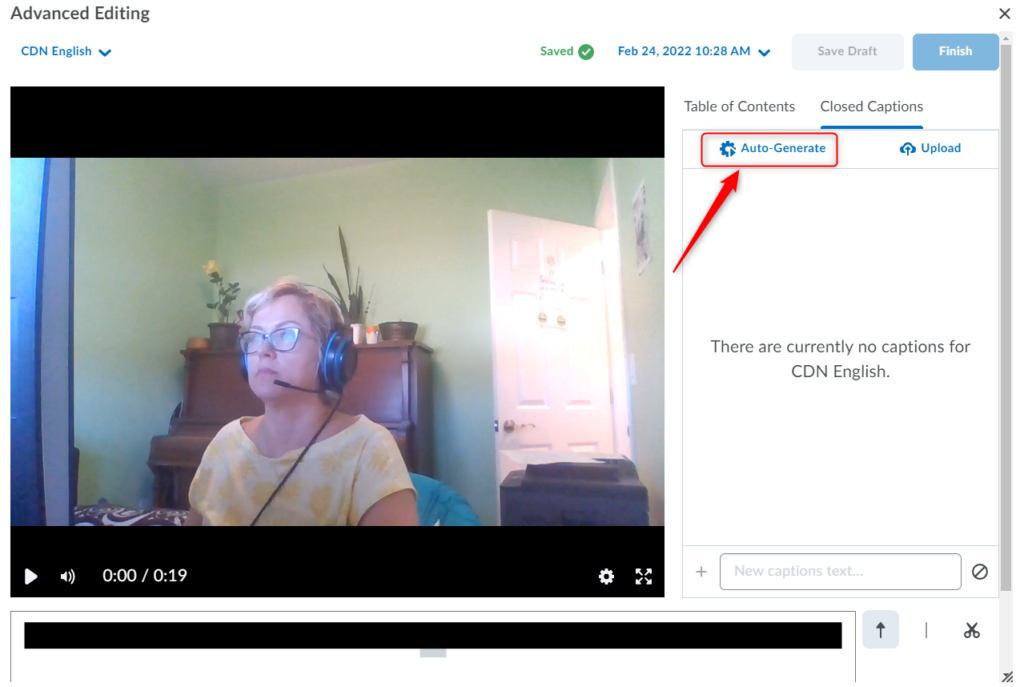
Under Closed Captions tab, click Auto-Generate to generate a caption track.
Note: Editing a video will change it in all the places it exists in Brightspace. You will receive a message to confirm your choice after you click on Auto-generate.
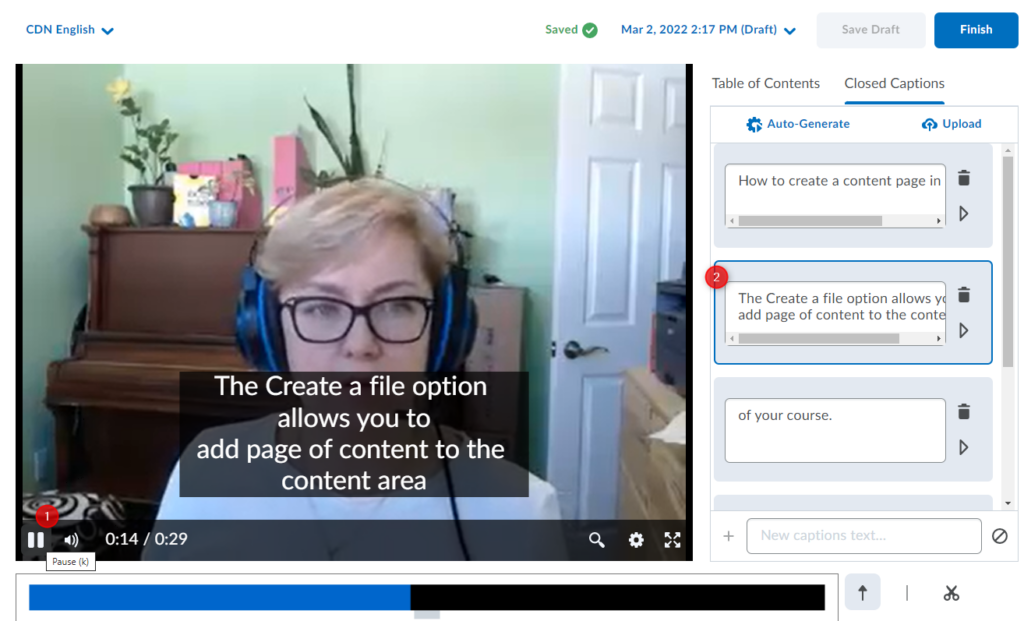
Once it’s processed, new captions will appear in separate blocks under the Closed Captions tab.
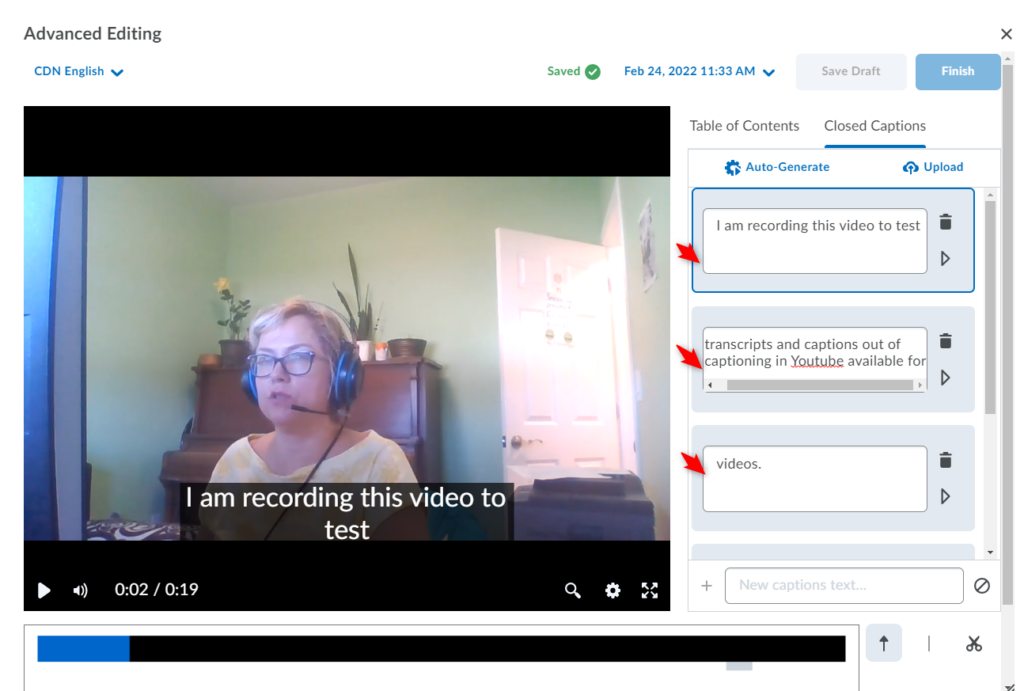
Important: As with any automatically generated captions, you should verify the accuracy of the captions. You will not be able to proceed to Saving/Finishing the video until you modify/edit at least one of the words in the Closed Captions, even if you find the captions accurate. To do so, simply click/highlight the word, delete and then retype it. The updated captions will immediately appear in your video preview. You can also add new captions to existing sections. The Save as Draftand Finish buttons will become active, so you can proceed to saving your video with the updated Closed Captions.
When you are done editing, you can click Save Draft to keep the changes, but not to update the published file OR Finish – to save the changes and publish a new version of the file.
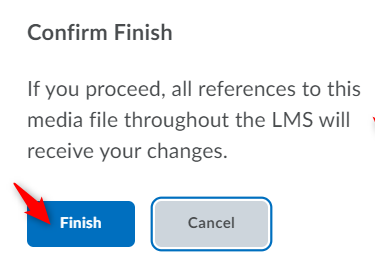
You will be asked to confirm your decision to update the video, reminding you that your updates will affect all the instances of this file in all the places it exists in Brightspace. Click Finish to proceed.
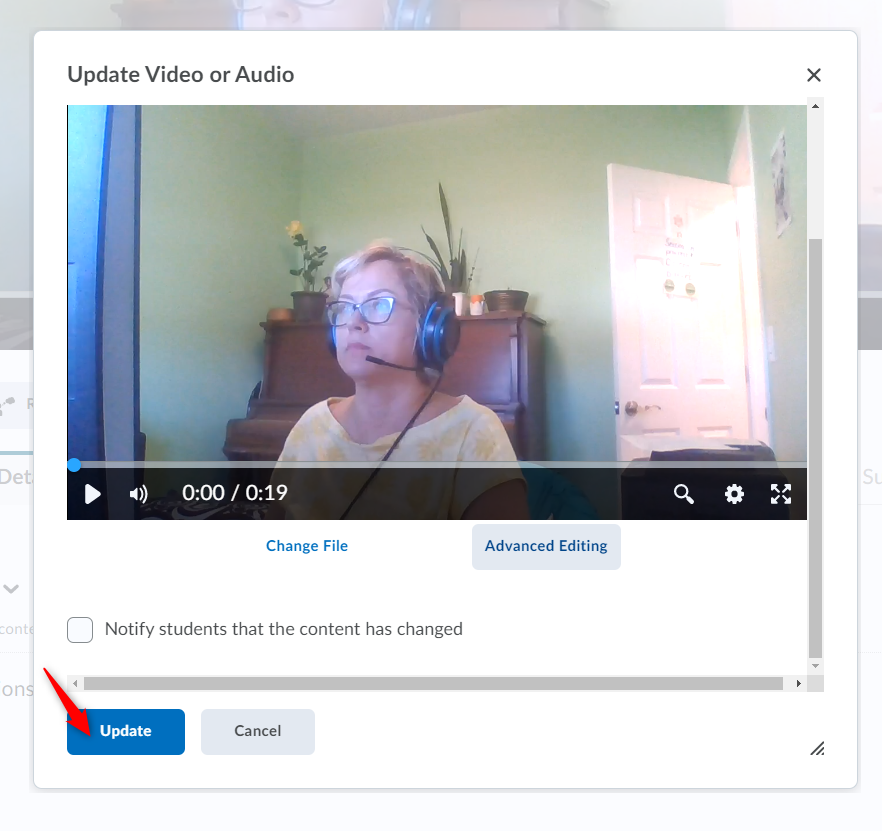
Once the update is done, close the Advanced Editing window.

Click Update in the Update Video or Audio window to apply changes to your video.
To enable captions in the video, click on the gear cog (settings) (1), click on Captions (2) and choose CC (3).
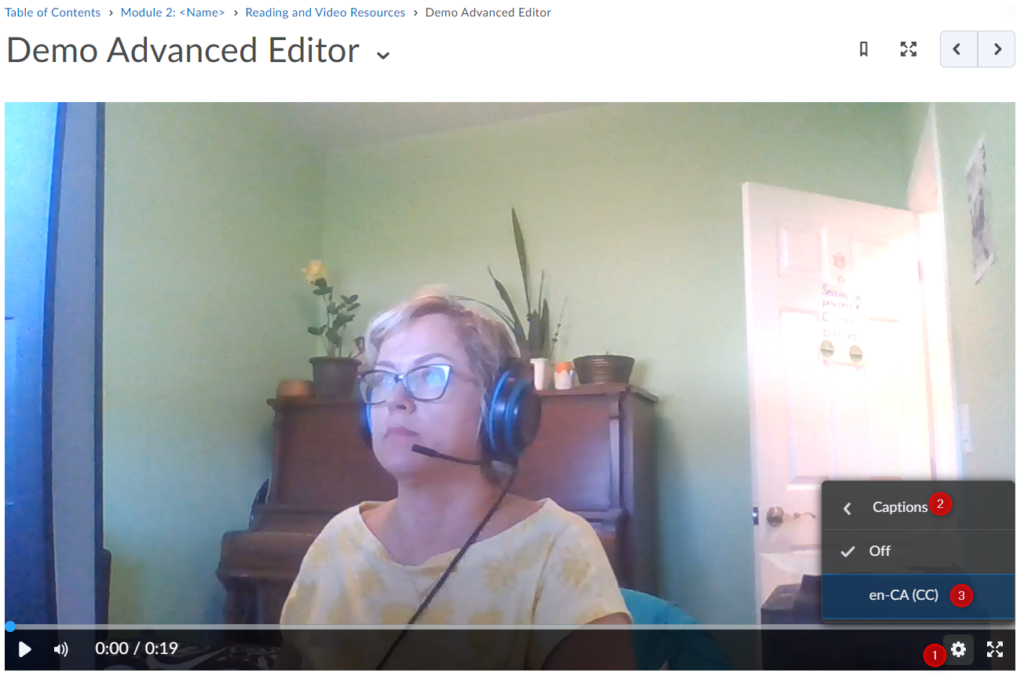
When the captions enabled, users can see a search box at the bottom of the video player to locate key words in video captions and quickly navigate to those sections. Those spots will be visible on the timeline.

Note: A caption track must be present for the video and the user must have captions turned on to use the Search option.
If you want to upload and modify your own Closed Captions from a file (a .vtt or .srt file), follow the steps 1-6 for Closed Captions: Auto-Generate, then Click Upload under the Closed Captions tab and navigate to the captions file on your computer.
After video processing, you can view the closed captions using video player controls and edit them the same way as the auto-generated ones by following steps 10 – 16 in Closed Captions Auto-Generate to finish the update.
Now you can generate automatic closed captions for newly created Video Notes and manually add or edit closed captions for all previously recorded Video Notes.
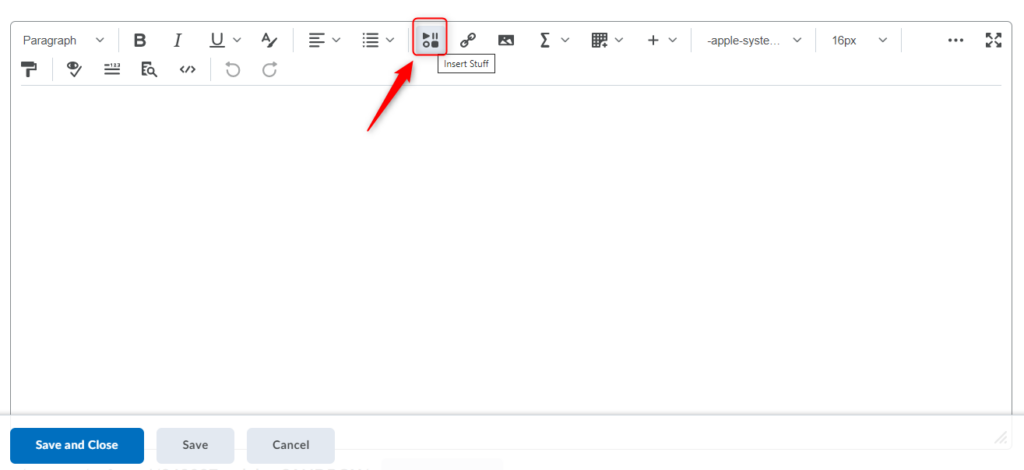
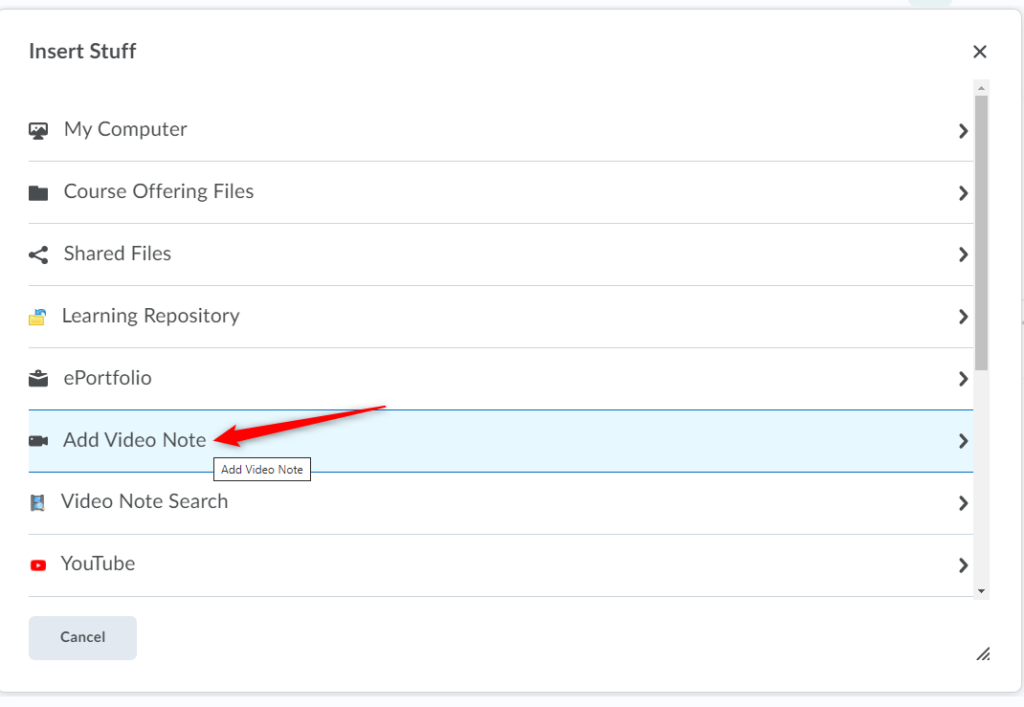
Select Add Video Note from the Insert Stuff option in the Brightspace Editor/HTML Editor.
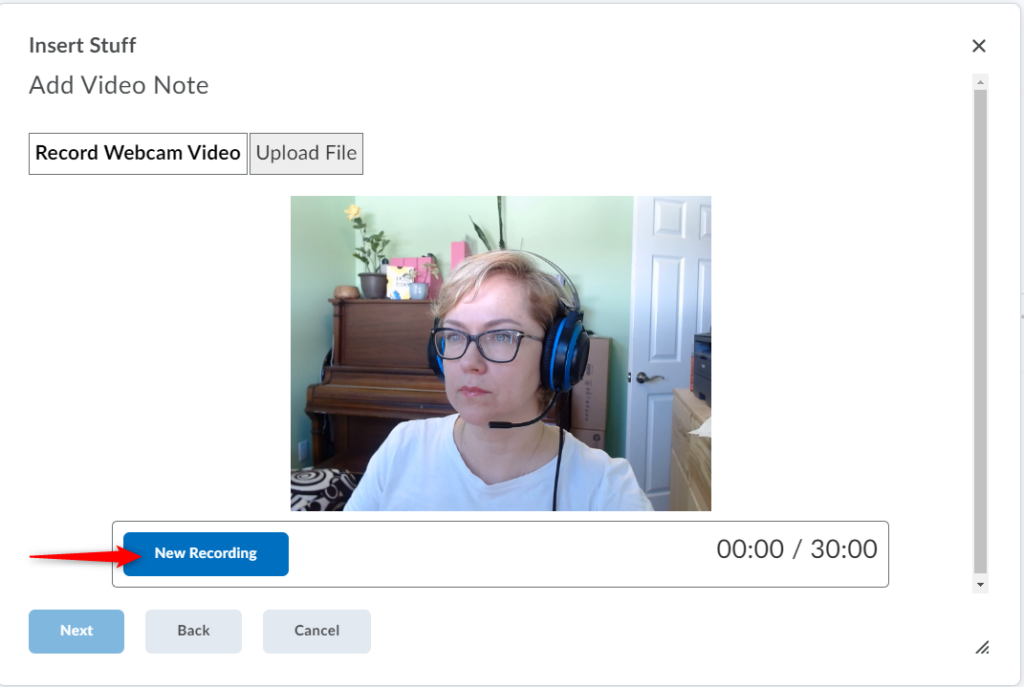
Click on New Recording to start your recording.
Click Stop Recording (1) when done recording your message and click Next (2).

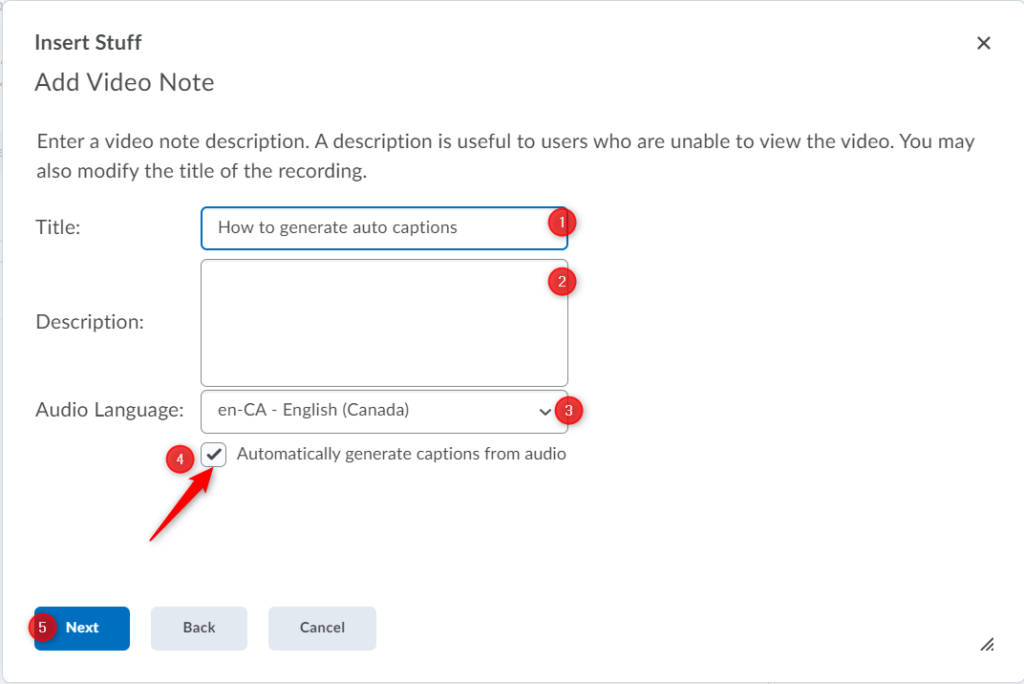
Enter a title (1) and description (2) for the Video Note. Choose the audio language (3) and check the “Automatically generate captions from audio” box (4). Click Next (5) to proceed.
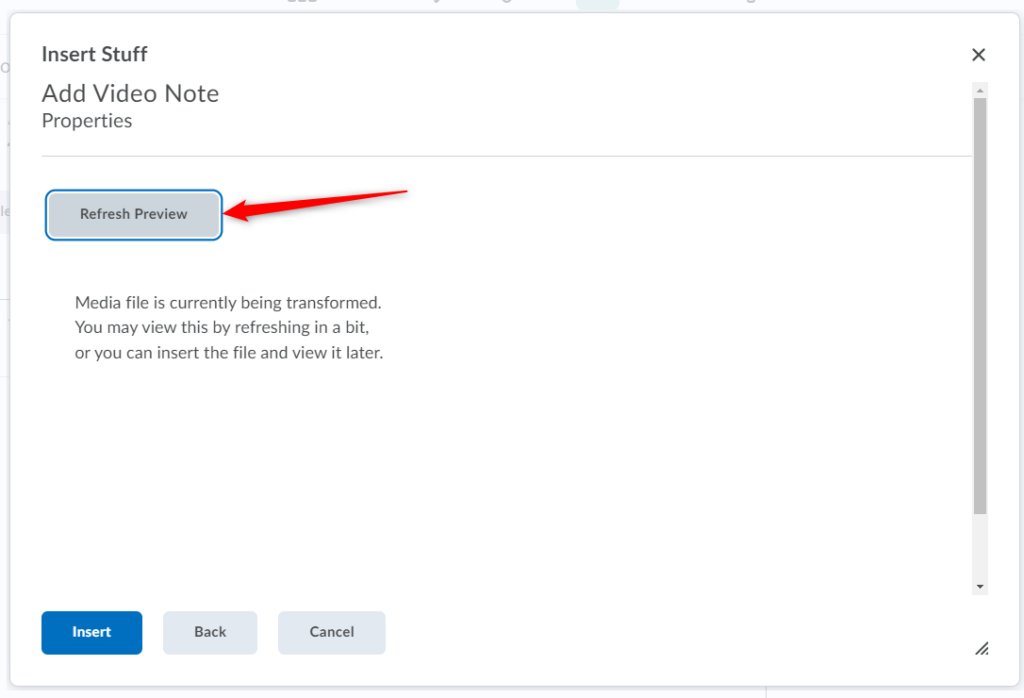
You will see a message about your video being processed, you might need to click on Refresh Preview to preview your video.
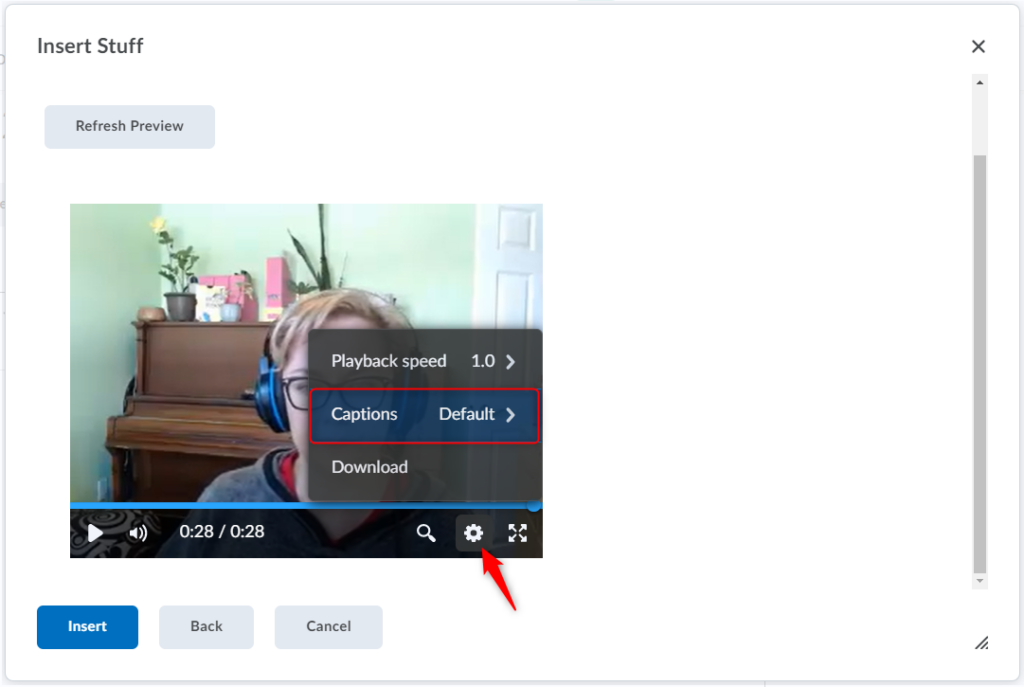
After the video has been processed, you can preview the closed captions using video player controls. Make sure you enable the captions in the video by clicking on the gear cog (settings).
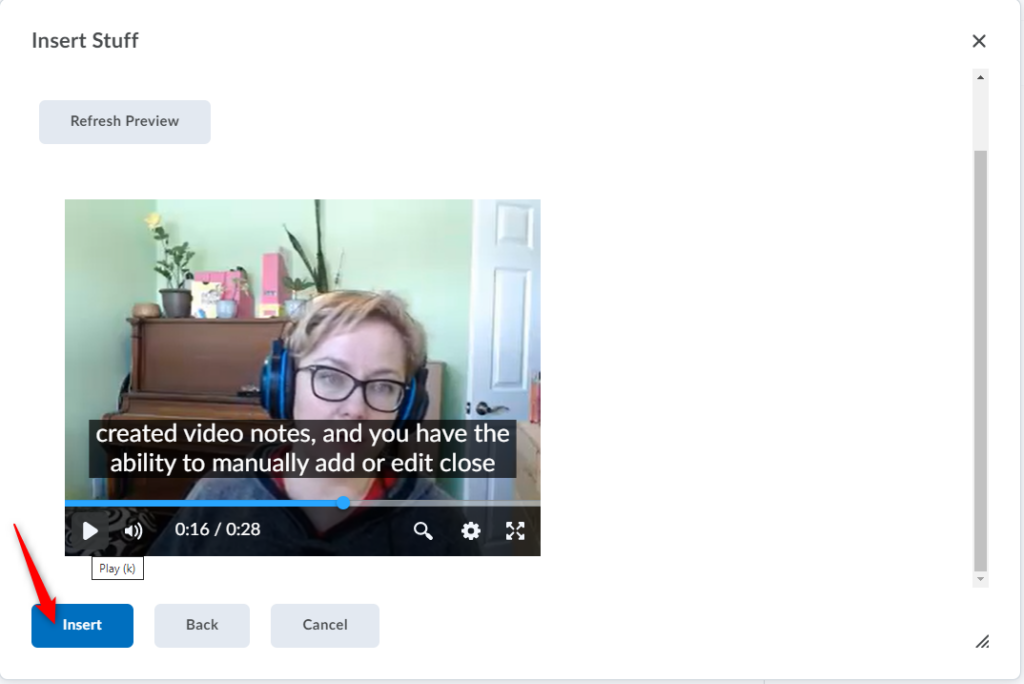
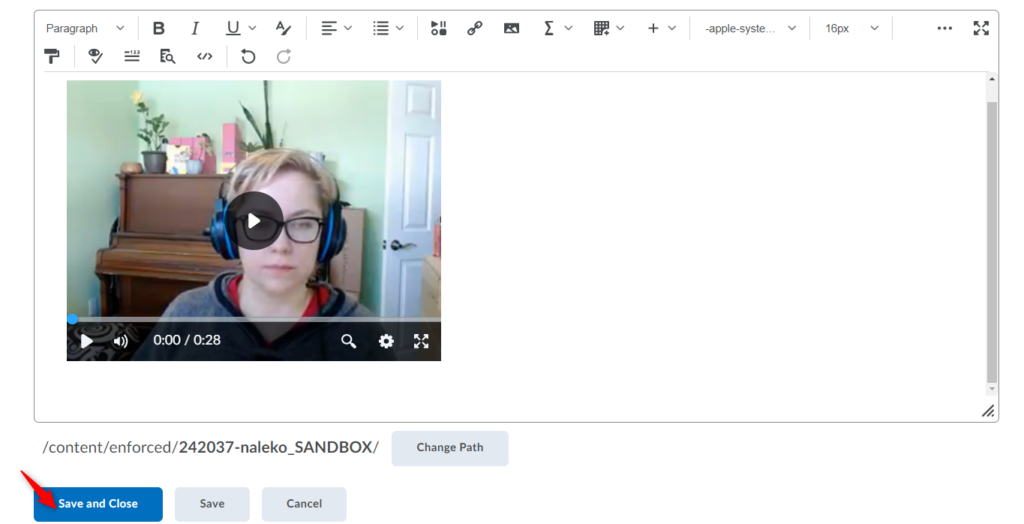
When done previewing your video note, click Insert to add your video note to the Brightspace editor.
Click Save and Close.
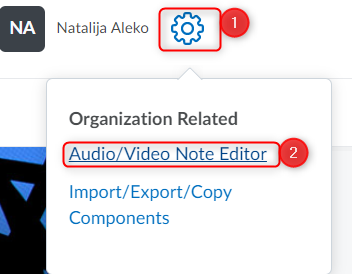
Click on the cog icon (1) in the top right corner of your course page and select Audio/Video Note Editor.
Locate the Video Note you would like to add captions to. You can use the search option to find a specific one.
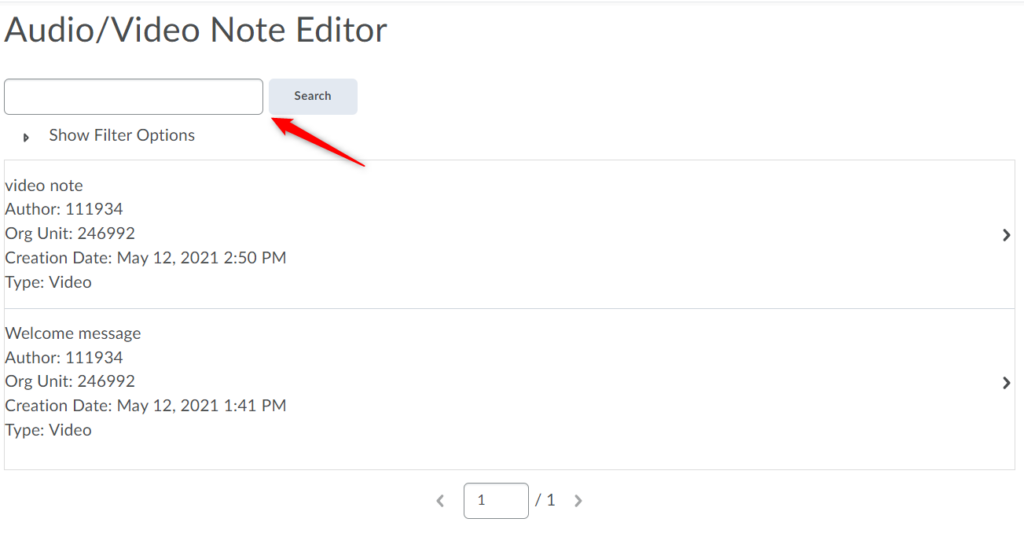
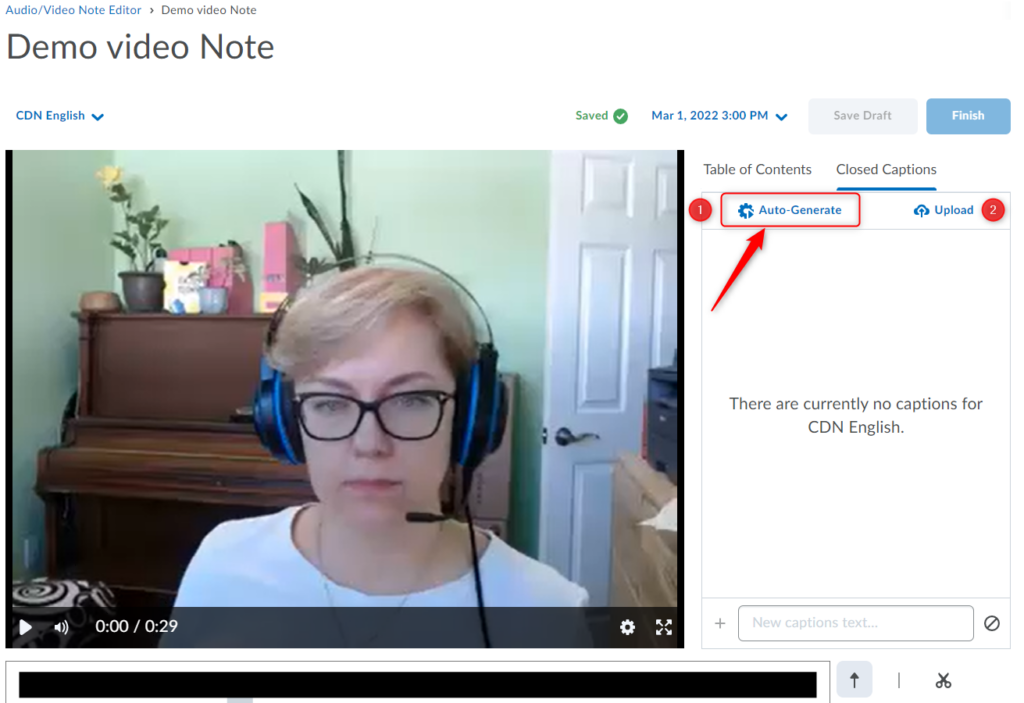
Select the Video Note from the list and click on the Closed Captions tab.
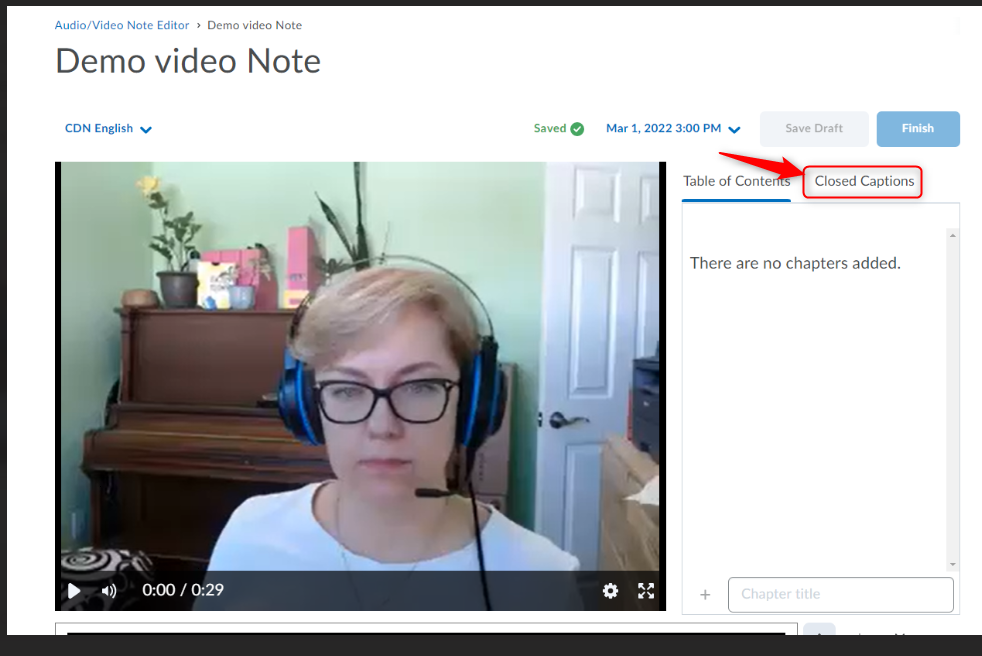
For automatic captions, click Auto-Generate (1) OR to upload a caption file, click Upload (2) and navigate to the captions file.
Note: Editing a video will change it in all the places it exists in Brightspace. You will receive a message to confirm your choice after you click on Auto-generate.
After video processing, you can view the closed captions using video player controls (1) or clicking on the captions blocks (2).
Note: As with any automatically generated captions, you should verify the accuracy of the captions.
Follow steps 1 – 3 of Generating auto captions for existing Video Notes to access your video note from the Audio/Video Note Editor.
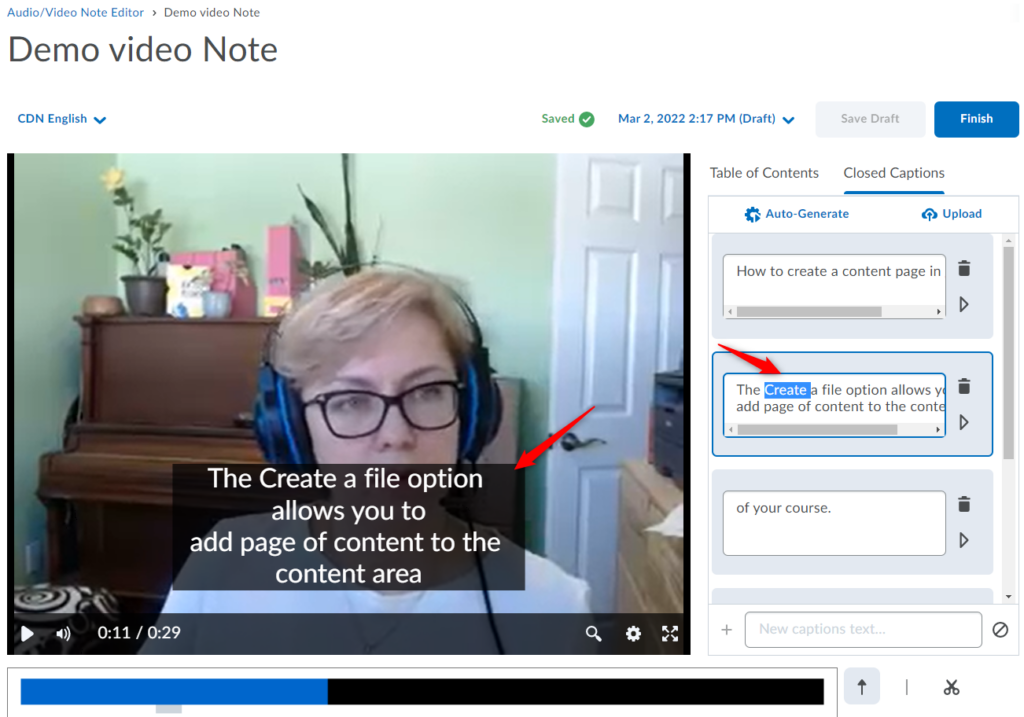
Click on the Closed Captions tab and edit the captions in the Captions Editor. You can modify them to correct any inaccuracies by simply clicking on the word/highlighting a phrase and changing or deleting it. The updated captions will immediately appear in your video preview.
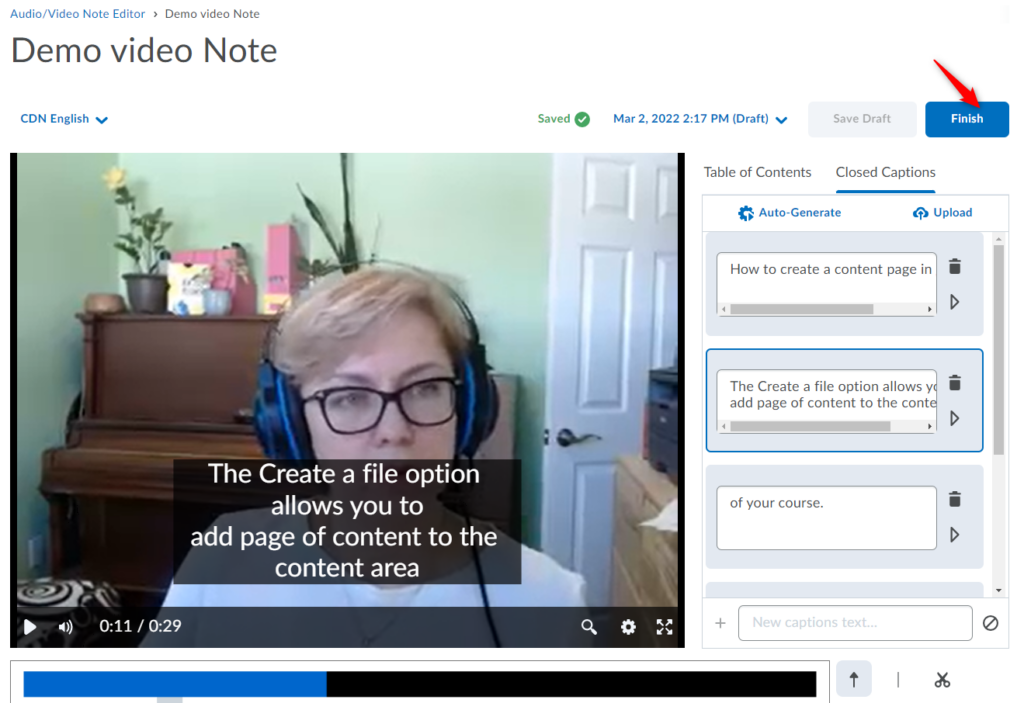
Click on Finish to save the captions.
RRC Polytech campuses are located on the lands of the Anishinaabeg, Ininiwak, Anishininwak, Dakota Oyate, and Denésuline, and the National Homeland of the Red River Métis.
We recognize and honour Treaty 3 Territory Shoal Lake 40 First Nation, the source of Winnipeg’s clean drinking water. In addition, we acknowledge Treaty Territories which provide us with access to electricity we use in both our personal and professional lives.