Learning Technologies

Learning Technologies

Course Introduction Package

Course Introduction Packages

Starting a new course?

Download the Course Introduction Package Course (.zip)

This package includes:

  • Course Information Module
  • Sample Module Description and Structure
  • Sample Discussions
  • Sample Assignment Description
  • Sample News Posts

Already have a course created?

Download the Course Introduction Package Module (.zip)

This package contains:

  • The Course Information module to fill out for each course

The Course Information module contains a series of templates that should be edited to reflect the structure and content of your course. For example, there are placeholders where you can upload an instructor bio and photo as well as student course delivery instructions referencing features that you may or may not be making use of.

How to import the Course Introduction Package

Within the course you wish to add the Course Introduction Package to, you will have to:

1. Click on the Edit button within the course to get to the Import/Export/Copy Components Tool:


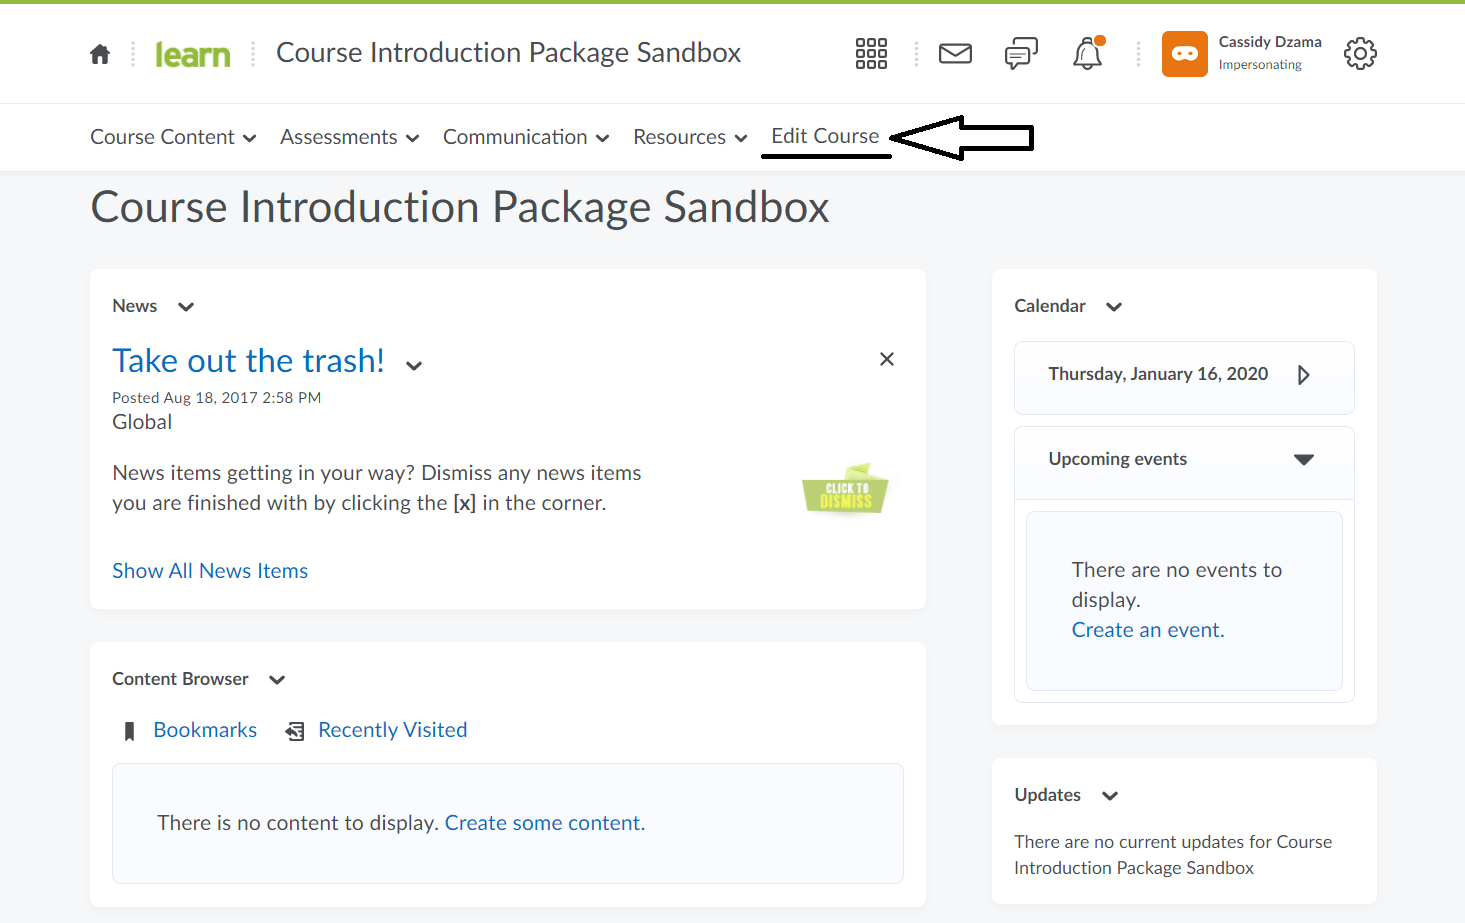
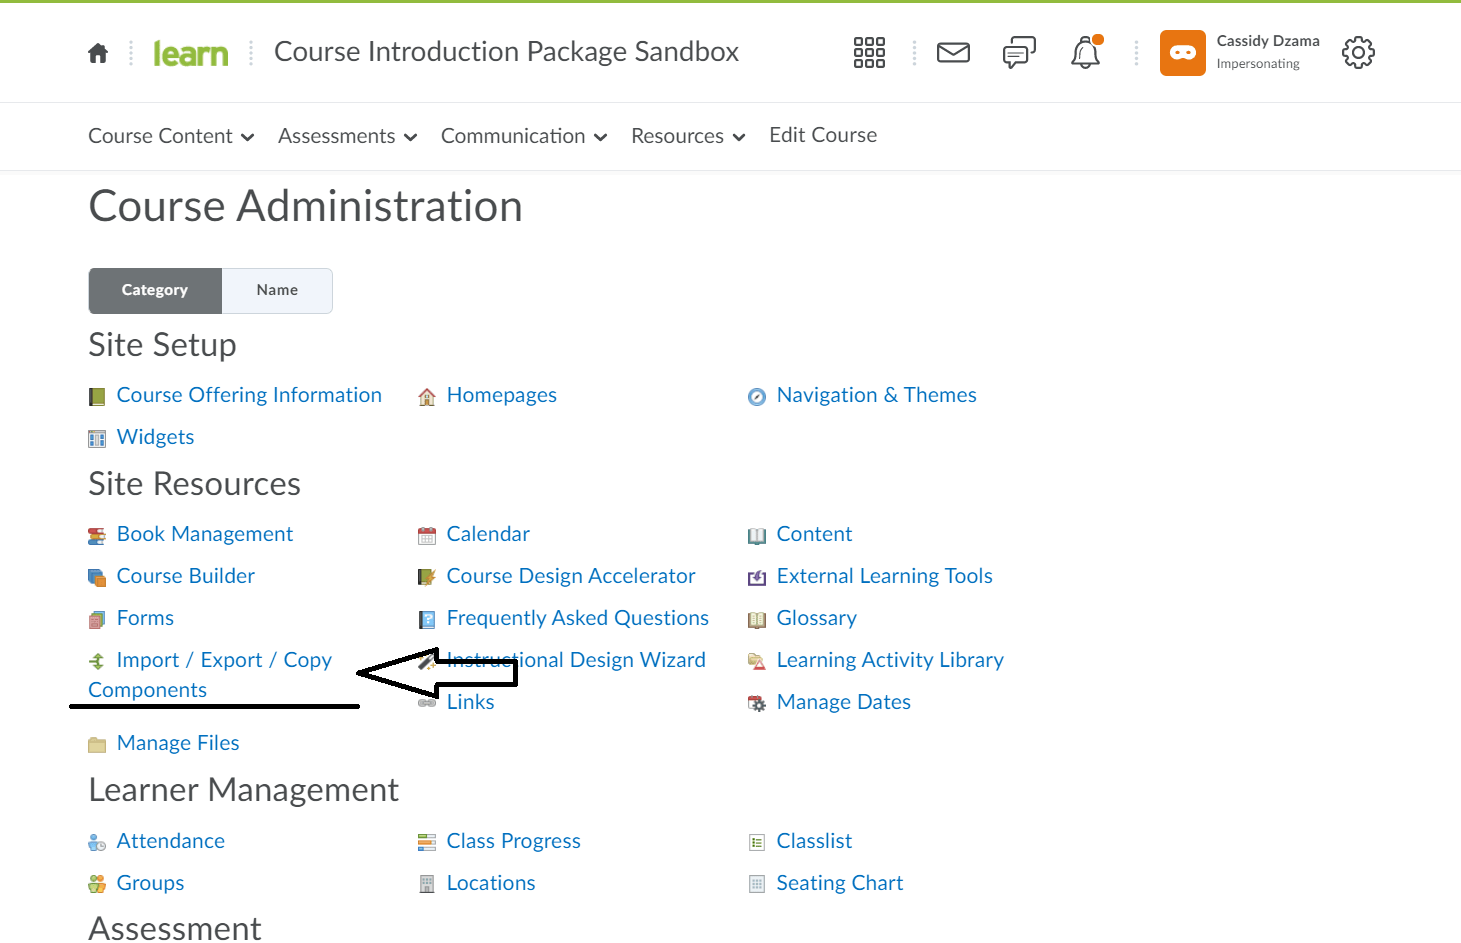
2. Click on the Import/Export/Copy Components Tool:

3. Click on the Import Components button and then click on Start:

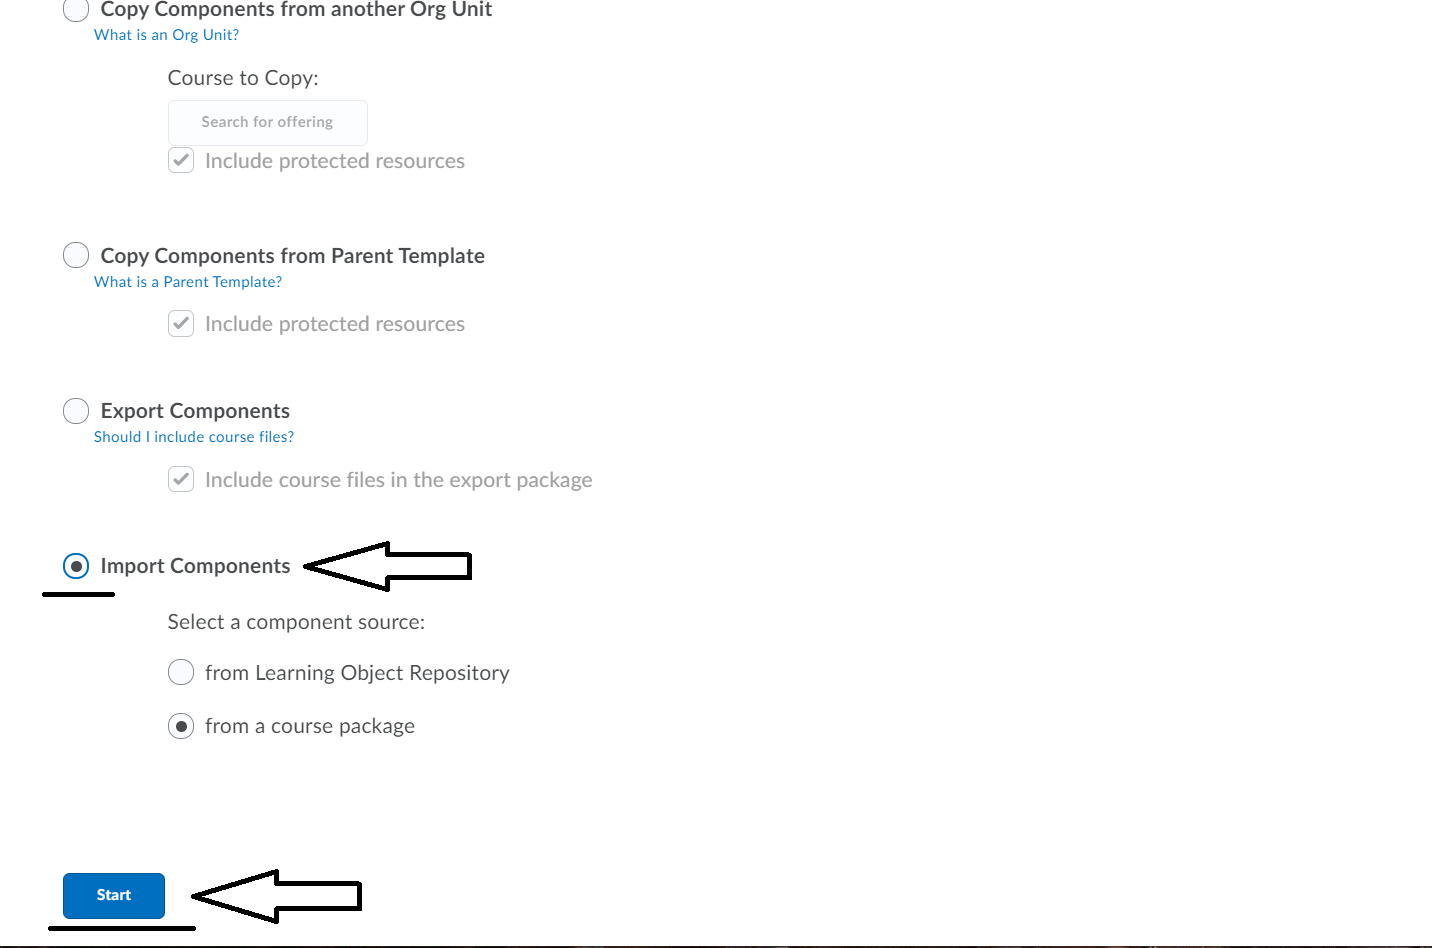
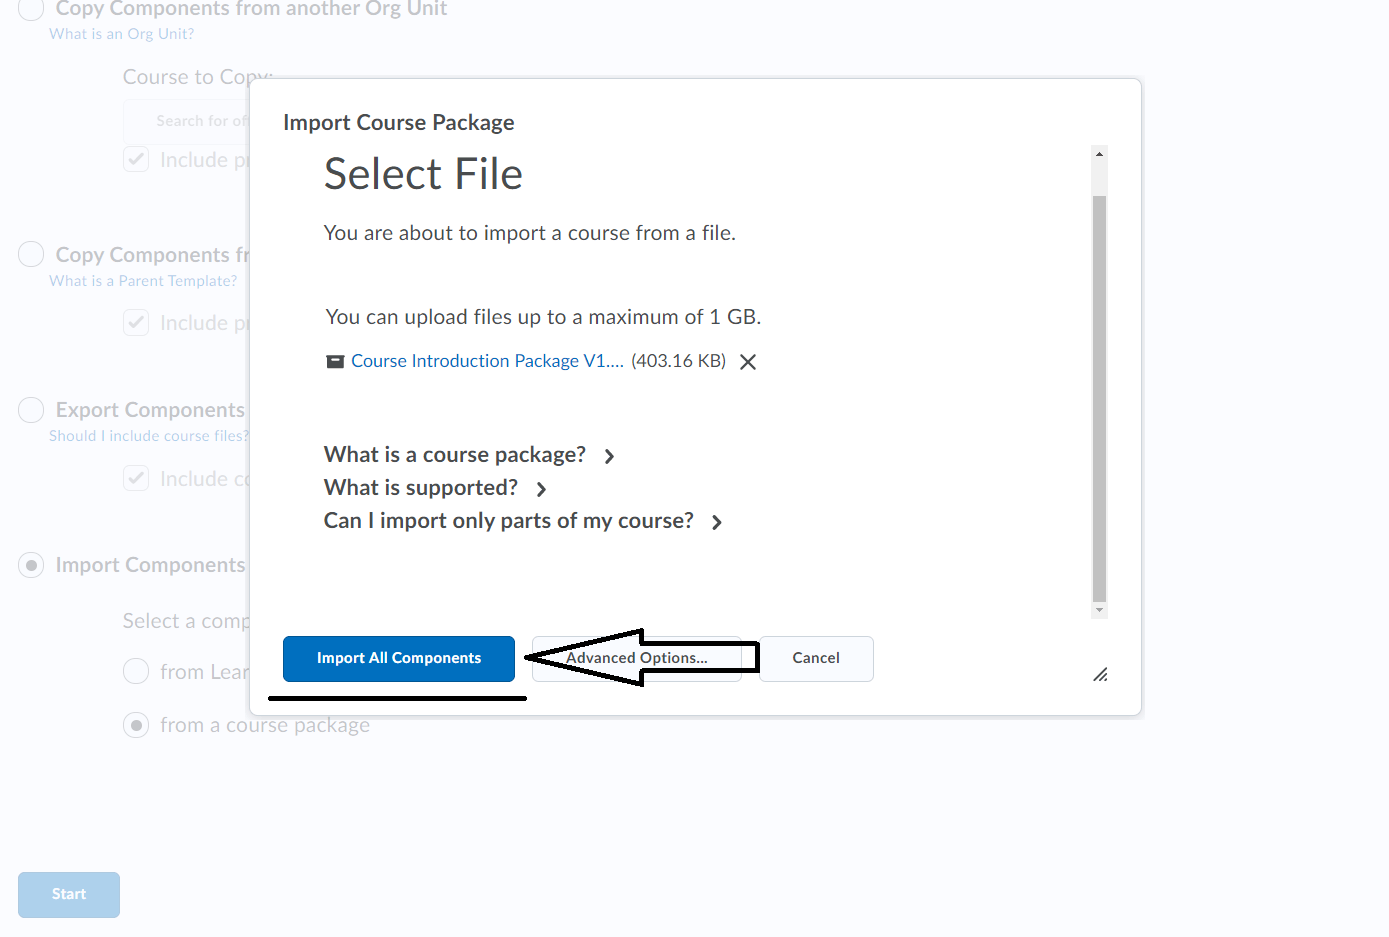
4. Click on the the Upload button. From here, you can either drag-and-drop the Course Introduction Package ZIP file into the dotted section or browse your computer for the file:

5. Click on the Import All Components button:

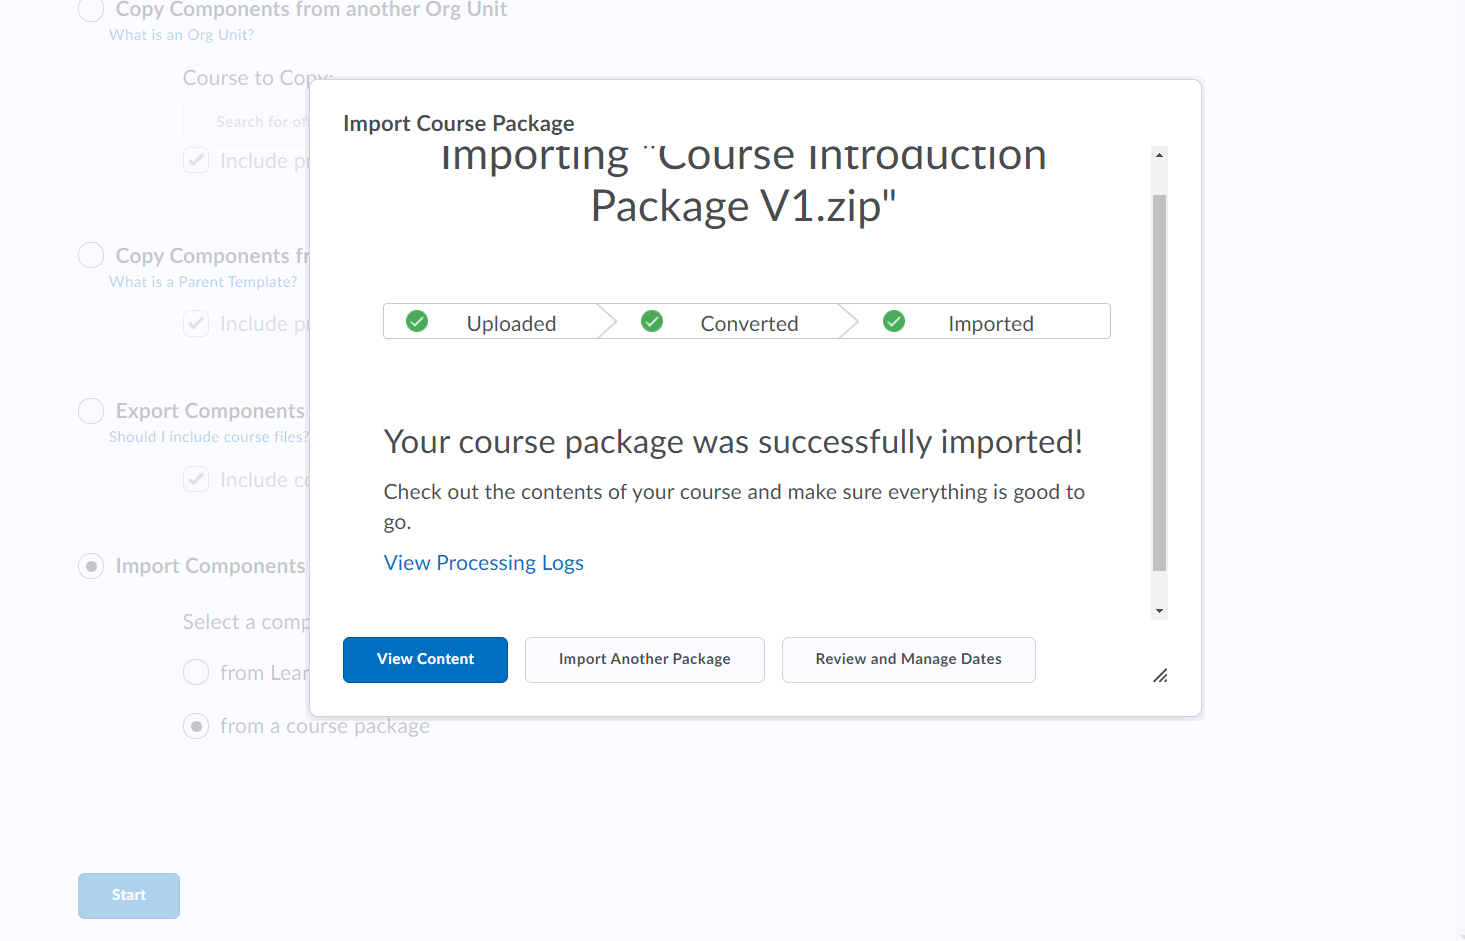
6. After you have completed the upload, you can now view the content by clicking on the View Content button. If your upload failed, please contact LEARN Support at learn@rrc.ca:

7. The last step involved will be to move the imported module to the top of your content. To do this, visit the Content tool  and locate the Course Information module in the navigation section of the content tool. You should see 8 dots beside the Module name that you can click and drag to move the module. This module should be the first module right underneath the “Table of Contents”:

How to edit the Course Introduction Package for your delivery

You will have to customize many of the course files within this module. To do this view the course file, scroll to the bottom of the page and click “Edit HTML”.  You will not need to know how to program HTML to edit these items as you can make use of the built-in HTML text editor. If you have never edited a course file this way within LEARN you can practice on the How to use this Module file as it is in “Draft” mode and hidden from students.

The content files that need to edited for each LEARN course are:

  • Course Introduction
  • Instructor Introduction
  • Course Schedule
  • Course Outline (PDF file that needs to be replaced)
  • Textbook and Course Materials

One thing to note is that when copying/pasting into the HTML file, please remember to right click + paste as plain text. This removes formatting from the origin file that may cause issues in the HTML.

Instructor / Student Communication Protocols

  1. Be explicit about the platform(s) that will be used for course delivery; for example, courses are developed and delivered in LEARN, using MS Teams OR WebEx for synchronous delivery (use only College-approved platforms).
  2. Be explicit about where the link to your synchronous course can be found: post it in LEARN and/or send an email to students.
  3. Create an MS Teams channel or LEARN discussions for course-related questions, that may affect fellow students; be sure to check and respond to the forum regularly (daily or 3x per week) during the week. The communications through MS Teams channel or LEARN discussions can, in turn, be turned into FAQ documents for future course delivery.
  4. Designate regular “office hours” via video-conferencing (MS Teams, WebEx), if possible, at a specified time for course questions or comments, no appointment necessary (e.g., once or twice per week from 3:30 – 4:30 p.m.); or provide students with “reasonable availability” —ask them to direct message (DM) you via MS Teams regarding availability or setting an appointment, which can also be done by MS Teams bookings.
  5. Create a hierarchy of contact methods, a communication hierarchy that outlines methods of communicating for specific purposes, from general course matters to private to emergency.
  6. General messages – provide a single, consistent method of delivering course announcements to the class be that through LEARN, MS Teams or another College-approved messaging service, and let students know how often you will be posting announcements (weekly, bi-weekly).
    1. Personal or formal course matters – have students use RRC Polytech email to contact you about a personal or formal matter or to arrange an appointment with you, or
    2. Private matters – have students use direct messaging (DM) via chat in MS Teams or another approved communication channel for private student matters
    3. Time-sensitive matters – students could use RRC Polytech email or DM in cases of where they may not be able to attend a scheduled class or an assessment. Instructors should confirm with their class/students what constitute time-sensitive matters
    4. Exams – provide exam details in advance, including start time, exam length, as well as method of contact should students have questions or technical issues during an exam

RRC Polytech campuses are located on the lands of Anishinaabe, Ininiwak, Anishininew, Dakota, and Dené, and the National Homeland of the Red River Métis.

We recognize and honour Treaty 3 Territory Shoal Lake 40 First Nation, the source of Winnipeg’s clean drinking water. In addition, we acknowledge Treaty Territories which provide us with access to electricity we use in both our personal and professional lives.

Learn more ›