
Demo students: what can students see?
Demo students are fake students that LEARN Support can enroll in your MASTER course or sandbox.You can enter grades for demo students, then “impersonate” them to see how things look from a student’s perspective.
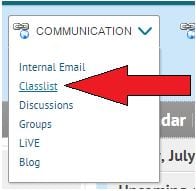
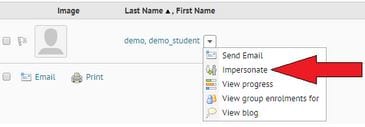
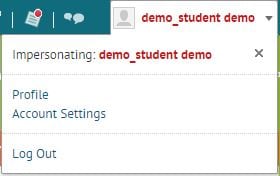
How do I impersonate a demo student?
How do I get a demo student?
Contact LEARN Support to request a demo student. Please include where you want the demo student enrolled. Demo students can only be enrolled in one course, but you can have one for each course you’re working on.
Demo Student Video:
If you have properly set up associations from your dropbox or gradebook (see video) you can simply release the grades to the gradebook when marking that item. The quiz tool can also be set to automatically grade and automatically release the grades (but only if you use question types that a computer can auto-grade. It cannot grade short or long answers).
You can create the dropbox or quiz association through the Dropbox or the Quiz tool:
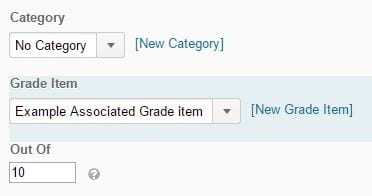
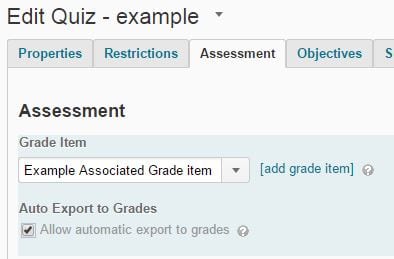
When an association is set up correctly, you will see a rule icon when viewing the dropbox or quiz and the association will be listed in the gradebook.
![]()

You can still overwrite any associated grades in the gradebook through manual entry.
Setting up Associations Video:
![]()
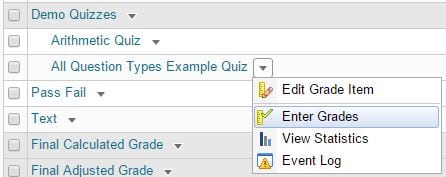
From “Manage Grades” (the default view when you click into your gradebook) you are able to enter grades by clicking the action button (![]() ) that is beside the grade item or category you would like to grade. You will be brought to a screen where you can enter the grades for that item or category for all the students.
) that is beside the grade item or category you would like to grade. You will be brought to a screen where you can enter the grades for that item or category for all the students.
You can leave private feedback for individual students by clicking the “comments” button (![]() ) or leave comments for everyone in the “Overall Comments” box. Remember that the comments are entered into the “WYSIWYG” editor so you are able to easily link to course content items and insert items like images or youtube videos in order to point students in the right direction. Make sure you “Save” your work.
) or leave comments for everyone in the “Overall Comments” box. Remember that the comments are entered into the “WYSIWYG” editor so you are able to easily link to course content items and insert items like images or youtube videos in order to point students in the right direction. Make sure you “Save” your work.

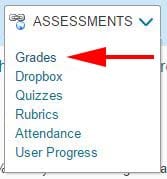
Enter the grade area and click “Enter Grades“. You will now see the gradebook in a course overview or spreadsheet view. There are a number of ways to enter grades on this page.
The easiest is to click the “Switch to Spreadsheet View“![]() button which will then allow you to enter grades for any student and any grade item. Once your changes are done, make sure to click “Save“. If you need to get in touch with students about a problem in the gradebook (for example to email students who don’t have grades for an assignment yet) you can select the students you want to contact and click the “email” button at the bottom of the page, which will bring up a compose email window with the students already addressed.
button which will then allow you to enter grades for any student and any grade item. Once your changes are done, make sure to click “Save“. If you need to get in touch with students about a problem in the gradebook (for example to email students who don’t have grades for an assignment yet) you can select the students you want to contact and click the “email” button at the bottom of the page, which will bring up a compose email window with the students already addressed.
You can also grade specific items or categories by clicking the action button (![]() ) that is beside the grade item or category you would like to grade, which will give you a page with all the students and their grades. You can then follow the same instructions as listed in the “Entering Grades from Manage Grades” section above.
) that is beside the grade item or category you would like to grade, which will give you a page with all the students and their grades. You can then follow the same instructions as listed in the “Entering Grades from Manage Grades” section above.
The 3rd way you can enter grades in this area is by clicking on a student name. This will bring up their “Final Calculated” and “Final Adjusted” grade so you can modify or release it. You can also access and edit every grade item for that student. Click “Save” when you’re done. You can also easily skip to the next student by clicking the blue arrow button at the top of the page.
![]()
There are multiple ways to view student grades.
When you first set up your gradebook you made a decision about using a Final Calculated or Final Adjusted grade scheme. You can access these grades to view them, release them, or to adjust the final adjusted grade.
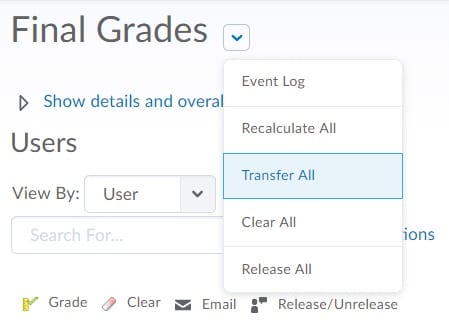
You’re able to release these grades to the students from under the “Enter Grades” area in the same way.
You can also access an individual student’s grades by clicking their name and then adjust or release their final grade individually.
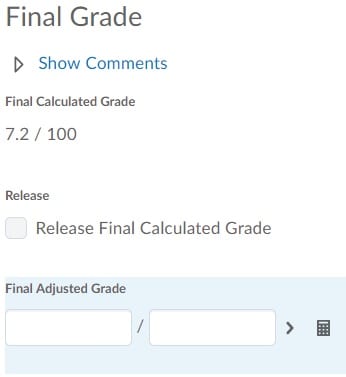
(final calculated and adjusted grade for individual student)
Video: Adding Grades to your Gradebook
Video: Once you have entered grades into your Gradebook, you can then begin to manage them. You are able to perform such tasks as overriding automatically graded items, managing grades for multiple students at once, reviewing grades for individual students, and releasing grades for students to see.
RRC Polytech campuses are located on the lands of the Anishinaabeg, Ininiwak, Anishininwak, Dakota Oyate, and Denésuline, and the National Homeland of the Red River Métis.
We recognize and honour Treaty 3 Territory Shoal Lake 40 First Nation, the source of Winnipeg’s clean drinking water. In addition, we acknowledge Treaty Territories which provide us with access to electricity we use in both our personal and professional lives.