Information Technology Solutions

Information Technology Solutions

Provide teamsite permissions

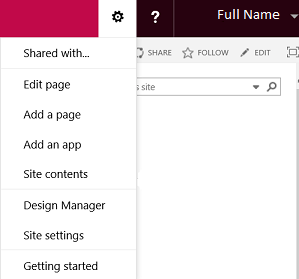
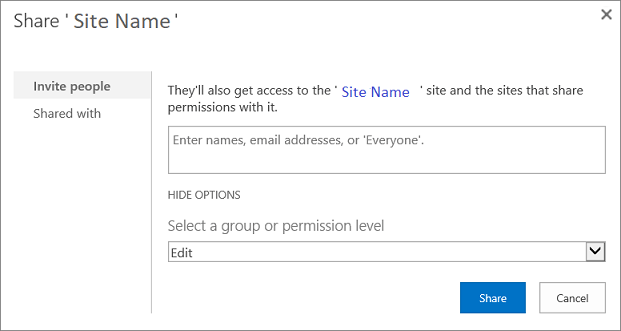
A full control owner can add, edit, or remove permissions in a teamsite, depending on the need of the teamsite and its team members.

Please see the Permissions FAQ webpage to learn more about permissions, including permission inheritance and stop inheritance of permissions.

You can choose to scroll through each topic on this page, or you may click individual topics directly below.
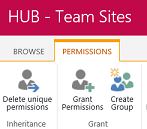
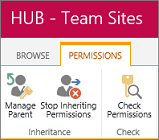
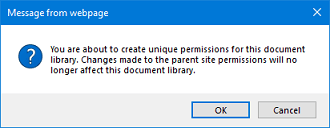

Permissions overview

  1. Click the Gear icon next to your name, and then choose Site settings.
  2. In the Users and Permissions group, click the Site permissions link.
  3. On the Site permissions page, select Grant Permissions or Create Group.
    NOTE: Creating permission groups provides the following benefits:

    • Permissions are easier to maintain since you can place anyone needing a particular permission into the group.
    • When staff members leave their roles, departments, or the College, you can add the people filling their positions to the group.
    • You can easily find departing staff in all SharePoint teamsites when you run reports, which provides better security of your information.

← Back to top of page


Grant permissions to a single member

  1. Click the Gear icon next to your name, and then choose Site settings.
  2. In the Users and Permissions group, click the Site permissions link.
  3. Click Grant Permissions.
  4. Click Show Options.
  5. Enter the name of the new member, permission level required using the drop‑down menu, and then click Share.

← Back to top of page


Create a member group with the same permission level

  1. Click the Gear icon next to your name, and then choose Site settings.
  2. In the Users and Permissions group, click the Site permissions link.
  3. Click Create Group.
  4. Enter the name for the permission group, in the Group owner field enter full control owner or the owner of the group, select options in the Group Settings and Membership Requests groups, and then click Create.

← Back to top of page


Unique permissions

Sub‑sites, libraries, and lists have the same permissions as the parent site. You can change the permissions in each of these to reflect specific permissions needed only for them. These are called unique permissions.

IMPORTANT: Only a full control owner can create unique permissions in a sub‑site, library, or list.

  • Anything after the unique permissions will no longer inherit permissions from the parent site if a member is added or removed from the parent site.
  • If permission types are changed on the parent site, from Read to Contribute for example, this will not be reflected in the sub‑site, library, or list where you have stopped inheriting permissions.
    NOTE: For more information about permission inheritance, please see the Permission FAQ webpage.

← Back to top of page


Stop inheriting permissions in a sub‑site

  1. Click the Gear icon next to your name, and then click Site settings.
  2. Click Site permissions.
  3. On the Permissions tab, click Stop Inheriting Permissions.
  4. You will receive a message stating that if you stop inheriting permissions in this sub‑site, changes made in the parent site will no longer affect this sub‑site. Click OK if you would like to proceed.
  5. You can now modify the existing group permissions from your site or create new groups.
  6. Once your changes are complete, click OK.

← Back to top of page


Stop inheriting permissions in a library

  1. On the Library tab, click Library Settings.
  2. In the Permissions and Management group, click the Permissions for this document library link.
  3. On the Permissions tab, click Stop Inheriting Permissions.
  4. You will receive a message stating that if you stop inheriting permissions in this document library, changes made in the parent site will no longer affect this document library. Click OK if you would like to proceed.
  5. Click Grant permissions and you can now modify the existing group permissions from your site or create new groups.

← Back to top of page


Stop inheriting permissions in a list

  1. On the List tab, click List Settings.
    list then list settings
  2. In the Permissions and Management group, click the Permissions for this list link.
  3. On the Permissions tab, click Stop Inheriting Permissions.
  4. You will receive a message stating that if you stop inheriting permissions in this list, changes made in the parent site will no longer affect this list. Click OK if you would like to proceed.
  5. Click Grant permissions and you can now modify the existing group permissions from your site or create new groups.

← Back to top of page


Add new members to a group

  1. On the Permissions tab, click on the group name.
  2. Click New, and then click Add Users.
  3. Type in the name or email address of your new group member, and then click Share.

← Back to top of page


Remove members from a group

  1. On the Permissions tab, click on the group name.
  2. Click Actions, and then click Remove Users from Group.

← Back to top of page


View group settings

  1. On the Permissions tab, click on the group name.
  2. Click Settings, and then click Group Settings.
  3. IMPORTANT: Ensure that the group owner section contains the owner of the team site, whether that is one full control owner or an owner group. This will ensure that every full control owner has access to edit this permission group’s membership.

  4. Enter either the one full control owner or the owner group, and then click OK.

← Back to top of page


Delete unique permissions

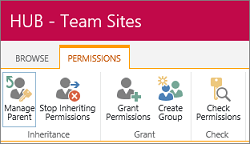
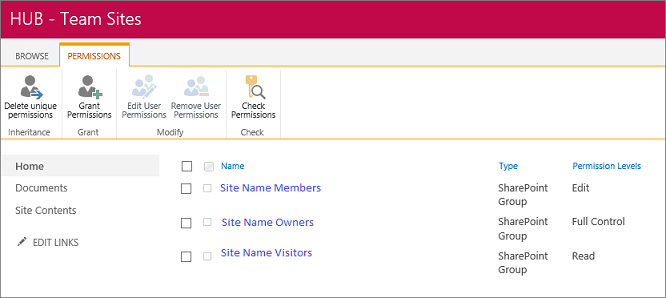
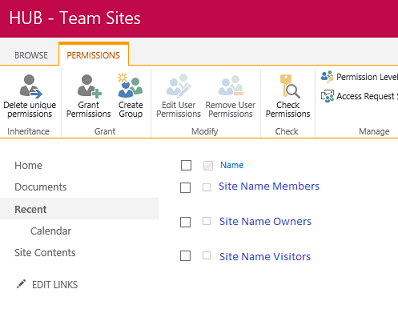
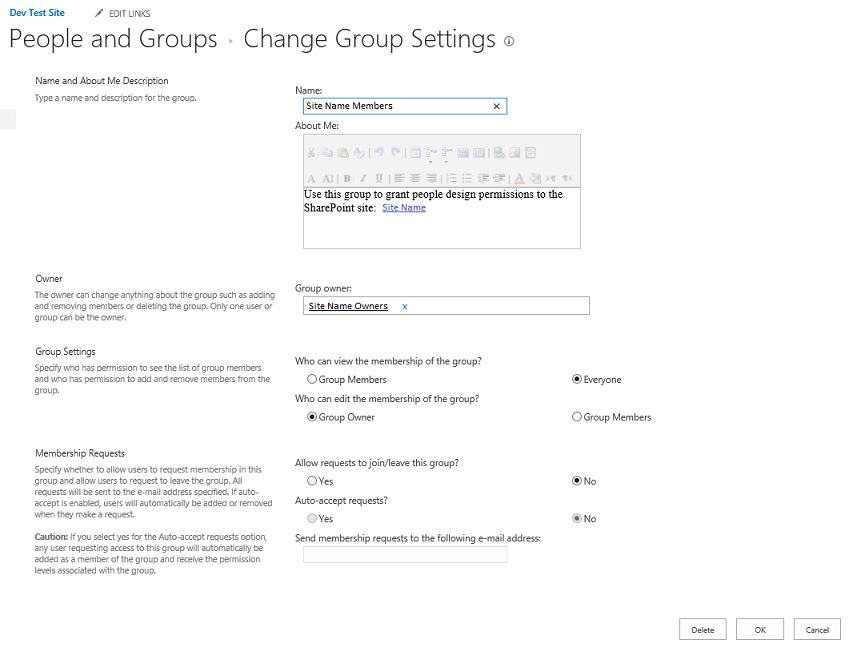
A full control owner can delete unique permissions and inherit the parent site permissions again on a sub‑site, library, or list. For example, a project may be complete and everyone can view the files now.

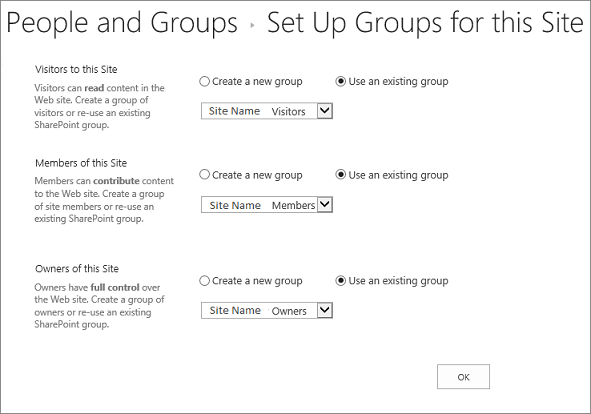
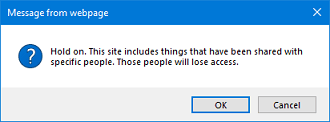
If you delete unique permissions, however, it results in the following:

  • Any specific or unique permissions in that sub‑site, library, or list will be removed.
  • All parent site permissions will once again cascade down to that sub‑site, library, or list.
  1. On the Permissions tab, click Delete unique permissions.
  2. You will receive a message stating that if you delete the unique permissions, members may lose access to that particular sub‑site, library, or list. Click OK if you would like to proceed.

← Back to top of page


← Back to SharePoint (teamsites@rrc.ca)

RRC Polytech campuses are located on the lands of Anishinaabe, Ininiwak, Anishininew, Dakota, and Dené, and the National Homeland of the Red River Métis.

We recognize and honour Treaty 3 Territory Shoal Lake 40 First Nation, the source of Winnipeg’s clean drinking water. In addition, we acknowledge Treaty Territories which provide us with access to electricity we use in both our personal and professional lives.

Learn more ›