Information Technology Solutions

Information Technology Solutions

Customize your HUB widgets

You can scroll through all of the topics on this page or click the individual topics below:


Pin applications to your Launchpad widget

  1. Click the chevron (˅) icon at the top right‑hand side of the widget to expand the contents.
    click chevron to expand the widget
  2. Locate the application you want to pin, and then click the pin.
    locate the application to pin

    The pin will turn and will change to red, and then it will be added to your Pinned Items.
    click pin to attach to pinned items

← Back to top of page

Remove a pinned item from the Launchpad

  1. Click the chevron (˅) icon at the top right‑hand side of the Pinned Items widget to expand the contents.
    click the chevron on the pinned items widget
  2. Click the pin icon next to the application that you want to remove. It will turn and become red, and then will disappear from your Pinned Items, but remain in your Applications.
    locate the application you want to remove

← Back to top of page

Change the layout of Pinned Items or other widgets

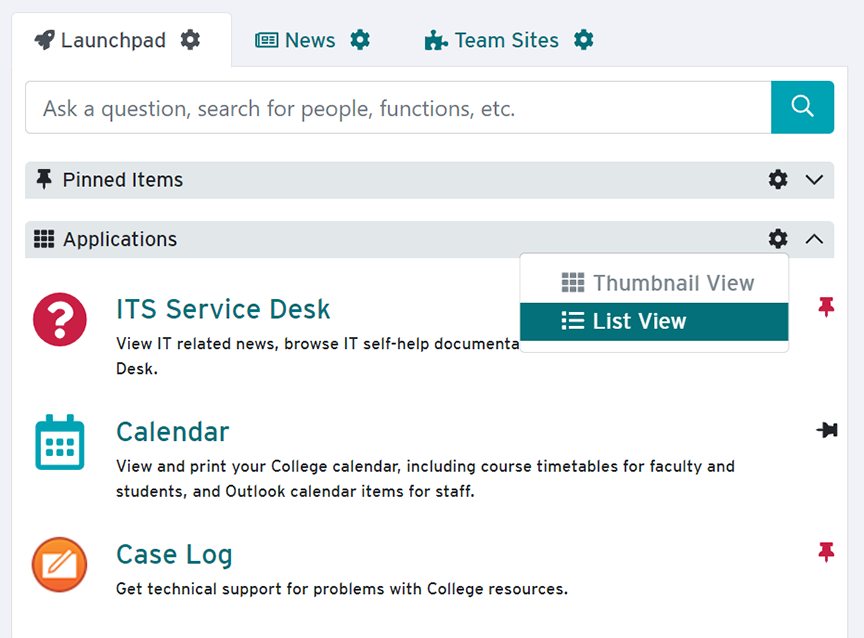
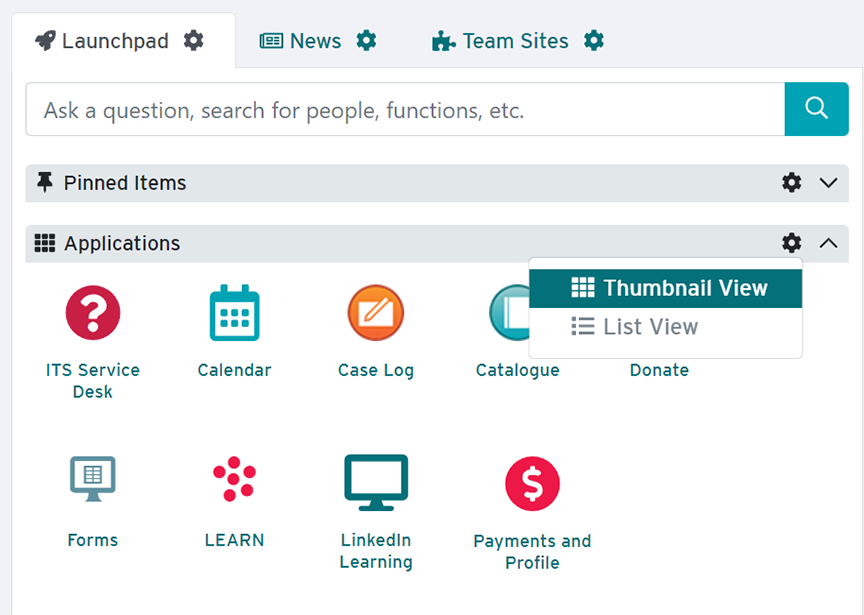
Click the gear (gear icon) icon in the top right‑hand corner of the Applications widget, for example, to change the layout to either Vertically Stacked or Horizontal Tabs. You can experiment with these options to determine which you prefer.

Vertically Stacked Horizontal Tabs
list view thumbnail view

← Back to top of page

Move Pinned items in the following two ways

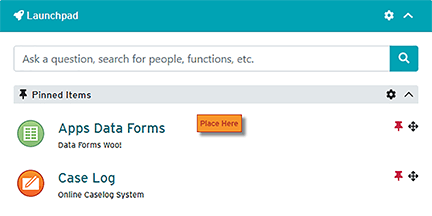
Vertically Stacked

  1. Click the move (move icon) icon (next to the pin icon) of the application that you want to move.
  2. Click the Place Here button at the position where you want to place your application.
    place here button

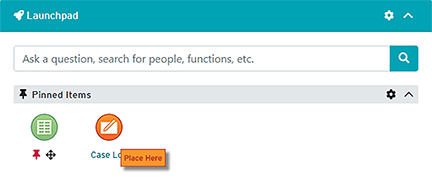
Horizontal Tabs

  1. Click and hold the application icon that you want to move until the icon begins to shake, and then click the move (move icon) icon (next to the pin icon).
  2. Click the Place Here button at the position where you want to place your application.place here button

← Back to top of page

Add links to your Links widget

  1. Click the gear (gear icon) icon at the to right‑hand corner of the widget, and then select +Add Link.
    click gear and add link
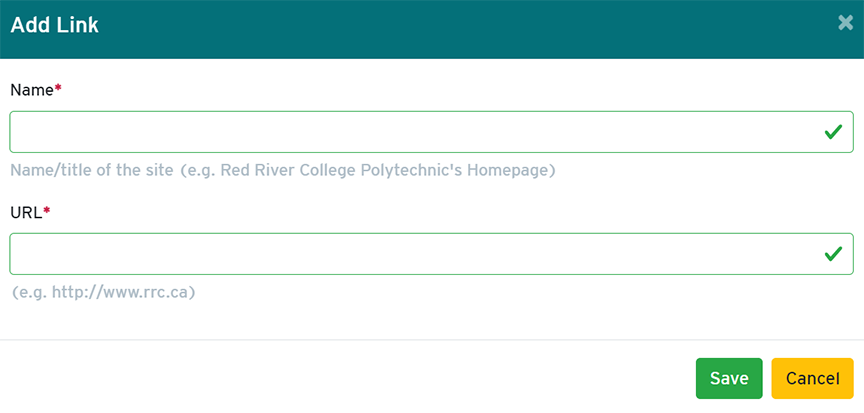
  2. On the Add Link screen, enter a descriptive name in the Name field, type or paste the link in the URL field, and then click Save.
    add name and url and click save

← Back to top of page

Revert to your staff or student default HUB settings

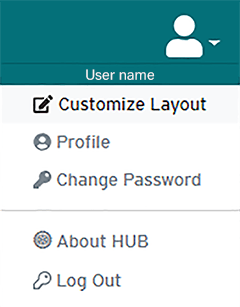
  1. To revert to your staff or student default HUB settings, click the User icon in the top right‑hand corner, and then select Customize Layout in the drop‑down menu.
    HUB user drop-down menu
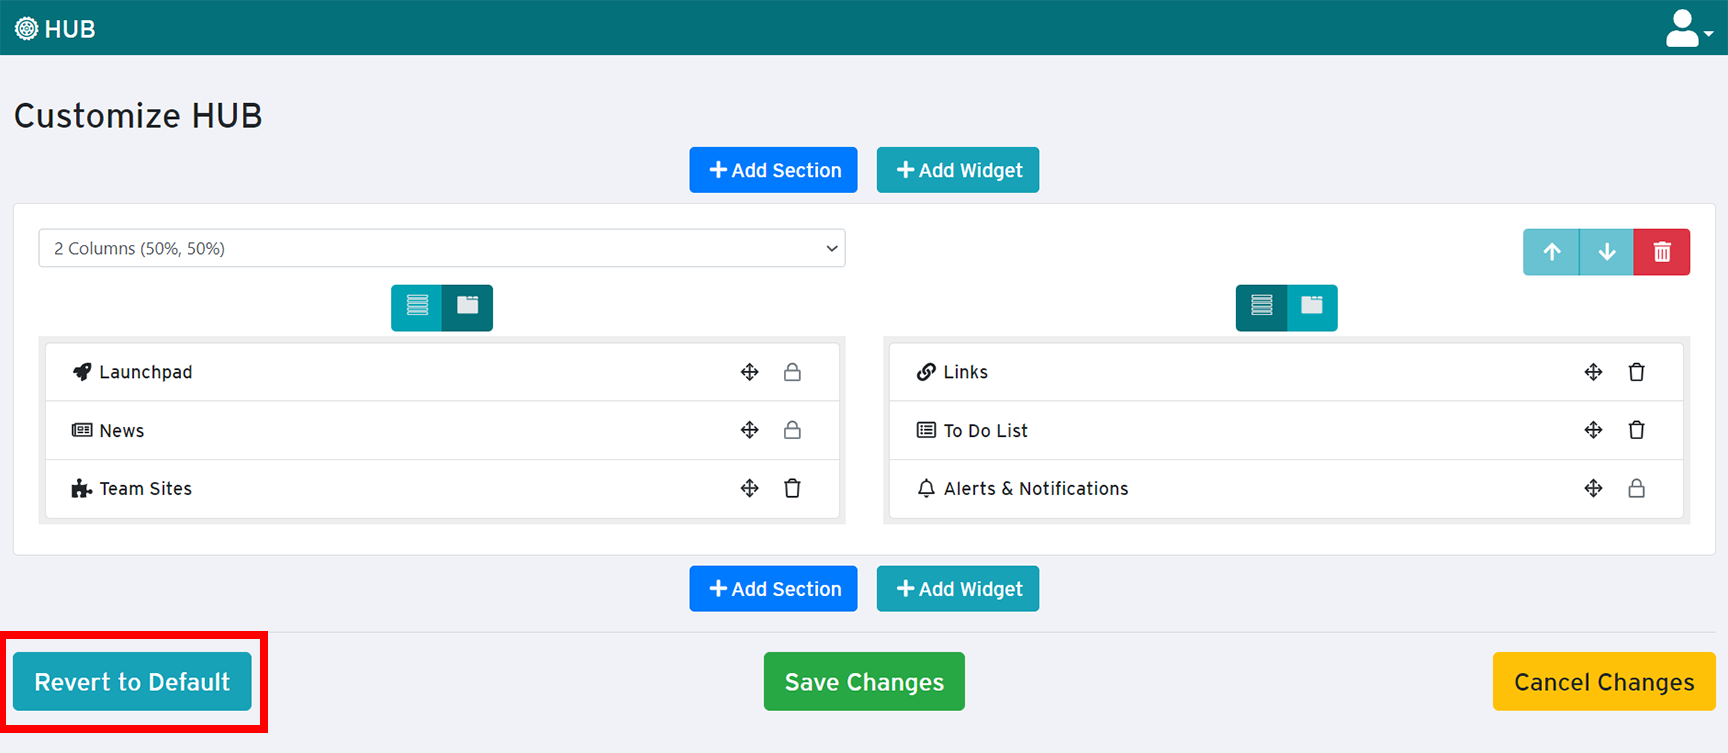
  2. On the Customize HUB page, click the Revert to Default button, click OK to confirm your selection, and then click Save Changes.
    click revert to default

← Back to top of page


← Back to College Website Support

RRC Polytech campuses are located on the lands of Anishinaabe, Ininiwak, Anishininew, Dakota, and Dené, and the National Homeland of the Red River Métis.

We recognize and honour Treaty 3 Territory Shoal Lake 40 First Nation, the source of Winnipeg’s clean drinking water. In addition, we acknowledge Treaty Territories which provide us with access to electricity we use in both our personal and professional lives.

Learn more ›