Information Technology Solutions

Information Technology Solutions

Insert an Adobe Digital ID signature on your documents

  1. Save the document you want to sign electronically as an Adobe PDF file.
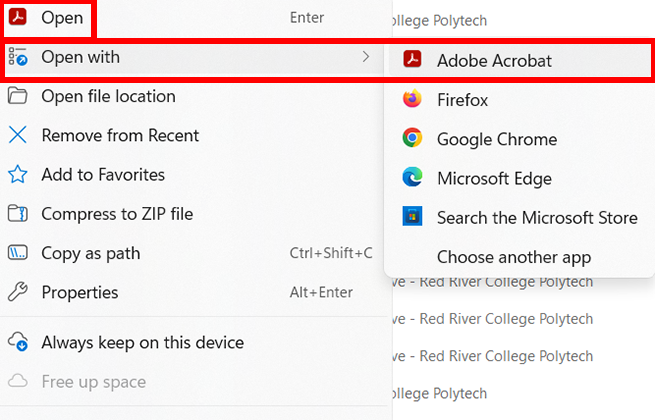
  2. Right‑click the PDF you saved in Step 1, and then click Open with Adobe Acrobat DC at the top of the menu.
    NOTE: If the Open with Adobe Acrobat DC option does not appear at the top of the menu choices, click Open with, and then select Adobe Acrobat DC (or click Choose another app, and then select Adobe Acrobat DC).
    adobe acrobat dc menu option
  3. Once the document opens, on the menu bar, click Tools, scroll down to the Forms & Signatures group, and then select Certificates.
    Certificates icon in the Forms & Signatures group
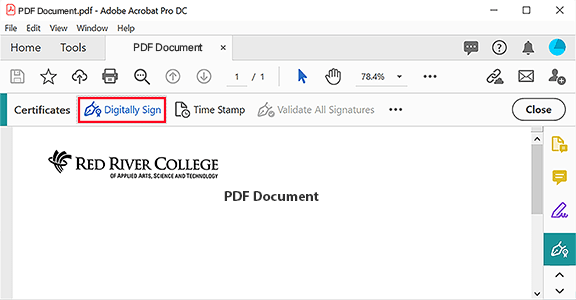
  4. On the Certificates tool bar, click the Digitally sign tool.
    Certificates tool bar,  Digitally sign tool
  5. On the Adobe Acrobat window, read the instructions, and then click OK.
    Adobe Acrobat window instructions
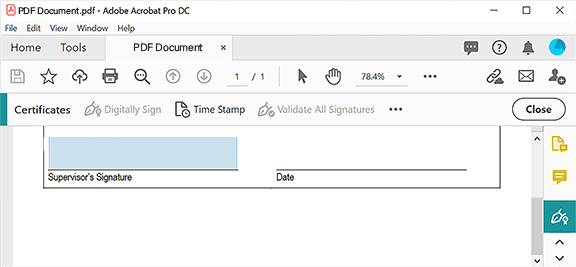
  6. Click‑and‑drag your mouse to draw the area where you want your signature to appear, ensuring that the box is big enough for your signature to be readable.
    Click-and-drag to draw signature box
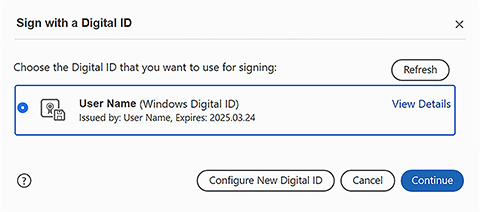
  7. On the Sign with a Digital ID window, choose from the following options:
    • If you have previously created a Digital ID, select your existing Digital ID, click Continue, and then proceed to Step 12.
    • To create a new Digital ID, click Configure New Digital ID, and then proceed to Step 8.

    Configure new digital ID button

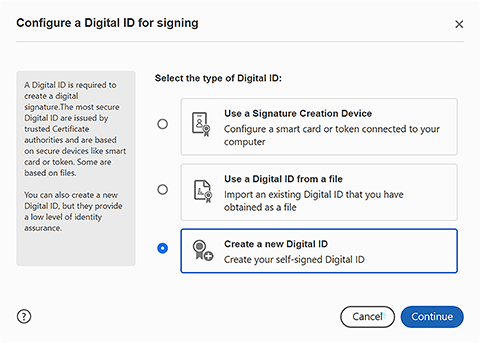
  8. On the Configure a Digital ID for signing window, select Create a new Digital ID, and then click Continue.
    Create a new digital ID and continue button
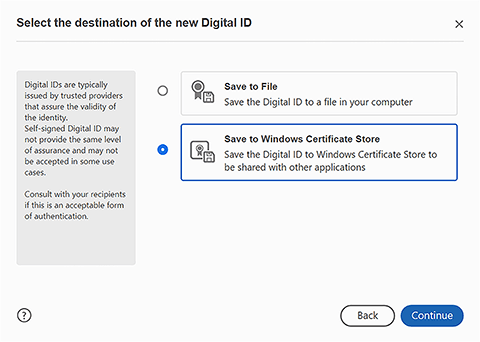
  9. On the Select the destination of the new Digital ID window, select Save to Windows Certificate Store, and then click Continue.
    Save to windows certificate store and continue button
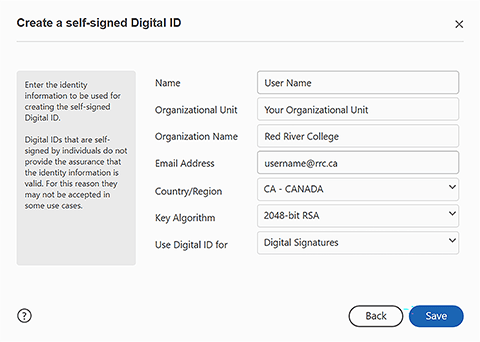
  10. On the Create a self‑signed Digital ID window, complete the fields as follows, and then click Save:
    • Name: Your name
    • Organizational Unit: Your organizational unit at the College
    • Organization Name: Red River College Polytechnic
    • Email Address: Your College email address
    • Country/Region: Canada
    • Key Algorithm: 2048-bit RSA
    • Use Digital ID for: Digital Signatures

    Create self-signed digital ID fields

  11. On the Sign with a Digital ID window, select your Digital ID, and then click Continue.
    Sign with a Digital ID window, select Digital ID,  click Continue
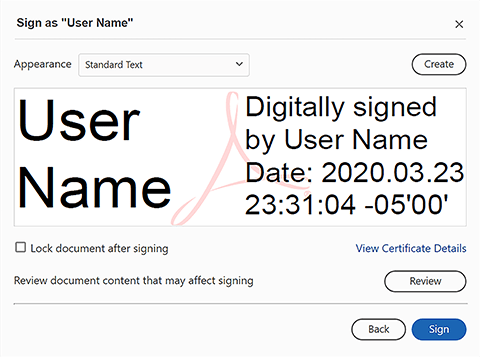
  12. On the Sign as “User Name” window, click Sign.
    IMPORTANT: If you are applying a Digital ID to an RRC Polytech Financial Services document, do NOT select the Lock document after signing check box. Financial Services requires the ability to modify your digitally signed documents.

    sign as user name window, sign button
  13. On the Save As PDF window, click Save, and your document will now include your Digital ID.

← Back to Adobe